We take a look at Unreal Engine Lighting and upcoming changes that will be available in Unreal Engine 4.18 (it's is not officialy released yet, but you can download the UE 4.18 preview version through Epic Launcher and test new features).
If you want to start work with lighting in Unreal Engine, you need to prepare your scene accordingly. First, you need to assure that all post effects are disabled (which is not the case even after launching blank scene or the scene without post-processing volume). some settings are enabled by default and you need at least one Post-Processing Volume to disable them.
So, insert Post-Processing Volume to your scene and make following changes:
- turn off Ambient Occlussion
- tuern off Screen space Reflections
- turn off Auto Exposure (you can also turn it off permanently in Project Settings)
- turn off bloom
- turn off vignette
- check all tonemapper sliders - they should be in default position (no yellow "return" arrow on the right of any of them)
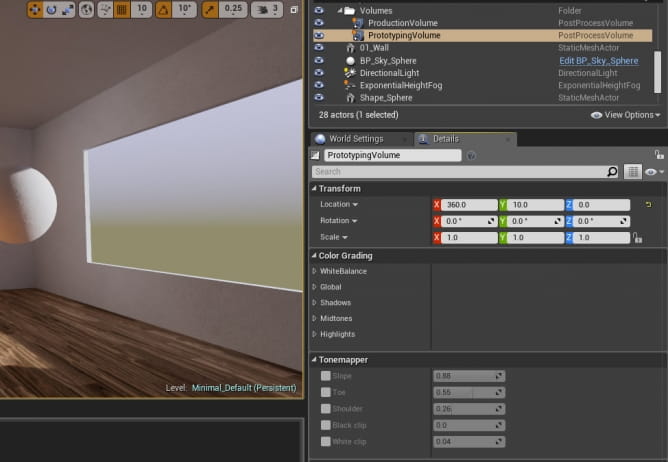
Tonemapper disabled. We created two Post Processing Volumes: one for creating lights - without any post-effects and the second for production with all bells and whistles that we need in final image.
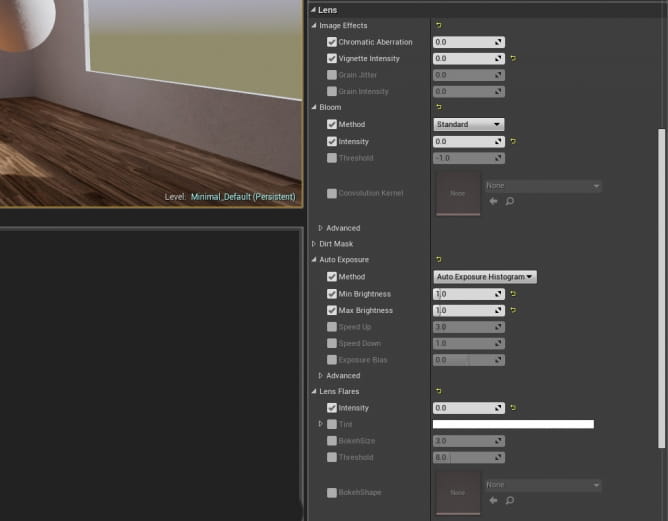
All Lens effects are disabled.
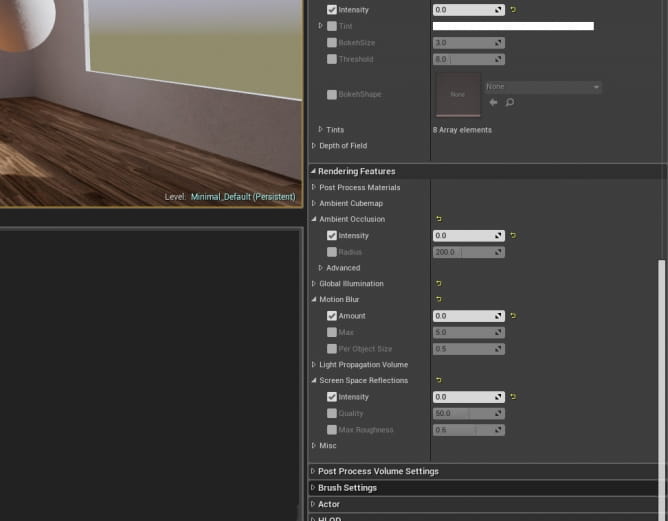
Ambient Occlusion, Motion Blur, Screen Space Reflections are disabled too.
Make two reference spheres and aassign two materials. One should be perfect chrome and one 50% grey (which you achieve by typing 0.18 in RGB fields, because .18 linear = .5 RGB), they will help you to reference lighting in your scene.
If you work with static lighting (which is the most common when making architectural visualizations), start with direct lighting (no fog, no skylight, just direct lighting). You may need to open "World settings" and change "Environment Intensity" to 0, so you can control your lighting without any interference from other sources (if you turn this slider to zero and your scene will not have any light enabled, it should bake as completely black).
Now you can start to work with your direct light, position it to your taste and build the lighting at "preview" quality. It is the fastest one, but it is enough during most of the time, until you will finish placing elements in your scene.
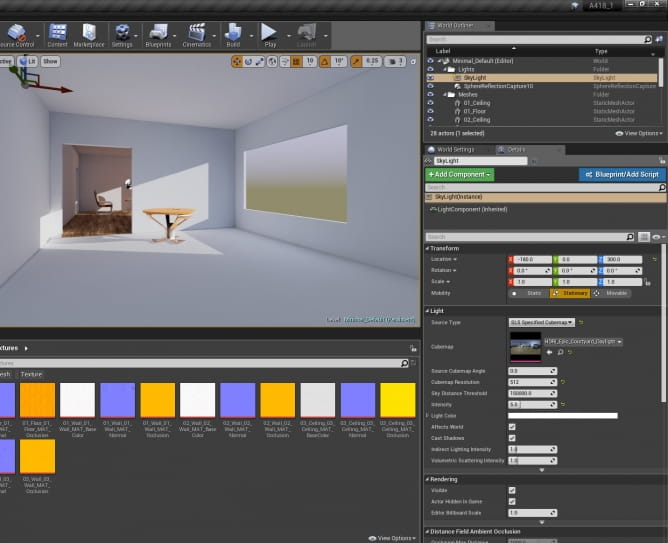
Add Skylight - it is the second source of light in your scene. you can use HDRI map instead of "scene capture". If you import .HDR file you will be able to simply drag and drop it to your Skybox Texture slot. Increase skybox intensity. Currently (version 4.17) skybox and emmiting materials are giving only one bounce of light, which means that the light will not reach darkest areas of your interior. Sometimes baked skylight can create artifacts. But, luckily, developers are changing it in Unreal 4.18 from this version skybox and materials that are emmiting light can have many bounces, which brings unreal closer to iRay capabilities, yay!
If you need to add some light to your scene, but you don't want to crank up skylight, you can tweak "Environment Intensity" in the World Settings that we were talking about earlier. Although, cranking up Skylight Intensity is not a bad thing. You probably should me more conservative when it comes to increasing Direct Light intensity, but for skylight you can use flexible values.
Your first bake probably will not be perfect, because there are many elements that are contributing to bake quality. They are not at their highest settings at default, because high quality bake takes much more time than a simple preview. If you want to have a better judgement on your scene, you probably should bake in higher quality from time to time, so here are the settings that affect baking time:
- Static mesh Lightmap resolution
- Build lighting quality
- Static Lighting Level Scale
- Num Indirect Lighting Bounces
- Num Sky Lighting Bounces (Unreal Engine 4.18 only)
- Indirect Lighting Quality
- Indirect Lighting Smoothness

Most of these settings can be found in the World Settings Tab
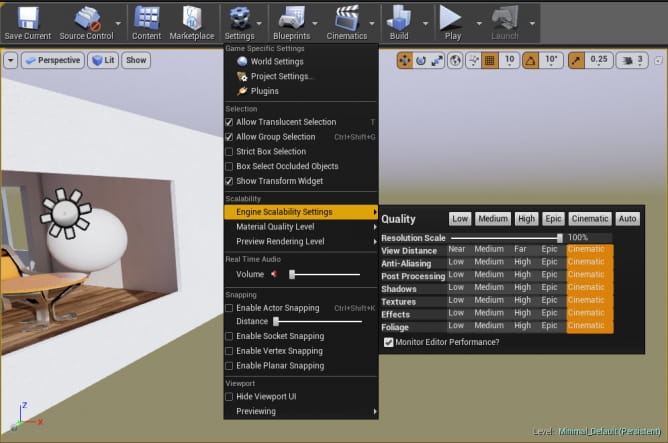
Your overall scene quality depends on Engine Scalability Settings. It controls the quality of your shadows, particles, post-effects (including volumetric lighting).
Unreal 4.18 only: If you have moving objects in your scene, their lighting depends on:
- Volume Lighting Method
- Volumetric Lightmap Detail Cell size
- Volumetric Lightmap Maximum brick Memory Mb
- Volume Light Sample Placement Scale
Static Lighting
Your static meshes should be properly unwrapped. Unreal can automatically create second UVmap for baking light and it does it quite decently, so you need only one UVmap in the most cases. You can control lightmap resolution per mesh, but you can also select all meshes and change this settings for all of them at once. You can also open Lightmap Resolution Adjustment and change settings for all static objects in your scene.
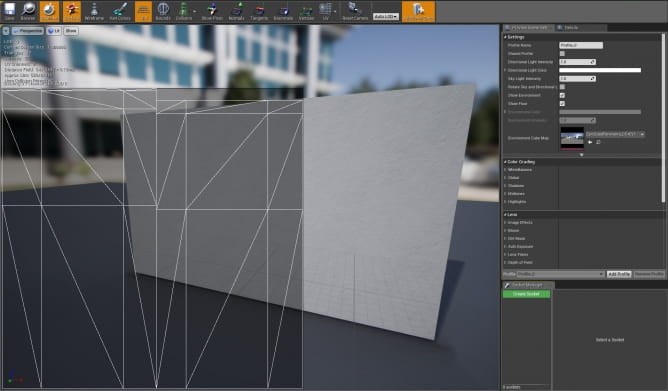
Unwrapped mesh
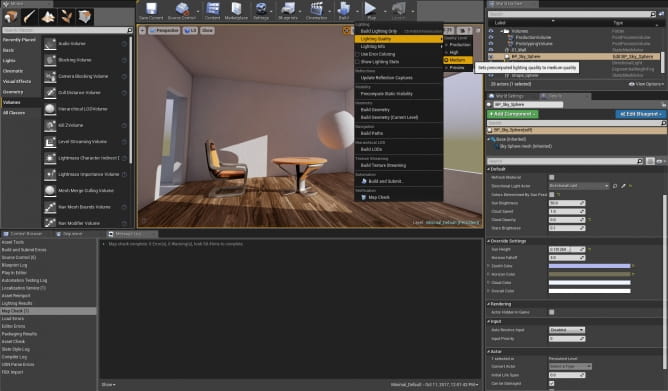
Build lighting quality has four levels: Preview, Medium, High and Production. For the most time you can work on "Preview level" - it's the fastest to bake. The biggest gap in baking time is between "High" and "Production" settings. Bake on production level when you are absolutely sure that your scene is complete.
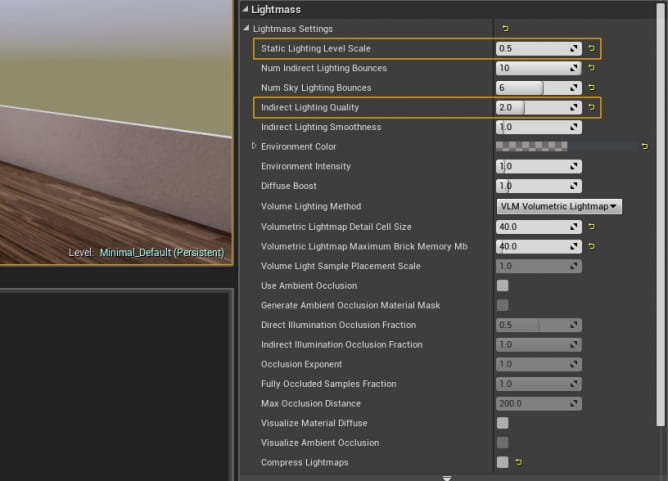
Static Lighting Level Scale: at default it is at "1". If you change it to lower value, it gathers more details, but it introduces artifacts (sploches). You can get rid of them by increasing Indirect Lighting quality. the rule of thumb is: Static Lighting Level Scale multiplied by Indirect Lighting Quality should equal 1.
Num Indirect Lighting Bounces - you can freely increase it even to 100 without increasing baking time. It has small influence on build time, it increases the brightness of the scene.
Unreal 4.18 only: Num Sky Lighting Bounces - the same as above, but for the skylight. This option is visible only in Unreal Engine 4.18 or above.
Indirect Lighting Quality, as mentioned earlier, decreases artifact noise, but greatly increases baking time. It is a number of rays for final gathering.
Indirect Lighting Smoothness blurs indirect light. Better not exceed 1 value. For the most of the time values .7 to 1 are ok.
Unreal 4.18 only: Volume Lighting Method - from Unreal Engine 4.18 you have two options.
Unreal 4.17: Old method using VLM Sparse Volume Lighting Samples, which works in conjunction with Volume Light Sample Placement Scale is less accurate. You can decrease the scale to increase the number of samples and boost quality a bit. You can visualize the samples using Visualization buffer.
Unreal 4.18 only: New method is using Volumetric Lightmap and it gives more pleasant result. Volumetric Lightmap Detail Cell Size: Size of the most detailed cells, in world units. Smaller cells increase memory and build times but also increase accuracy. Of course, they will not replace GI completely, but Volumetric Lightmap is the best solution to achieve higher quality of indirect lighting for movable objects, volumetric fog, particles, and instanced meshes.
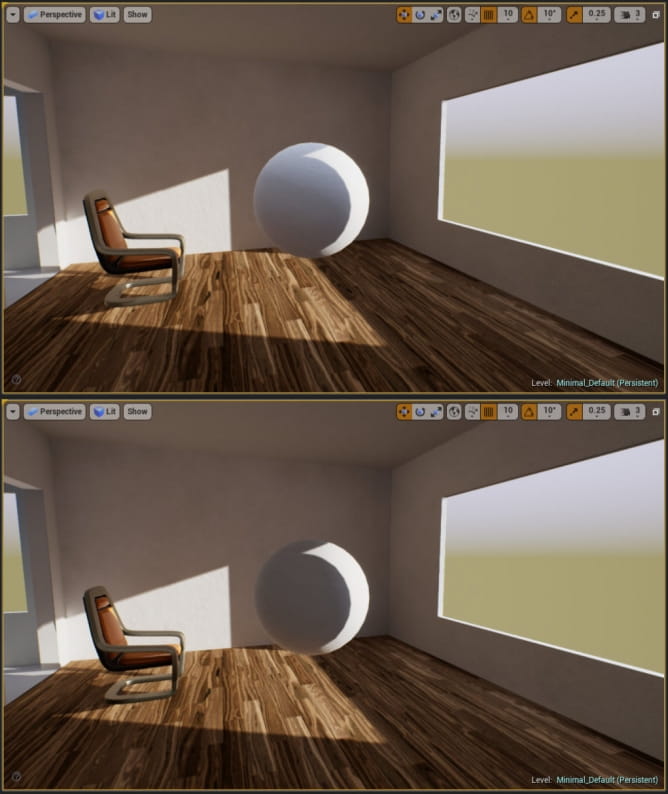
Comparison: Volumetric Lightmap Detail Cell size 200 (on the top) and 50 (on the bottom). The smaller cell size, the greater quality.
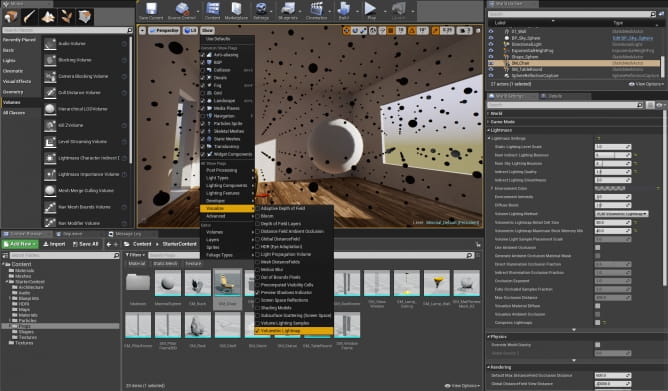
You can visualize cells in Unreal Engine. More about new Skylight multibounce feature and comparisons between the old and new system on Unreal Engine forum.
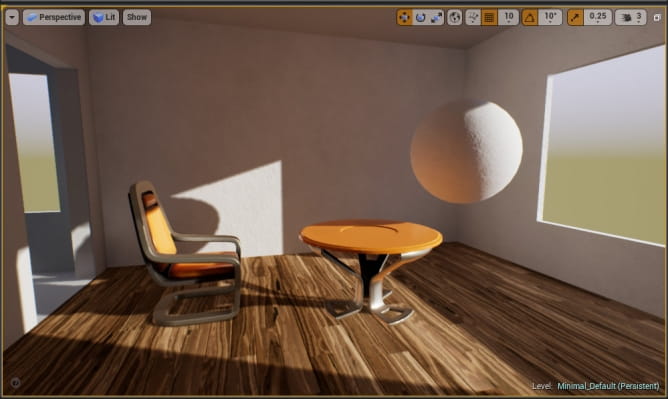
All objects are static, so we can see irradiance in full glory: the orange table is bouncing light on the sphere. This is the best quality, but we cannot move any object, or we break the scene.
Tips:
- Always remember to use Lightmass Portals - you will get less noise in interior GI.
- Use different viewing modes and buffer visualizations to control your scene lighting (default: ALT + number)..
- If you need soft shadows of overcast cloudy scene, select "Use Area Shadows" and set Light angle to 10.
- If you need some detailed shadows for smaller elements, use Raytraced Contact Shadows
- Use Shadow Resolution Scaling for Distance Field shadows to match quality of shadows of moving objects and static objects.
- Use sublevels as lighting scenarios to compare different lighting scenarios of your scene
Customer zone
Your special offers
Your orders
Edit account
Add project
Liked projects
View your artist profile


COMMENTS