How To Make Your CGI Walls More Realistic
Realistic walls with noise modifier.
Total: € 0
Continue Shopping
In accordance with the art. 13 section 1 and 2 of the European Parliament and Council Regulation 2016/679 of the 27th April, 2016 on the protection of natural persons, with regard to the processing of personal data and on the free movement of such data, and repealing Directive 95/46/EC (General Data Protection Regulation), hereafter RODO, I hereby inform that:
1. EVERMOTION S.C., 8 Przędzalniana Str., 15-688 Białystok, Poland is the Administrator of your Personal Data (APD)
2. Data Protection Inspector can be reached through e-mail: iod@evermotion.org
3. Your personal data are to be processed on the basis of art. 6 section 1 letter a, b and f of RODO in order to:
a) prepare, conclude and execute the agreement and for other purposes approved by you,
b) to execute the legitimate interest like marketing of products and the agreement, claim assertion or defence against claims resulting from the law regulations.
4. Entities entitled to the reception of your personal data may be the authorised public bodies; mail providers; providers of the services covered by the agreement; responsible for debt recovery, keeping the archives, document utilization, legal consulting, technical services, IT services and accountancy.
5. Your personal data shall not be transferred to the third country, nor to the international bodies.
6. Your personal data shall be processed within the period of the agreement and upon your additional consent until you withdraw it. APD shall keep the data for the period of any civil law claim execution connected with the agreement.
7. You have the right to demand an access to your personal data, to correct or to delete the data if there is no other basis for the processing or any other purpose of such processing or to limit the processing of the data, to transfer the data to another administrator and to raise objections to the further data processing if there is no legal basis for further processing and to withdraw any previous consent.
8. You provide the personal data voluntarily, however they are necessary to conclude the agreement. The refusal of providing such data may result in the refusal of the agreement conclusion.
9. You have the right to lodge a complaint to the Personal Data Protection Office when in your opinion the data processing violates the regulations of General Data Protection Regulation of the 27 April, 2016 (RODO).
10. Your data will be automatically processed, including the form of profiling.
11. You are obligated to forward above mentioned information to your representative, especially if you appointed this person in the agreement as the contact person or as the representative for the agreement execution.
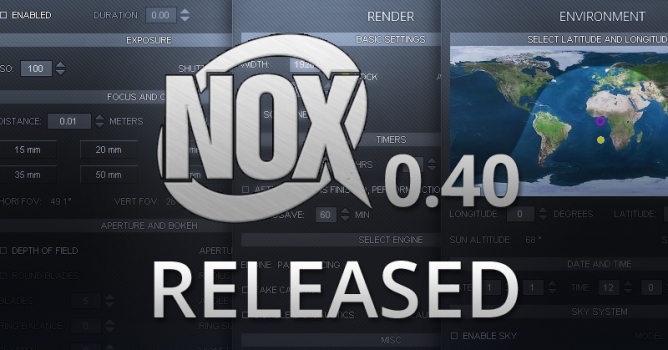

We present you completely refreshed NOX 0.40 - with new graphical user interface (GUI). We believe that new NOX is more intuitive and user-friendly. It is a start of new development process that will bring updates more frequently and faster than before. Our goal is to provide you a great, industry quality renderer integrated with common 3d software.
Click on image to enlarge
Download NOX 0.40 - no registration needed
Main changes in version 0.40
- completely new GUI. More user friendly options grouping, design, etc.
- new material editor
- new, advanced color picker
- added sample scenes
We want your feedback!
We want to constantly improve NOX, so we are waiting for your feedback. Please, tell us what you think about NOX 0.40, what you would like to see, what we should improve next.
We included a crash log sender in NOX. If something goes wrong, NOX will ask you for permission to send a crash report so we can investigate the error. Please, press "Send" if you see it, it will help us to find the cause of error faster.
You can also send email to michal@evermotion.org if you have ideas / issues with NOX.
Learning
If you use 3ds Max or Blender and you want to know how to use it with NOX, please go to "Getting started with NOX" paragraph.
NOX user guide v0.40 is still a work in progress and will be available online soon. If you want to know more about camera, environment or postproduction settings, you can read our old guide in NOX Download section - the principles of operation of most of NOX features are still the same.
NOX features
NOX Renderer is a stand-alone application that renders images from 3D geometry. The rendering engine is based on unbiased methods. Light behavior is based on laws of physics, however some simplifications occur. Path tracing and bidirectional path tracing algorithms are used for Global Illumination evaluation. NOX is CPU-based renderer.
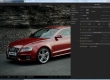
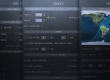
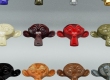
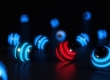
And here is a little preview of what NOX can do:
Click on image to enlarge
Click on image to enlarge
Click on image to enlarge
Click on image to enlarge
Click on image to enlarge
Click on image to enlarge
Click on image to enlarge
Click on image to enlarge
Sample scenes
We provided a couple of sample scenes for the beginning. You will find these scenes in "sample scenes" folder which is located in NOX folder.
Example:
C:\NOX\sample scenes\
You can also download them manually from Evermotion NOX download page.
"Candles" 3ds max 2011 and NOX scenes:

"Helicopter" 3ds max 2011 and NOX scenes:

"Suzanne in studio" Blender and NOX scenes:

Water Drop NOX scene:

Wooden boxes NOX scene:

Cornell Box NOX scene:

NOX installer will put NOX plugin for 3ds max in appropriate folder automatically. After installation just go to your Render Settings dialog (F10) and choose "NOX" from "Assign Renderer" section in Common tab.

To set up the scene properly you will need to insert:
- at least one camera
- at least one source of light (some geometry, preferably plane with "Emitter" option turned on) or Sun / Sky object.
- an object to render.
NOX camera can be found in 3ds max camera tab. There are two possible choices: NOX Target or NOX free camera.
To make a source of light, just add a plane to the scene and turn its face normal in direction of object that you want to lit. Open Material Editor. At first Material Editor cells will display "Not a NOX material". To change that, you need to press "Standard" button and open Material / Map browser.

In Material Map Browser select "NOX Material" and press "OK".

Now, your selected material cell displays text: "No preview". First you need to run NOX Material Editor. Press "Run Material Editor" button.
Click on image to enlarge
To make a light source, you need a light material. Turn "Emission" on, select some light color value, increase power of light. Check if your emitter works before you close editor - select "Emitter scene" from drop-down menu and press "Render" button near preview window. If you can see the lightbulb, press "STOP" and close the editor. Now you can assign your material to object.

After NOX installation go to folder where you installed NOX and find "blender" folder. Inside you will find zipped file with a NOX script for Blender. Unzip it and move unzipped "render_nox" folder to your Blender\[version]\scripts\addons folder
Example:
C:\Program Files\Blender Foundation\Blender\2.69\scripts\addons
Then open Blender, go to user preferences dialog (CTRL + ALT + U), select "Addons" tab, find "Render: Nox Renderer" on the list and tick checkbox.

You can now select NOX from the list on the top of Blender window.

NOX is partially integrated with Blender which means that you can set up the scene using Blender interface. You can also tweak scene and material settings after exporting to NOX (F12).
To succesfully open your blender scene in NOX you need at least one light source and one camera. NOX does not use lamps, it uses geometry with "emitter" material layer instead. Just add for eg. plane to your scene, go to Materials tab, add new material and then add new layer by pressing "+" button. Scroll down and check "Emission" checkbox.

You can also increrase emission power and change units.
You can also go to "World" tab and enable Nox sun and sky or environment map.
We made a plugin that exports Cinema4D scene and render it in NOX. Only Cinema 4D R14 is supported.
Installation is easy: go to your NOX installation folder, and open "cinema 4d r14" folder. Inside you will find a zipped file: NOXpluginC4D.zip. Unzip it and move unzipped folder to your "plugins" folder in Cinema 4D installation folder. Now you have a new "NOX scene" option in File > Export menu. To succesfully export scene you need at least one light source, one camera and some object to render. NOX does not have lamps or light sources, instead it uses objects / surfaces with a material with "Luminance".
Tip: If your scene is too bright / too dark:
- change ISO, aperture or shutter speed of camera - either in your 3d software or NOX Camera tab
- change the power of emission in the NOX Material editor (3ds max, NOX standalone) or in "Material" tab in Blender
- change "EV" (exposure value) in POST tab in NOX.
Scenes exported from 3d software are saved in "exported scenes" folder in your NOX installation folder.


LEAVE A COMMENT


|

|

|

|

|
 Customer zone
 Your special offers
 Your orders
 Edit account
 Add project
 Liked projects
 View your artist profile
COMMENTS