Planning
Here's some reference that I used for studding this scene closely. In order to be precise with your modeling you might want to have all measurements and dimensions of your future objects in front of you - before you start to work. This way you can always relay on your remarks and stay in correct proportions according to the design that you're planning to do.
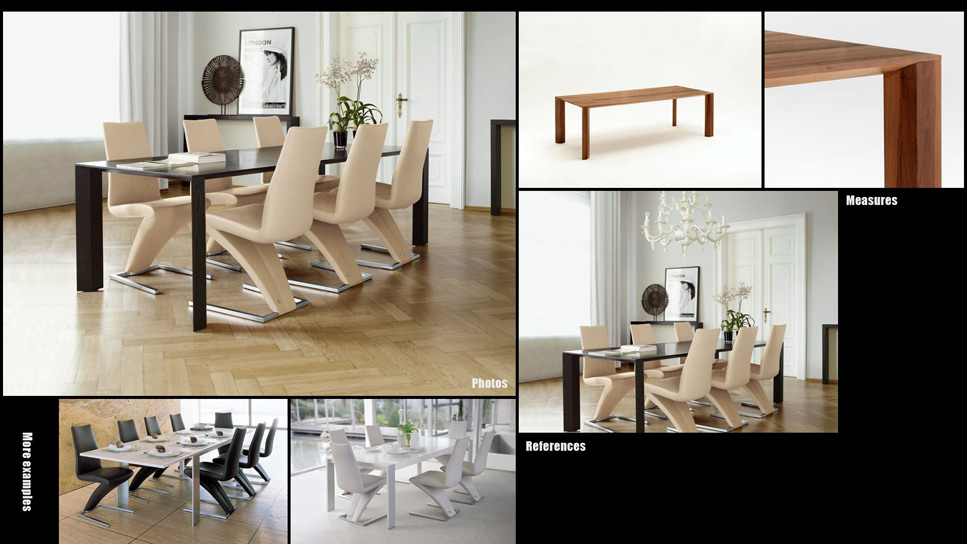
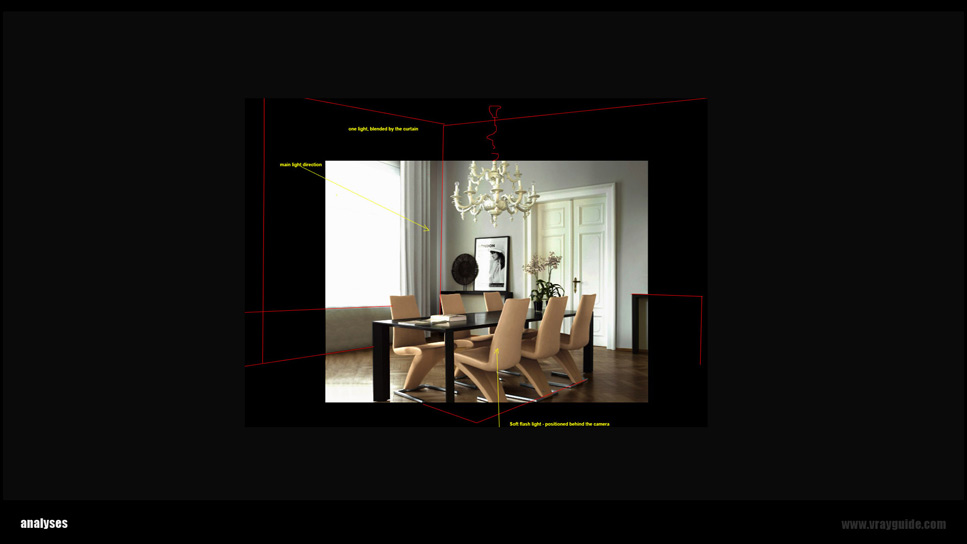
In my opinion planning is the most important part of the project - any failures in proper development might lead to endless working hours. So personally I like to invest as much as possible time in investigation and analyzing each aspect of the scene separately. Such as; lighting, materials, color combination, camera lenses-position/angle/height/etc. Here are some nice tricks that I've discovered during the analyses. If you add contrast and fix curves to be dark you'll be able to see exactly the direction of light and the reflections of light sources in glossy/reflective objects.
Modeling
Modeling process went really easy, I just needed to find something similar to the reference. After searching for a while in my DWG library I was able to find something that would fit perfectly to the scene I was trying to recreate. While working in 3Ds Max you might want to keep things simple and easy for future adjustments, that's why I prefer to work with layers - it makes the work flow much easier when the scene get complicated and heavy.
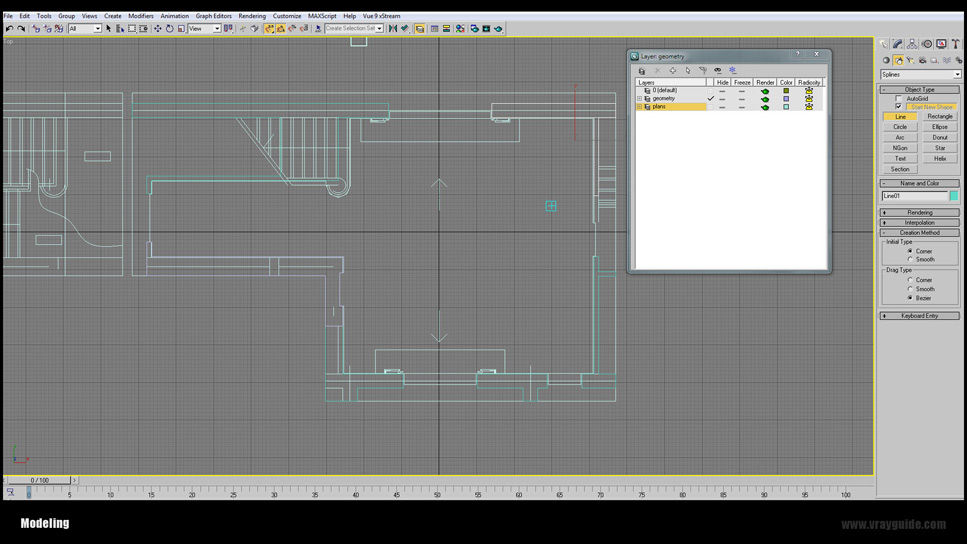
I've imported the DWG file selected "all" (that way I'll be able to have all parts in on layer) and clicked on "+" in the layers panel to create new "layer" - this layer will include only DWG's.
Note: Sometimes DWG plans come with small patrs that can be hidden or invisible. Those parts can be placed in all over the place, and you will not be able to see them or select them, such situations can cause different rendering errors, like "Far from origin" and bugs "Disco lights"/light dots/artifacts. Having all DWG in one layer will give you the option to hide/unhide the whole layer. In some cases you might want to delete DWG plans to identify errors/rendering bugs.
Next I've switched to the upper layer "geometry" and started modeling my room. (I'm using the "eyes" icon to hide and unhide layers).
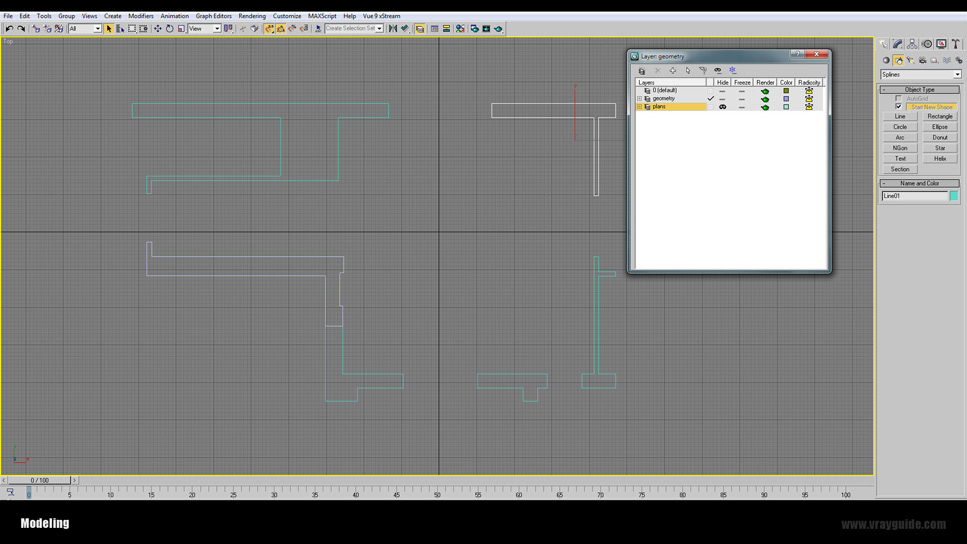
After I've modeled the walls and added boxes for the ceiling and floor, I needed to adjust the height, so approximately lifted the vertexes to about 280cm (about 9,2 feet) from the floor. Now it was the time to add some furniture and start working on the frame (camera angle).
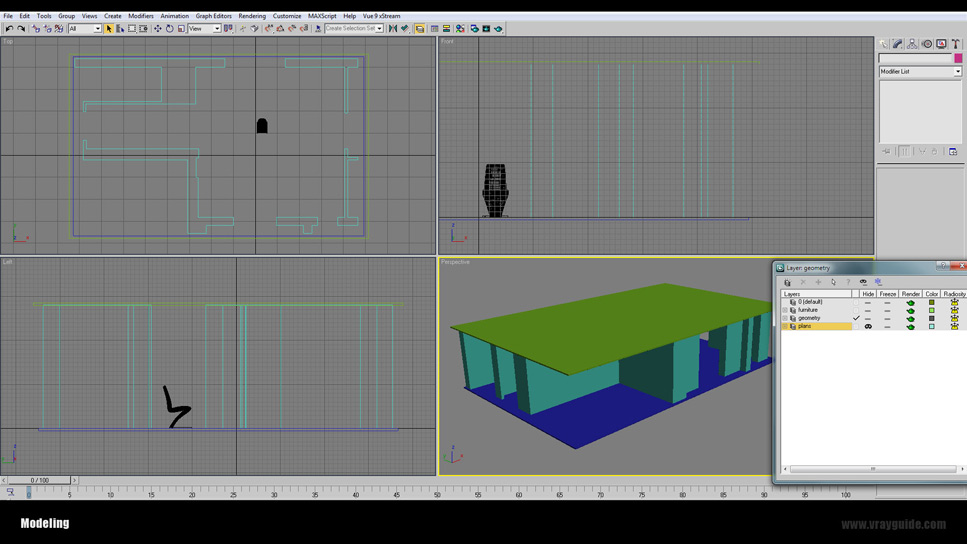
It's very important to have real size objects in your scene while doing something from the reference if you want to get correct proportions. Make a new layer and position all your furniture on it - it will be much easier to get proper camera angles and the ceiling height while having real size models in your scene.
Lighting
So before you start making textures and adjusting materials it's very advisale to set up lighting and rendering setting to test mode - this way you'll be able to save tons of time and move faster with your creation.
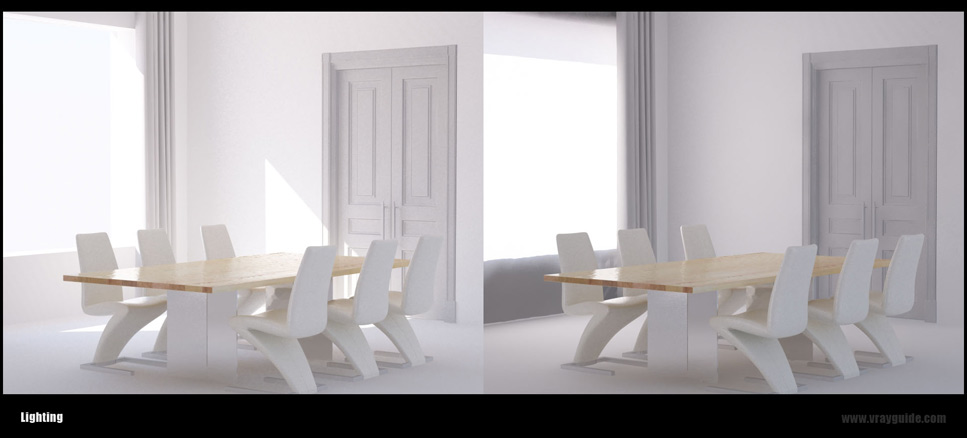
I've used very popular combination of VRaySun+VRaySky+VRayPhysCam, AND VRayLight as Sky Portal at the window.
That's it! No more lights.
The curtain was made from VRay2sideMtl - that way it could transmit light in to the room. Basically this material should be used to make transparent objects, like lamps, leaves, curtains…etc. You can find more info regarding this material on official VRay online manual here.
After adjusting the proper amount of lighting by lowering the VRayPhysCam f/number=4 and setting neutral in the white balance, you can get correct camera exposure - then you can start working on the materials. (I'm not going to go through full gamma 2.2 setup cos I've covered it many times in previous tutorials). I'm just gonna say that I work with gamma 2.2 and exponential color mapping. That's why I don't get hard contrast and it's easy to avoid burnouts.
Texturing
Aite, so now is the perfect time to start adding textures and getting the right look by adjust white balance.
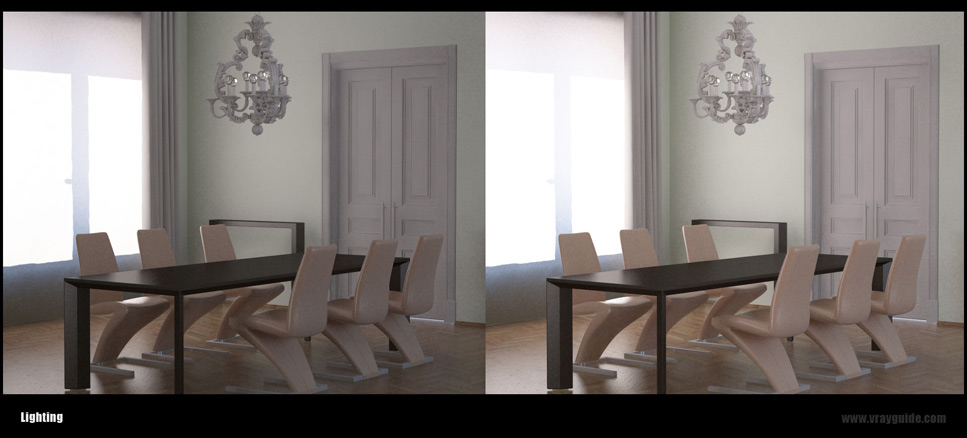
Naturally, after adding materials, especially dark ones - our scene got darker. Well duh! Dark materials absorb light, and the darker the material the more light it will absorb - as consequence you get dark images.
Easy fix, increase ISO on your VRayPhysCam, don’t touch anything else but ISO. You can go with basic ISO stops; 100, 200, 300, 400, 500, 600, etc.
This method works for me, and it's the easiest way to add more light to your render.
Note: Important to mention, adding textures procedure took me less than few minutes cos I've got materials library that easy to load in to the material editor. Literally in seconds I have over 100 VRay materials to choose from. If you still do not have your materials library now it's the time to build it - it do not cost anything - just time consuming, for free VRay materials visit www.vray-materils.de
White Balance
Something quite important that many 3D artist miss while doing their 3D renders. Proper white balance will give your materials natural look, and your lighting will also look natural - according to the day time.
It goes like this:
- you need to set up your white balance to pure white
- position in the middle of your scene pure white ball
- Run light cache calculation to the point where you have enough pixels to pick color from.
Note: Do not waste your time by rendering the whole image! Let light cache do the job.
- Pick color from the ball - with color picker from the white balance.
- Adjust the color to be slightly lighter than the color that was picked.
- Render to see the difference.
Here's what I've got.

Ok, so now it was just a matter of adding details to objects by rending small areas with region option - this way it's faster check and fix small imperfections.
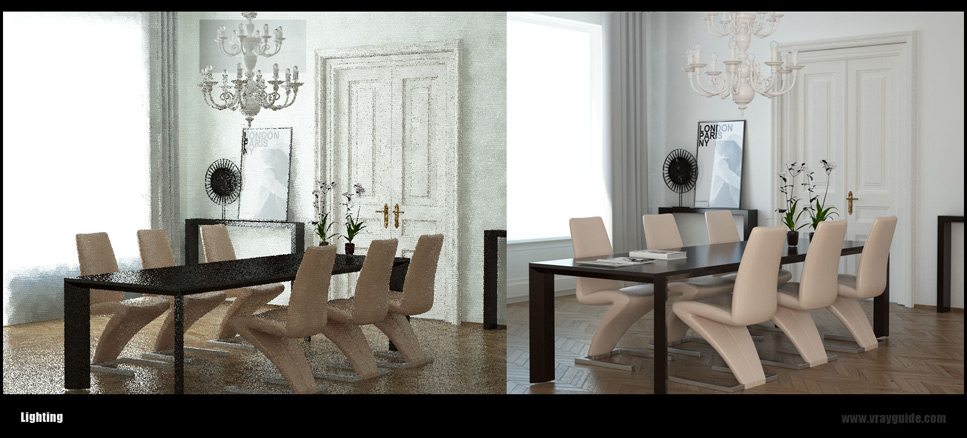
On the left image with region selection - on the right final fixed version. I always like to fix the white balance at the end - before I do final render, cos the any small change in the color of the floor or even table might affect final result. This is how my final render looks like:
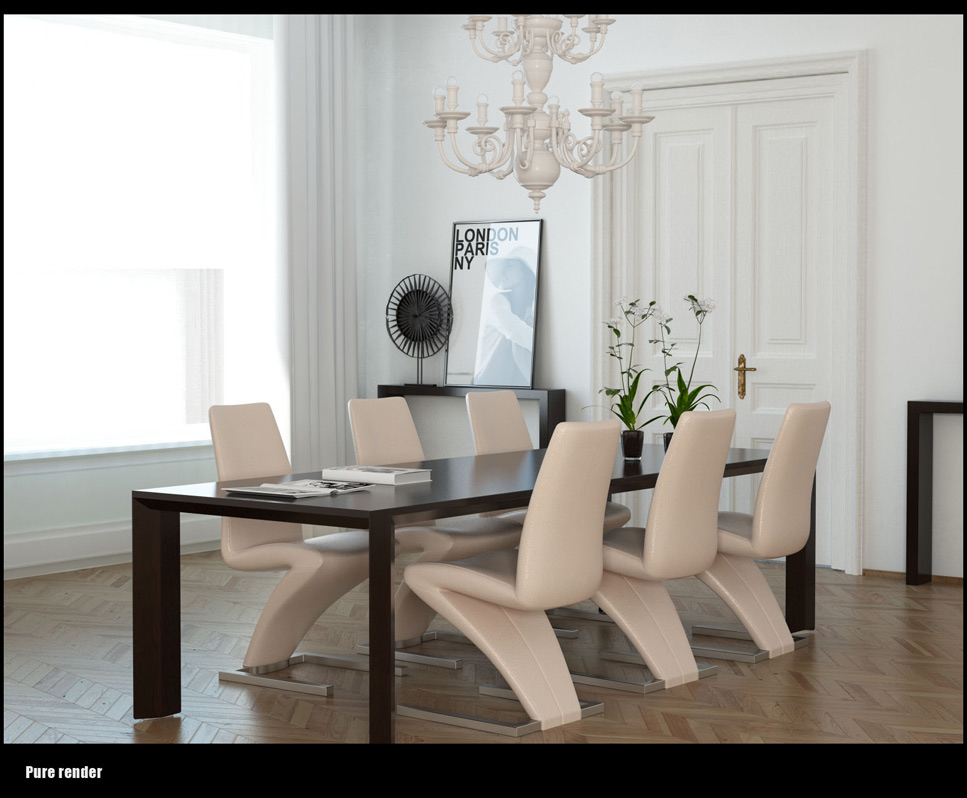
Ok so it's not bad, the image got proper exposure, no critical burnouts or over-darken areas. The lighting is pretty even and now is the time to get busy with making this image look like PHOTO.
Post Work
I've used Photoshop to make basic color correction - easy stuff, something that I do check for every single image, even if it's look perfect, you need to check render accuracy.
So it goes like this, in the Photoshop->adjustments;
- Exposure - check for proper exposure and darken gamma.
- Color balance - yellow/red on midtones. Blue/cyan on highlights.
- Curves - lower dark tones and lighter highlights. Get more contrast.
- You can always check hue-saturation to fix natural color of the wood-red and vegetation-green. (most common mistake of beginners is to make very saturated vegetation, such as grass and leaves).
Great now is the time to take this image to the higher level and add PHOTOREALISM.
First you can work your way with VRay passes - adding necessary passes to get natural look for your scene objects and lighting, fix shadows, add ambient occlusion (soft shadows) and global illumination, increase depth of reflections/refractions.
Such work requires good knowledge for each pass to be used – and the Photoshop “mode†it can be applied with.
This topic is quite big and it will be hard to cover everything in one tutorial, so if you want to learn more about proper color correction and passes combination, you are very welcome to join our Photoshop Post Work 2.0 – online LIVE training.
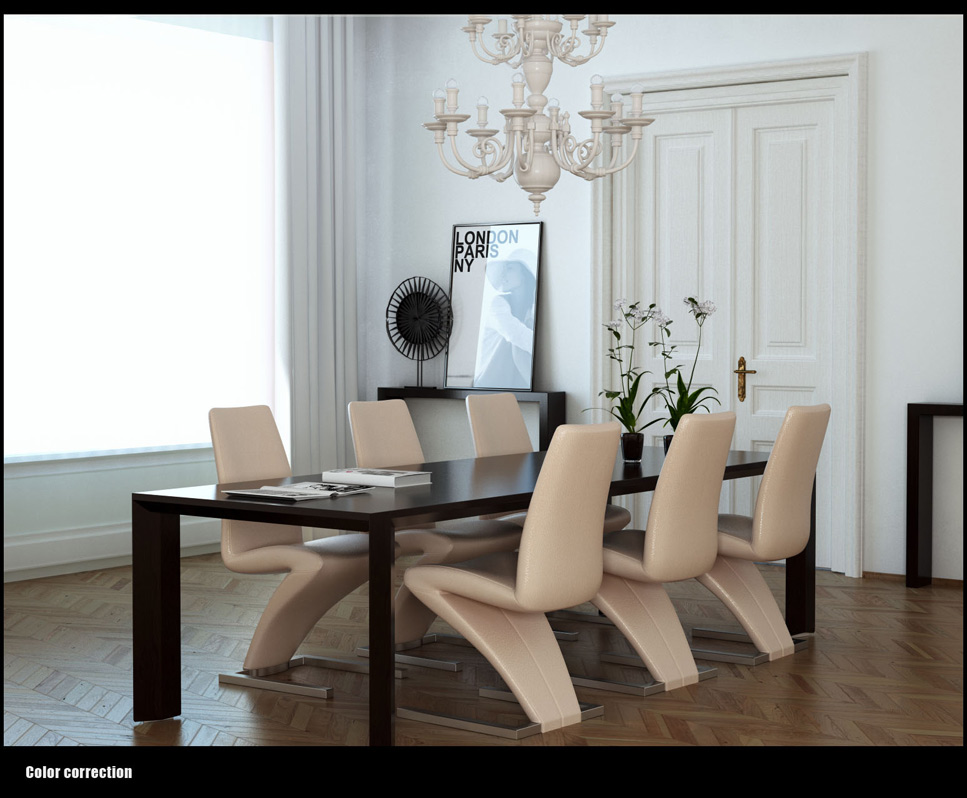
As you see this image got more contrast, more depth to the reflections, more accurate shadow and really nice soft shadows thanks to ambient occlusion pass. Ok, so some might say that looks great! Who needs more well if this is the case then I'll see you later - but if you say, I want to see more photorealism! here we go;
More Photorealism
I used Looks to make this happened to add nice lens distortions and other aspects that can bring my image closer to the photo. Let's try to analyze what real photos might have;
- Chromatic aberration
- Vignette
- Film Grain
- Blurred edges (out of focus)
- Spotted areas - lighten darken - remember one light motivation!
All of these create image that will look way REAL and way better than just simple color correction.
I know there is a lot of programs that can add such effects, most of them supply pretty much same results, of course most of them not for free but if you're looking for free software motiva will do the job!
Note: Very important to have references while creating 3D images. Lot's of newbies post their work and say "I don't know what to do so that my image will look real". Well take a good look at the real image and you'll know.
This is amazing how you start to see all those small nuances that previously were just invisible for your eye.
If you ask me, yes I always work with references, and sometimes I need to find even more references to finish my work - and make 3D render to look real.
If you can't find exact image, or similar - break your image into segments and try to find photo for each segment, it will be much easier to achieve photorealistic result.
Just remember - Photoshop is the easiest way to achieve photorealism!
As for now, here's my final image.
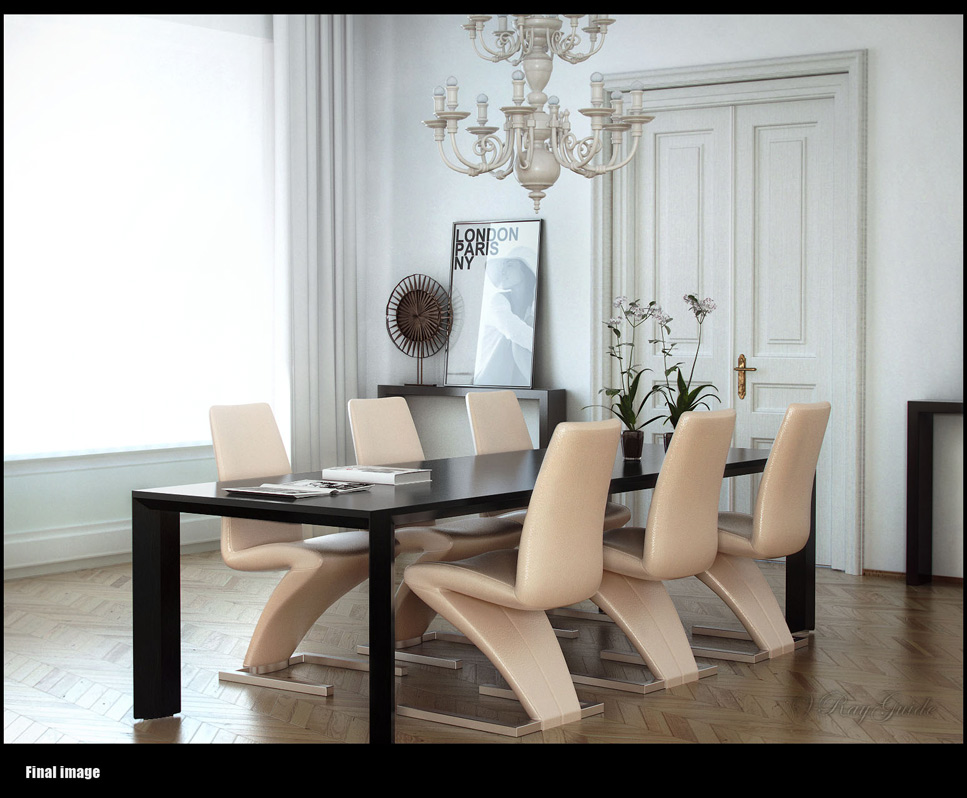
I hope you've enjoyed this "Making of" I hope to make more of these soon enough.
Post a comment bellow let me know what you think.
Thanks for checking this out!
Talk soon,
Alex
www.vrayguide.com
Customer zone
Your special offers
Your orders
Edit account
Add project
Liked projects
View your artist profile




COMMENTS