Create Dirty Windows - material tutorial
New tutorial by RenderRam.


In accordance with the art. 13 section 1 and 2 of the European Parliament and Council Regulation 2016/679 of the 27th April, 2016 on the protection of natural persons, with regard to the processing of personal data and on the free movement of such data, and repealing Directive 95/46/EC (General Data Protection Regulation), hereafter RODO, I hereby inform that:
1. EVERMOTION S.C., 8 Przędzalniana Str., 15-688 Białystok, Poland is the Administrator of your Personal Data (APD)
2. Data Protection Inspector can be reached through e-mail: iod@evermotion.org
3. Your personal data are to be processed on the basis of art. 6 section 1 letter a, b and f of RODO in order to:
a) prepare, conclude and execute the agreement and for other purposes approved by you,
b) to execute the legitimate interest like marketing of products and the agreement, claim assertion or defence against claims resulting from the law regulations.
4. Entities entitled to the reception of your personal data may be the authorised public bodies; mail providers; providers of the services covered by the agreement; responsible for debt recovery, keeping the archives, document utilization, legal consulting, technical services, IT services and accountancy.
5. Your personal data shall not be transferred to the third country, nor to the international bodies.
6. Your personal data shall be processed within the period of the agreement and upon your additional consent until you withdraw it. APD shall keep the data for the period of any civil law claim execution connected with the agreement.
7. You have the right to demand an access to your personal data, to correct or to delete the data if there is no other basis for the processing or any other purpose of such processing or to limit the processing of the data, to transfer the data to another administrator and to raise objections to the further data processing if there is no legal basis for further processing and to withdraw any previous consent.
8. You provide the personal data voluntarily, however they are necessary to conclude the agreement. The refusal of providing such data may result in the refusal of the agreement conclusion.
9. You have the right to lodge a complaint to the Personal Data Protection Office when in your opinion the data processing violates the regulations of General Data Protection Regulation of the 27 April, 2016 (RODO).
10. Your data will be automatically processed, including the form of profiling.
11. You are obligated to forward above mentioned information to your representative, especially if you appointed this person in the agreement as the contact person or as the representative for the agreement execution.
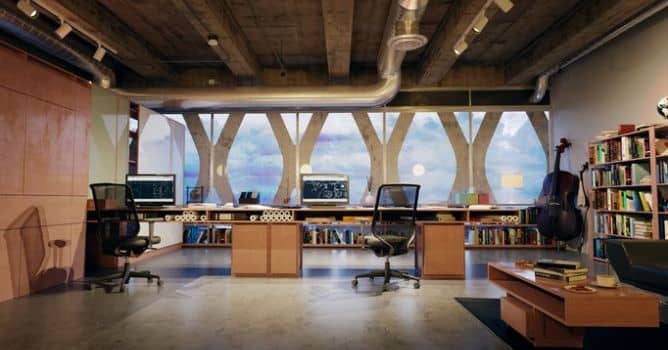

This scene comes from Archinteriors vol 33 for Blender - a collection of 10 arch-viz scenes - modern office spaces compatible with Blender 2.8. This collection is available here.
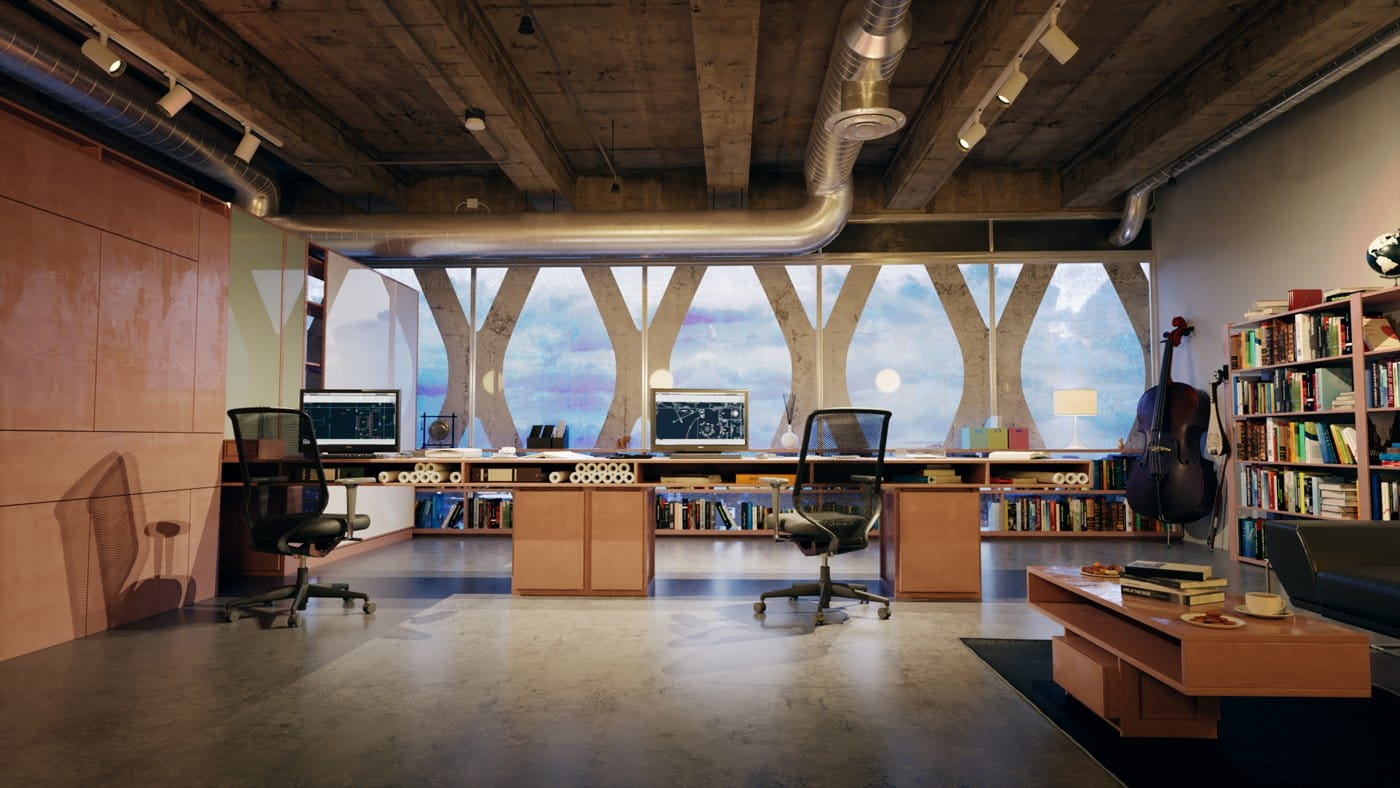
Final render after post-production. It depicts modern office interior with some industrial vibe (ceiling elements) and a lot of props, including many books, computer screens, binders, etc. Warm lighting is contrasted with blue evening sky tint behind the window.
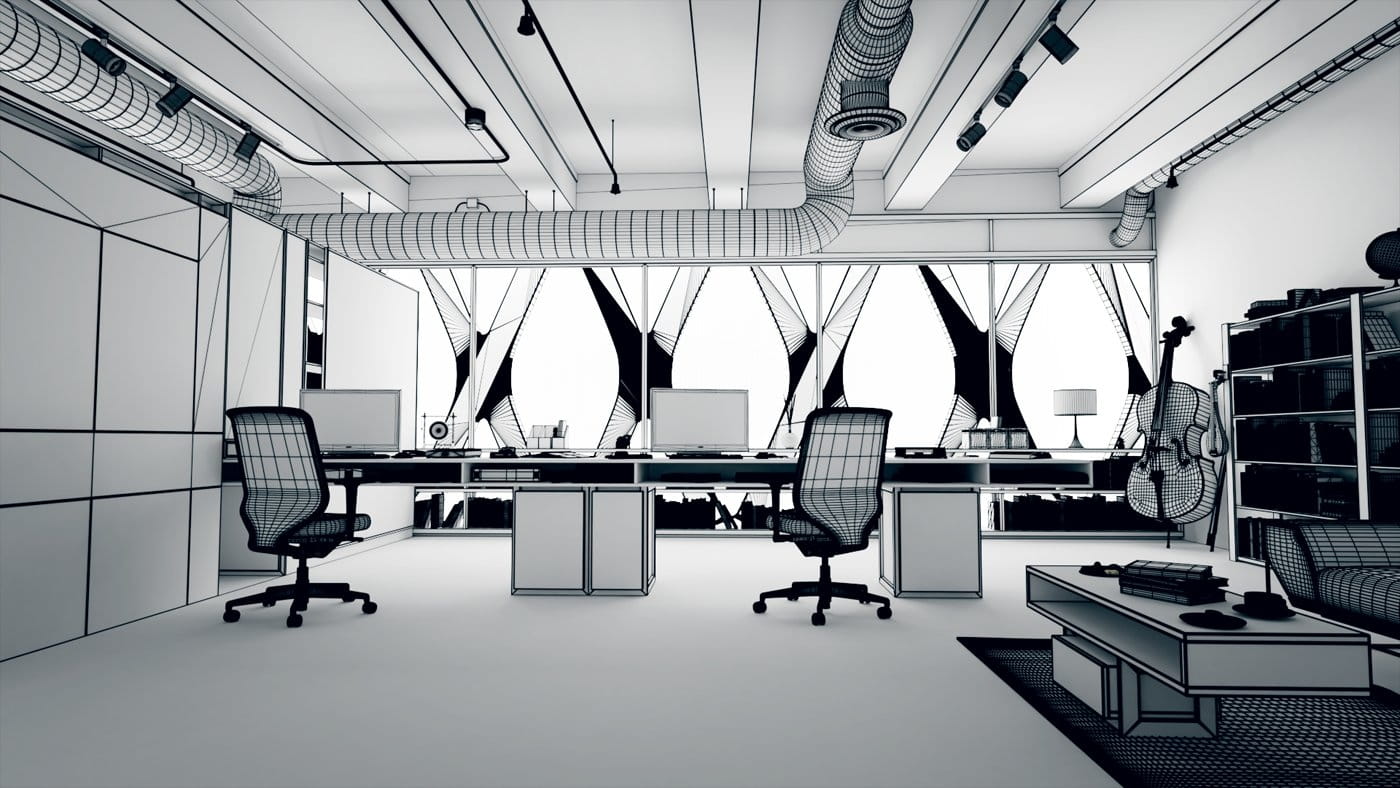
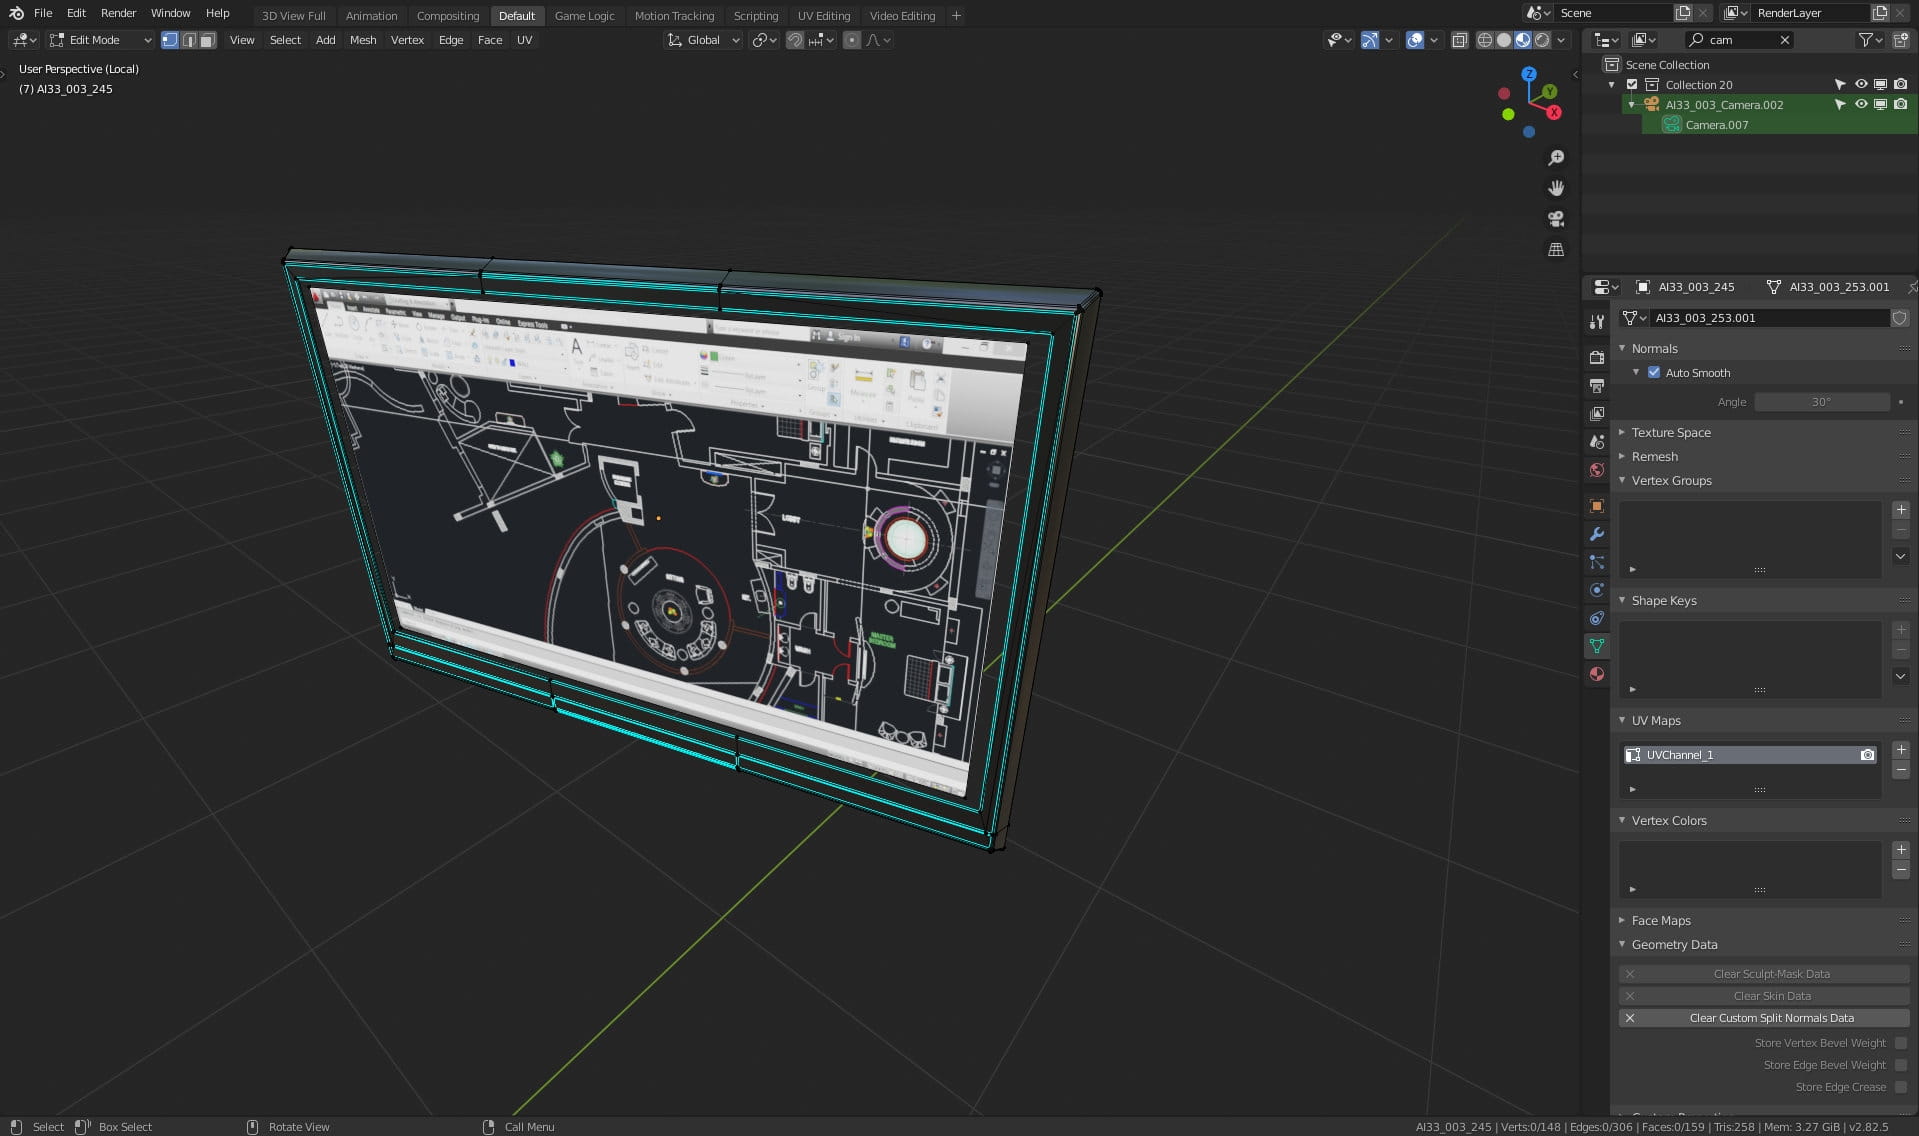
Wireframe view. You can make wireframe render by using simple material that mixes two shaders together and placing it in "Override" slot in Blender scene settings. Or you can use Freestyle mode of cycles renderer.

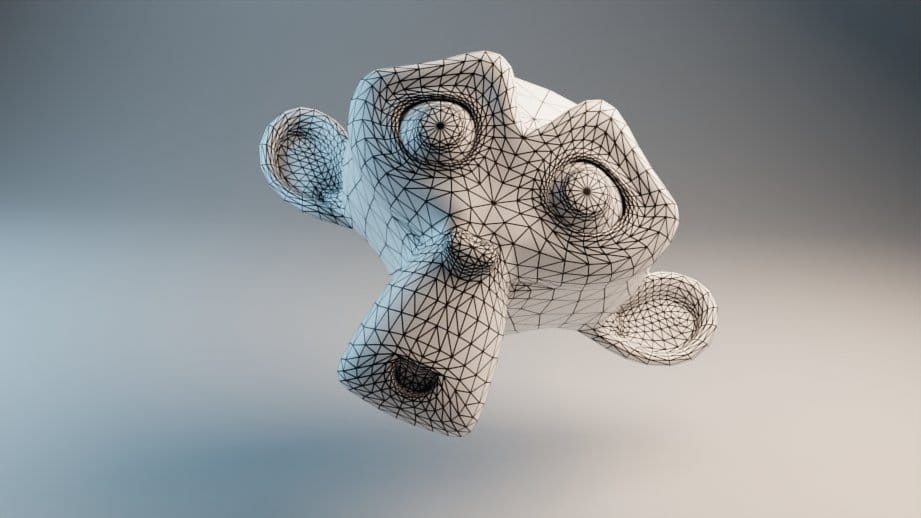
This is the result of "freestyle" rendering.
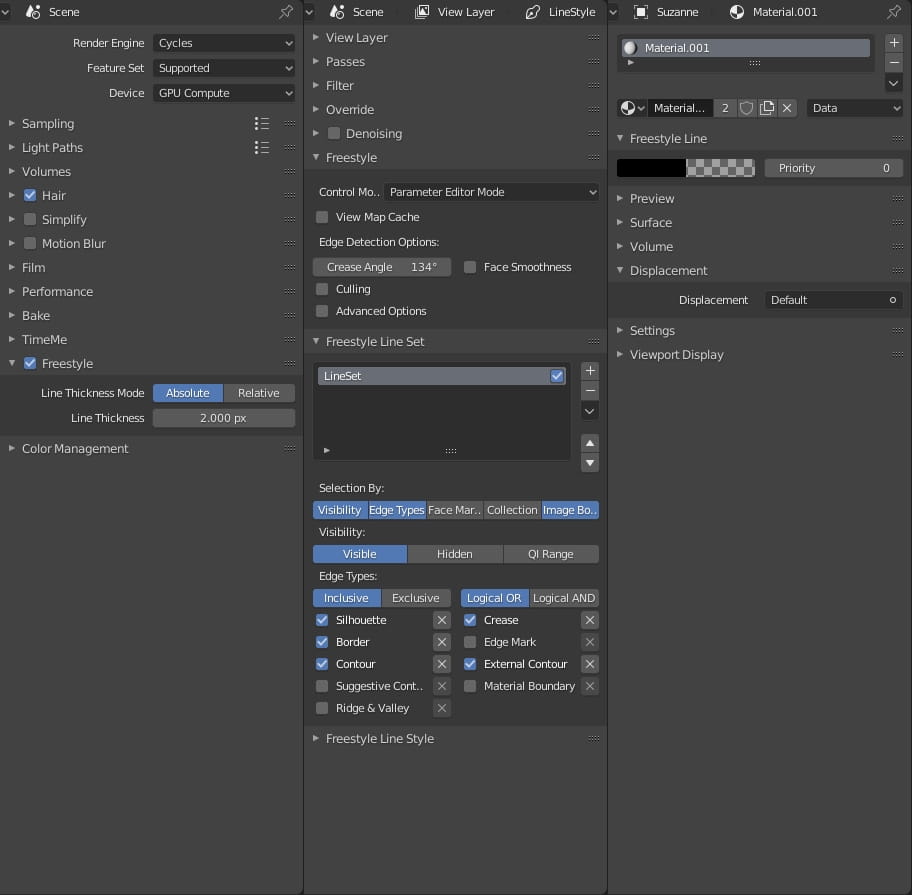
And these are the settings that control this rendering mode. First, you need to enable "Freestyle" in Render Settings. You can choose line thickness there (and decide if it should be absolute or relative). In the scene layers settings you have more advanced panel that will let you to include outlines for creases, material boundaries, etc. If you choose to outline material boundaries you can decide about the style of outline of each amterial in Material settings (on the right), or leave the same outline for all materials the same.
You can also setup your material to draw wireframe (triangles only) on the mesh.
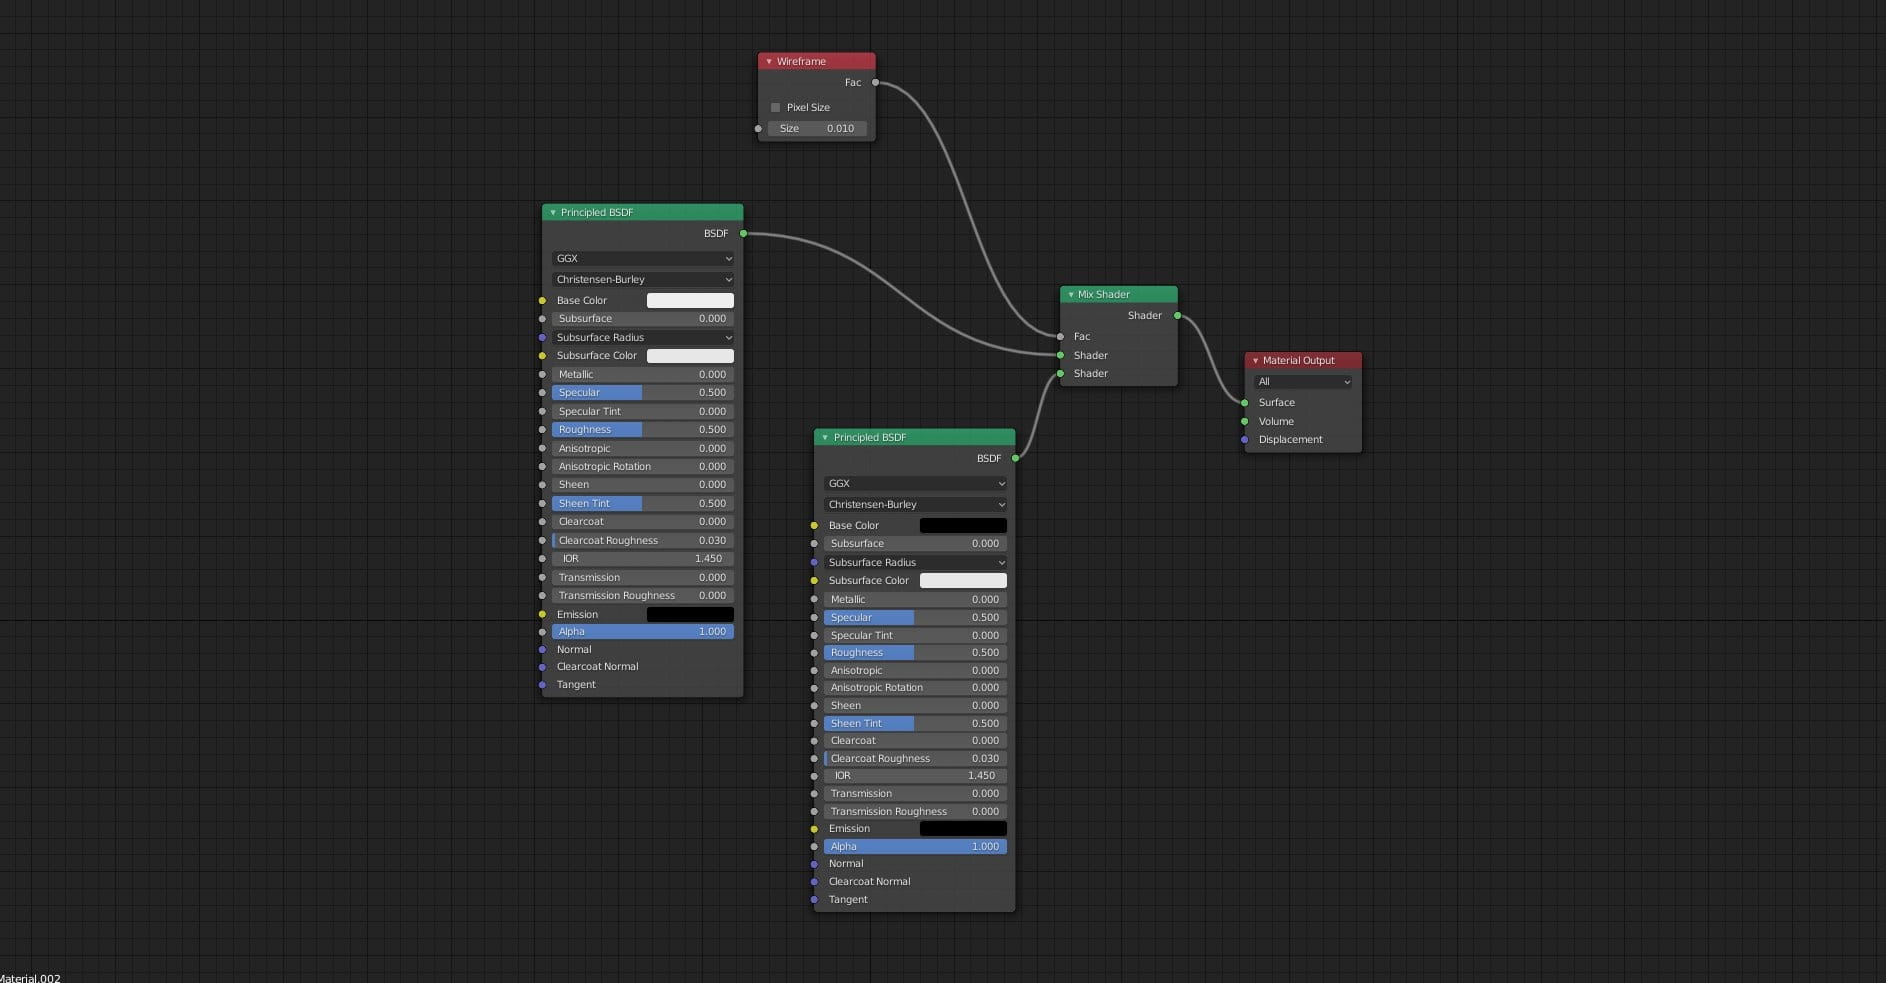
It's a very simple setup - you use two shaders and mix them with wireframe node.
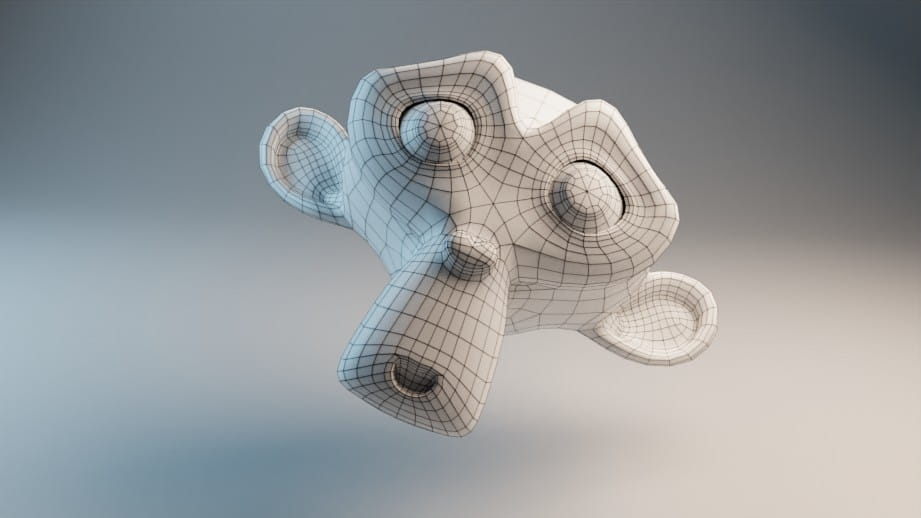
But in this scene we used wireframe modifier - it gives the best results (quad wireframe) and you can easily add it to many objects at once.

Wireframe modifier - add it to your object and uncheck "replace original". Then, use "1" for material offset. Add two materials for your object and make one black and the other - white. "Material offset" in wireframe modifier controls which one will be used as a background, and which one will be used as a wireframe. Now, assign this material to all other objects in the scene.
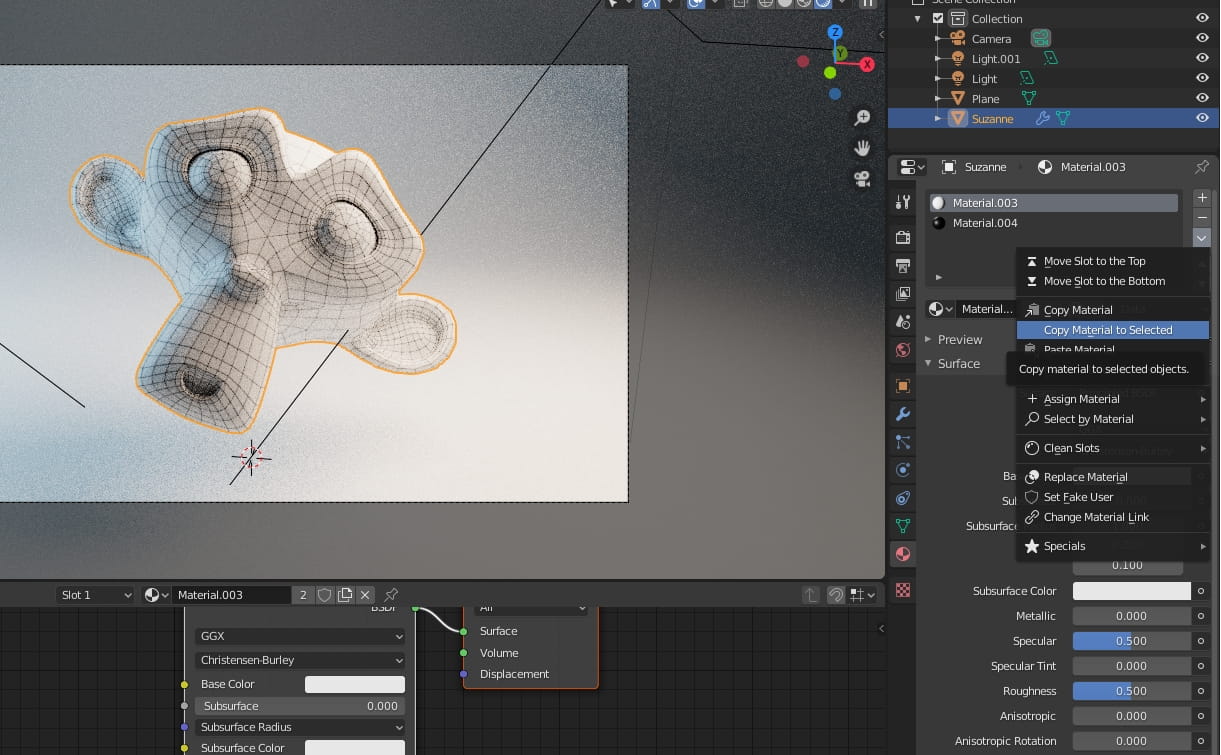
You may need to "copy material to selected" to replace all other materials assigned to objects. This option is available after you enable "Material utilities" add-on in Blender. Don't forget to backup your scene first! You should make your wireframe on a copy of the scene.
here is how our scene looks like in the Blender viewport (material view enabled).
3d model of cello - material preview / wireframe selected / wireframe unselected
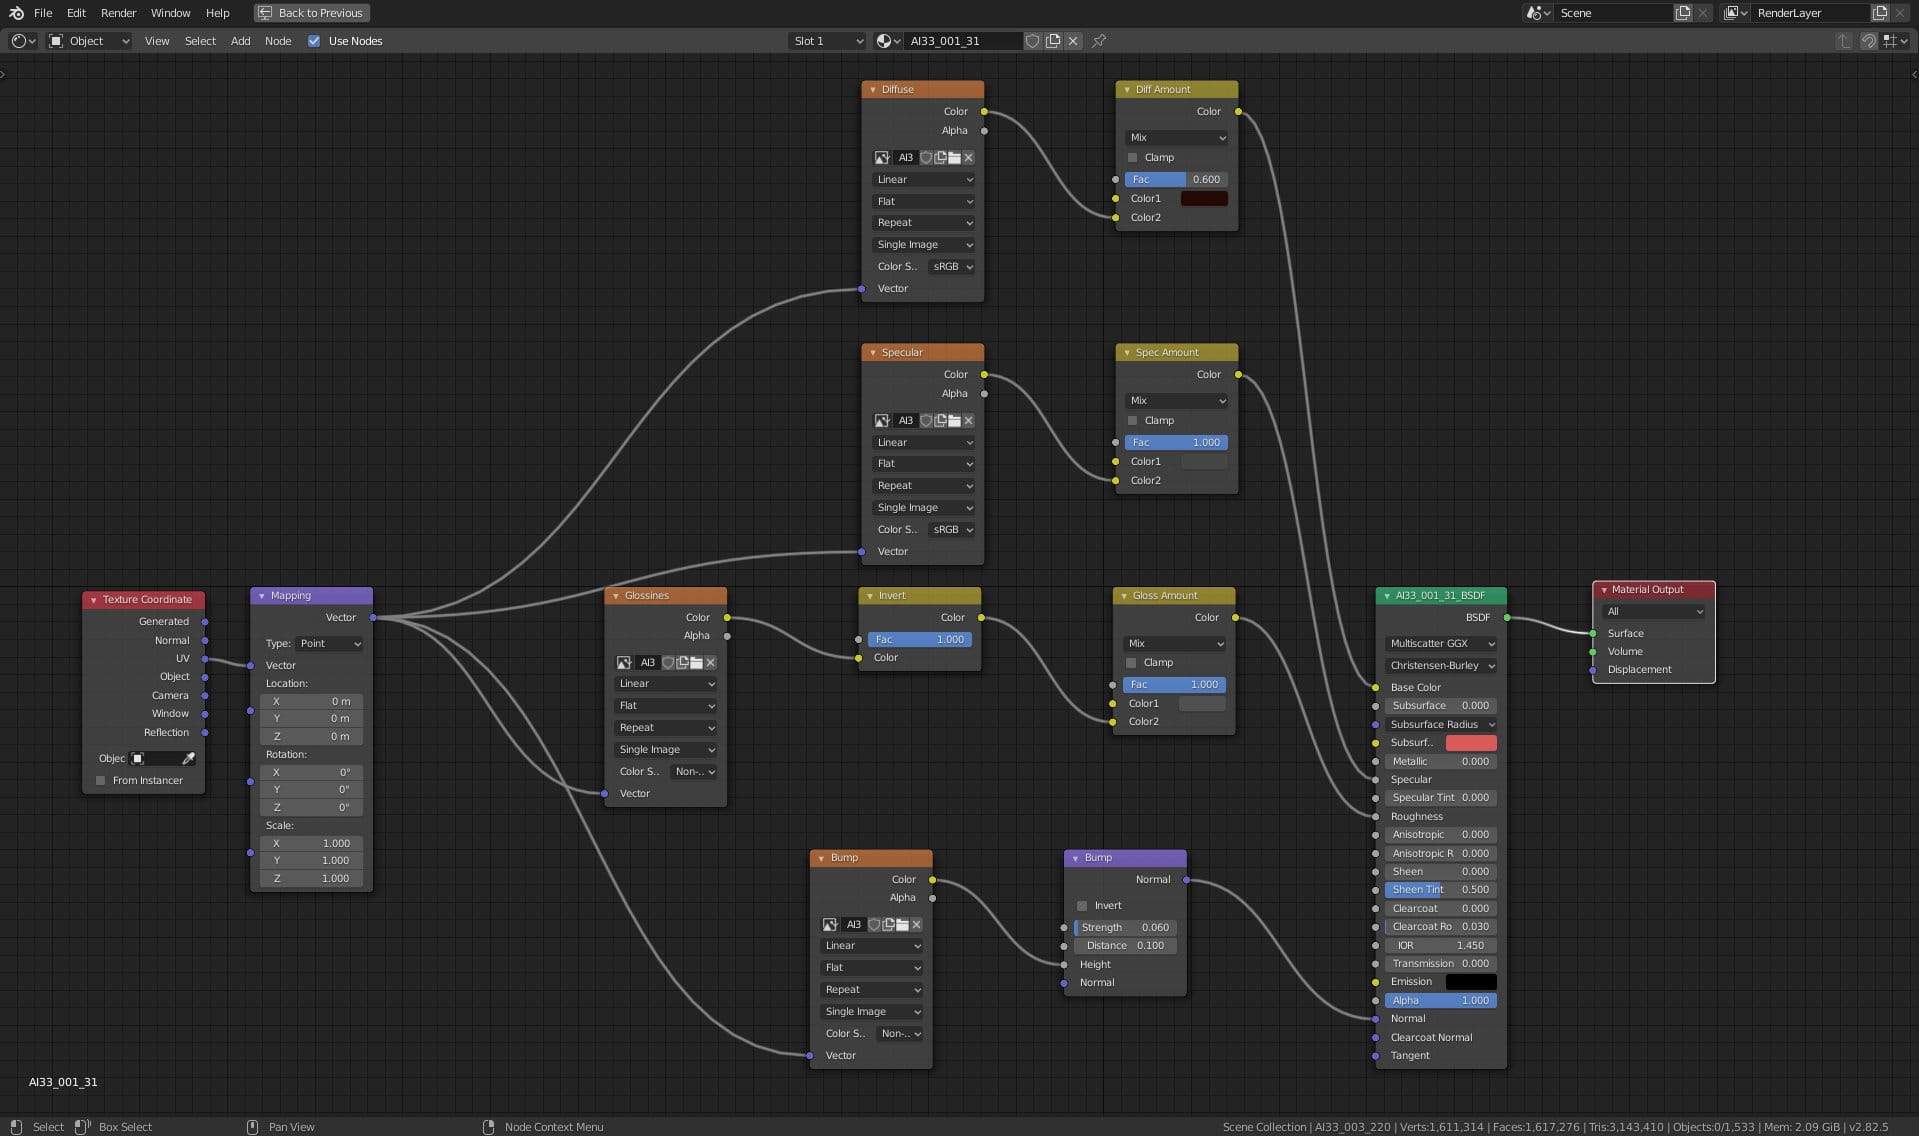
Double Bass material - mostly, wghen it comes to unique assets that need special attention, Substance Painter is used, and this instrument was no exception. After texturing in Substance Painter all we have to do is to import textures and put them in valid slots. With Node Wrangler add-on it is even easier (just select your shader in shader editor and press CTRL-SHIFT-T to automatically pin nodes from the textures you point on your disk). Although, in this case we needed some changes, because we used textures that were primarily meant for V-ray renderer. We could export textures again from Substance Painter in the format that is the most suitable for Cycles, but we chosen to simplify the process - we used a script that pinned all textures into valid nodes and for each Specular texture thescript inserted "Invert" node to turn it to Roughness. There was some manual tweaking afterwards, but a lot of repetitive and uncreative work was avoided this way.
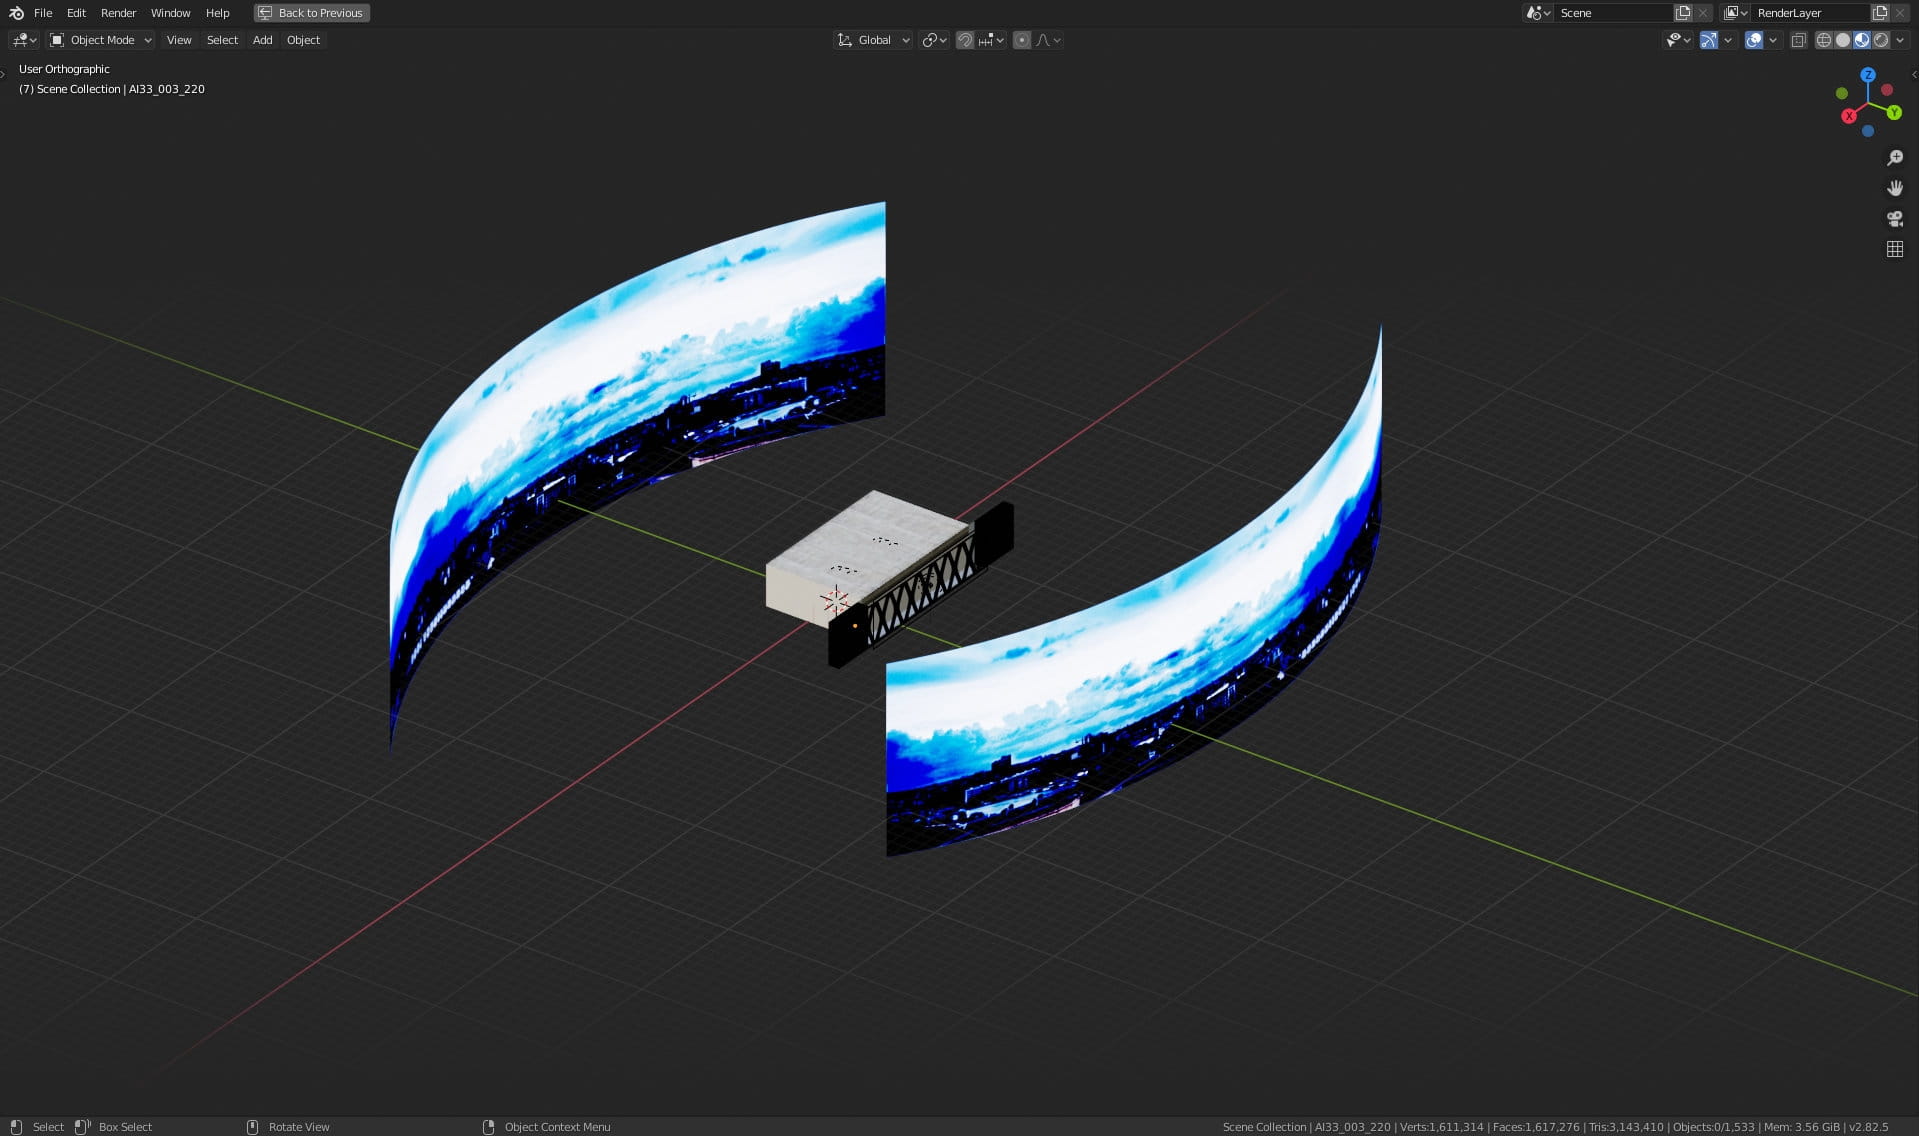
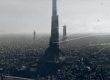
Outside planes (environment that is visible to the camera but it is not used for lighting the scene)

Environment planes material - just an emissive material with some color correction nodes.

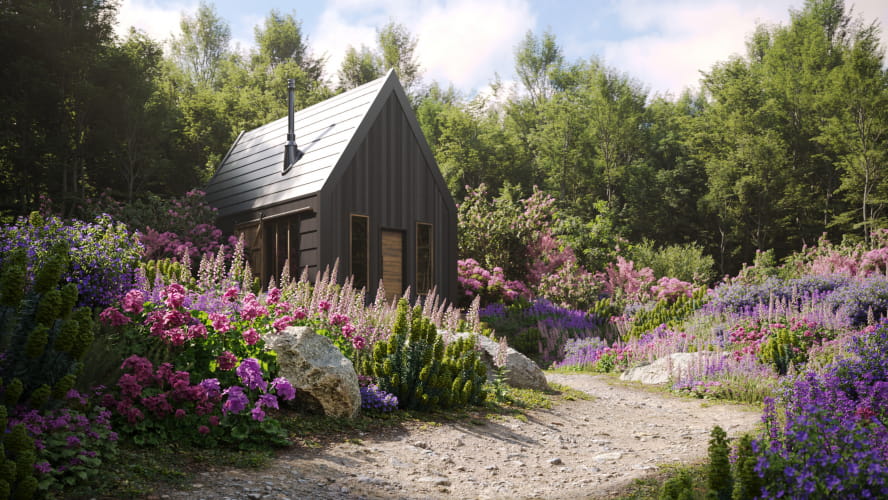
Environment map used for planes, it is not used for lighting but only as a nice look from the window.
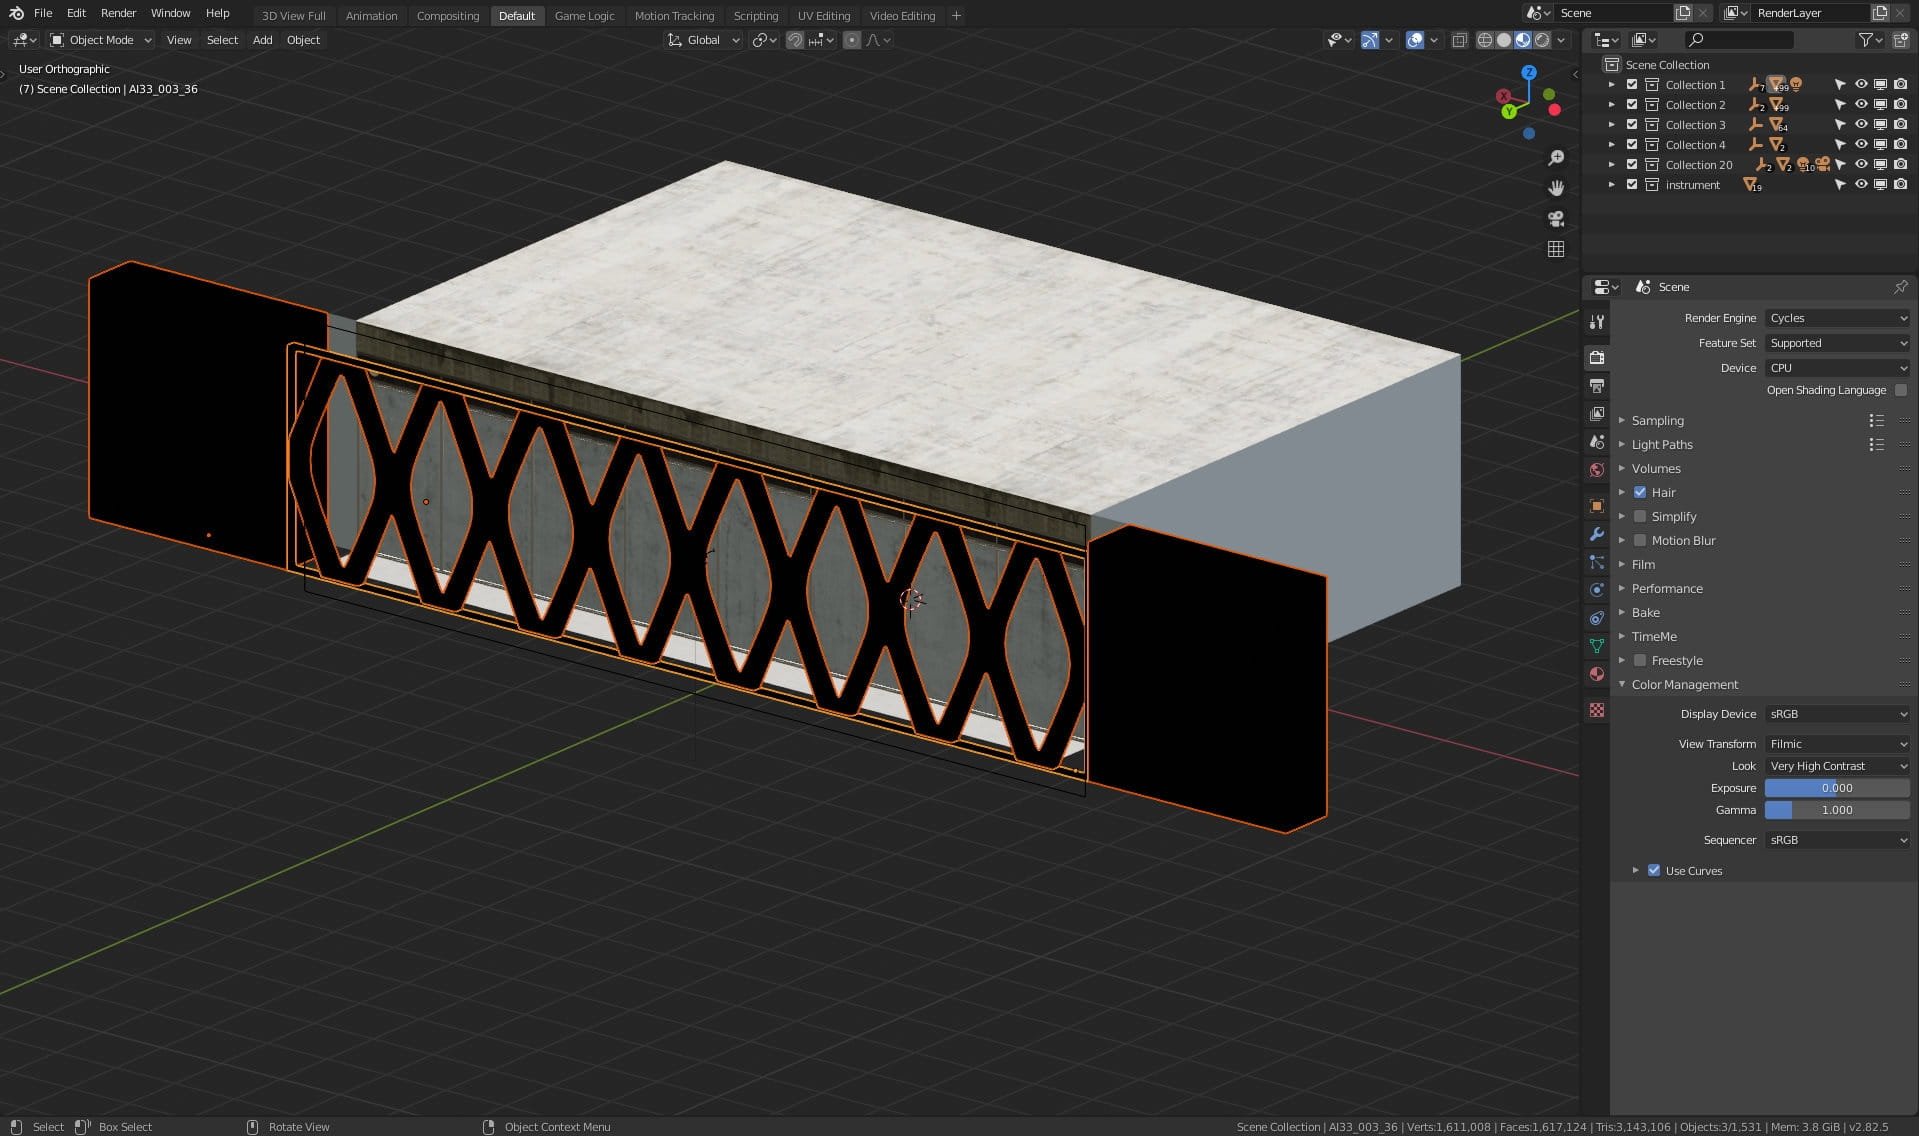
Concrete elements of outside elevation of this office.
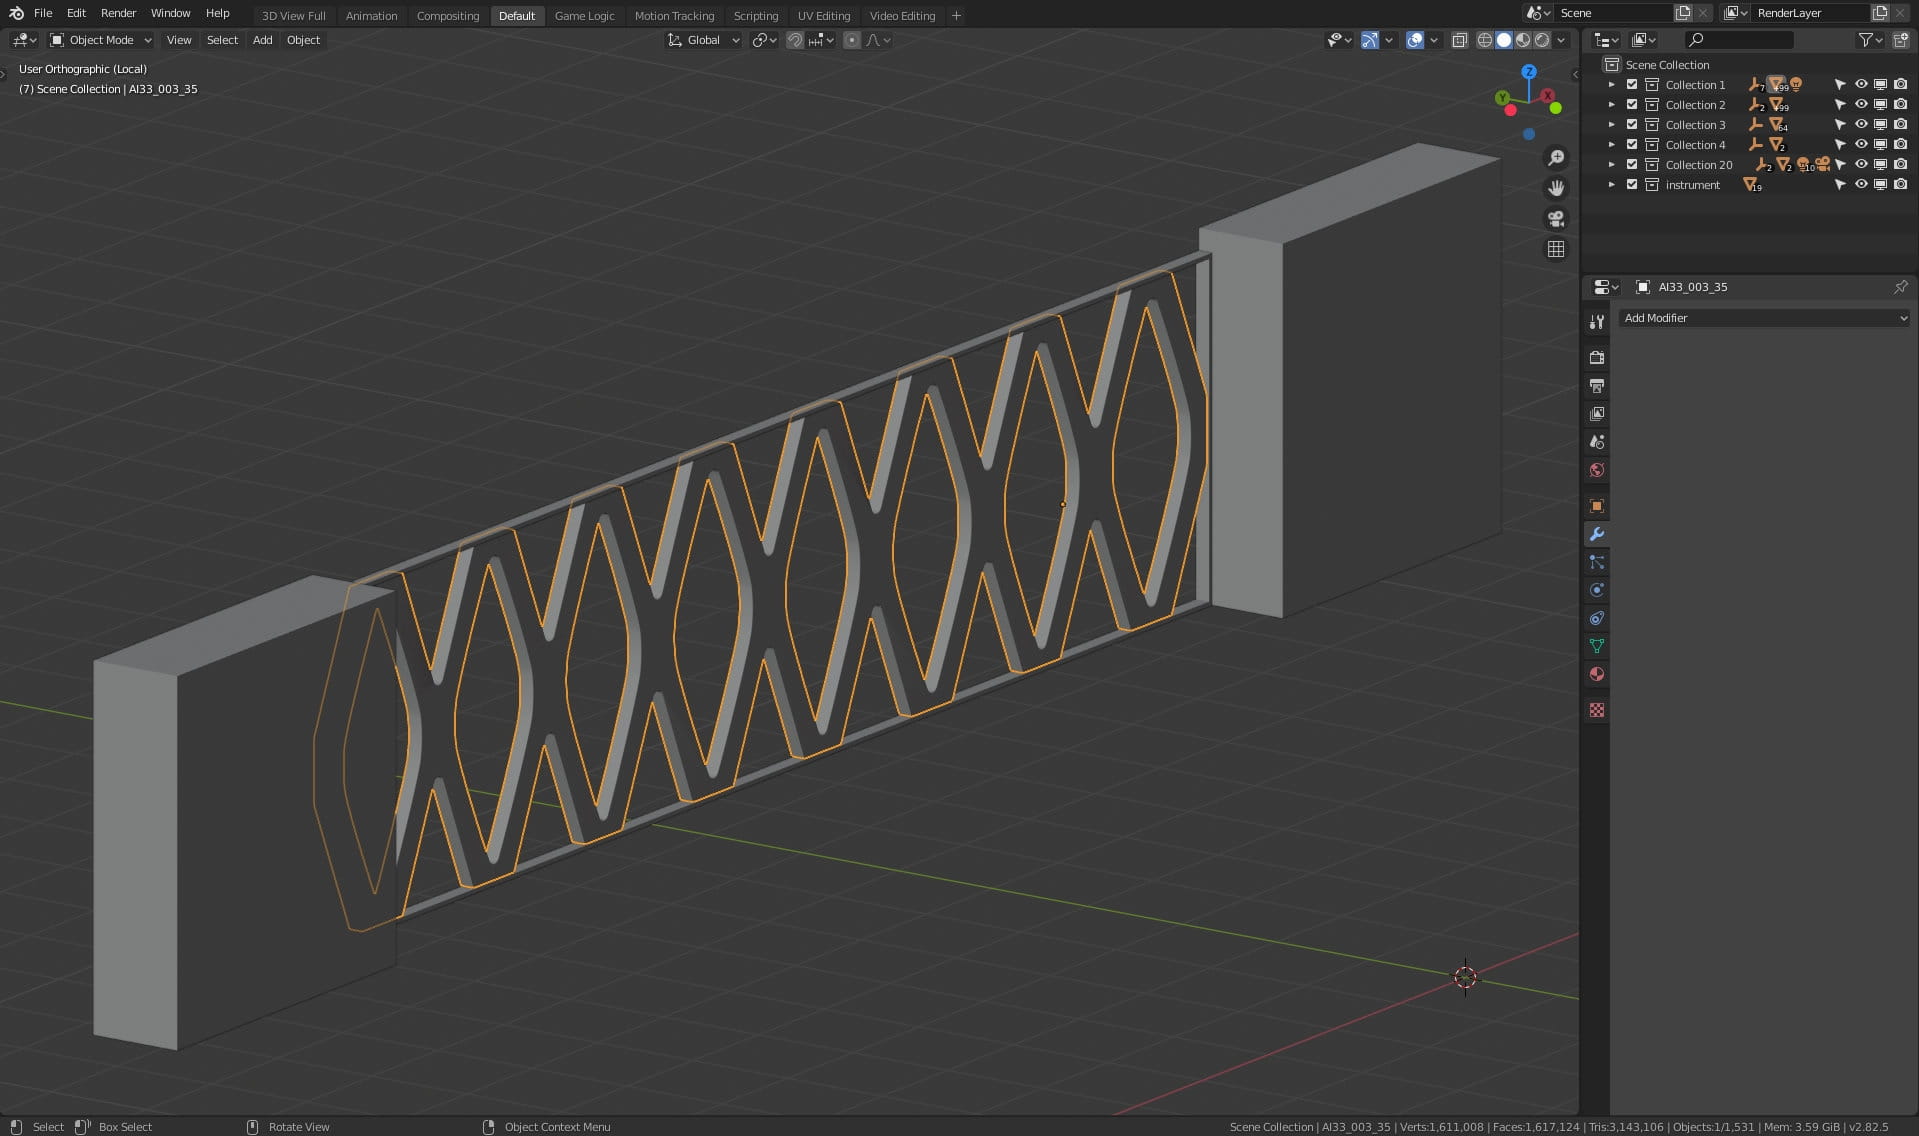
Only construction elements of elevation decoration.
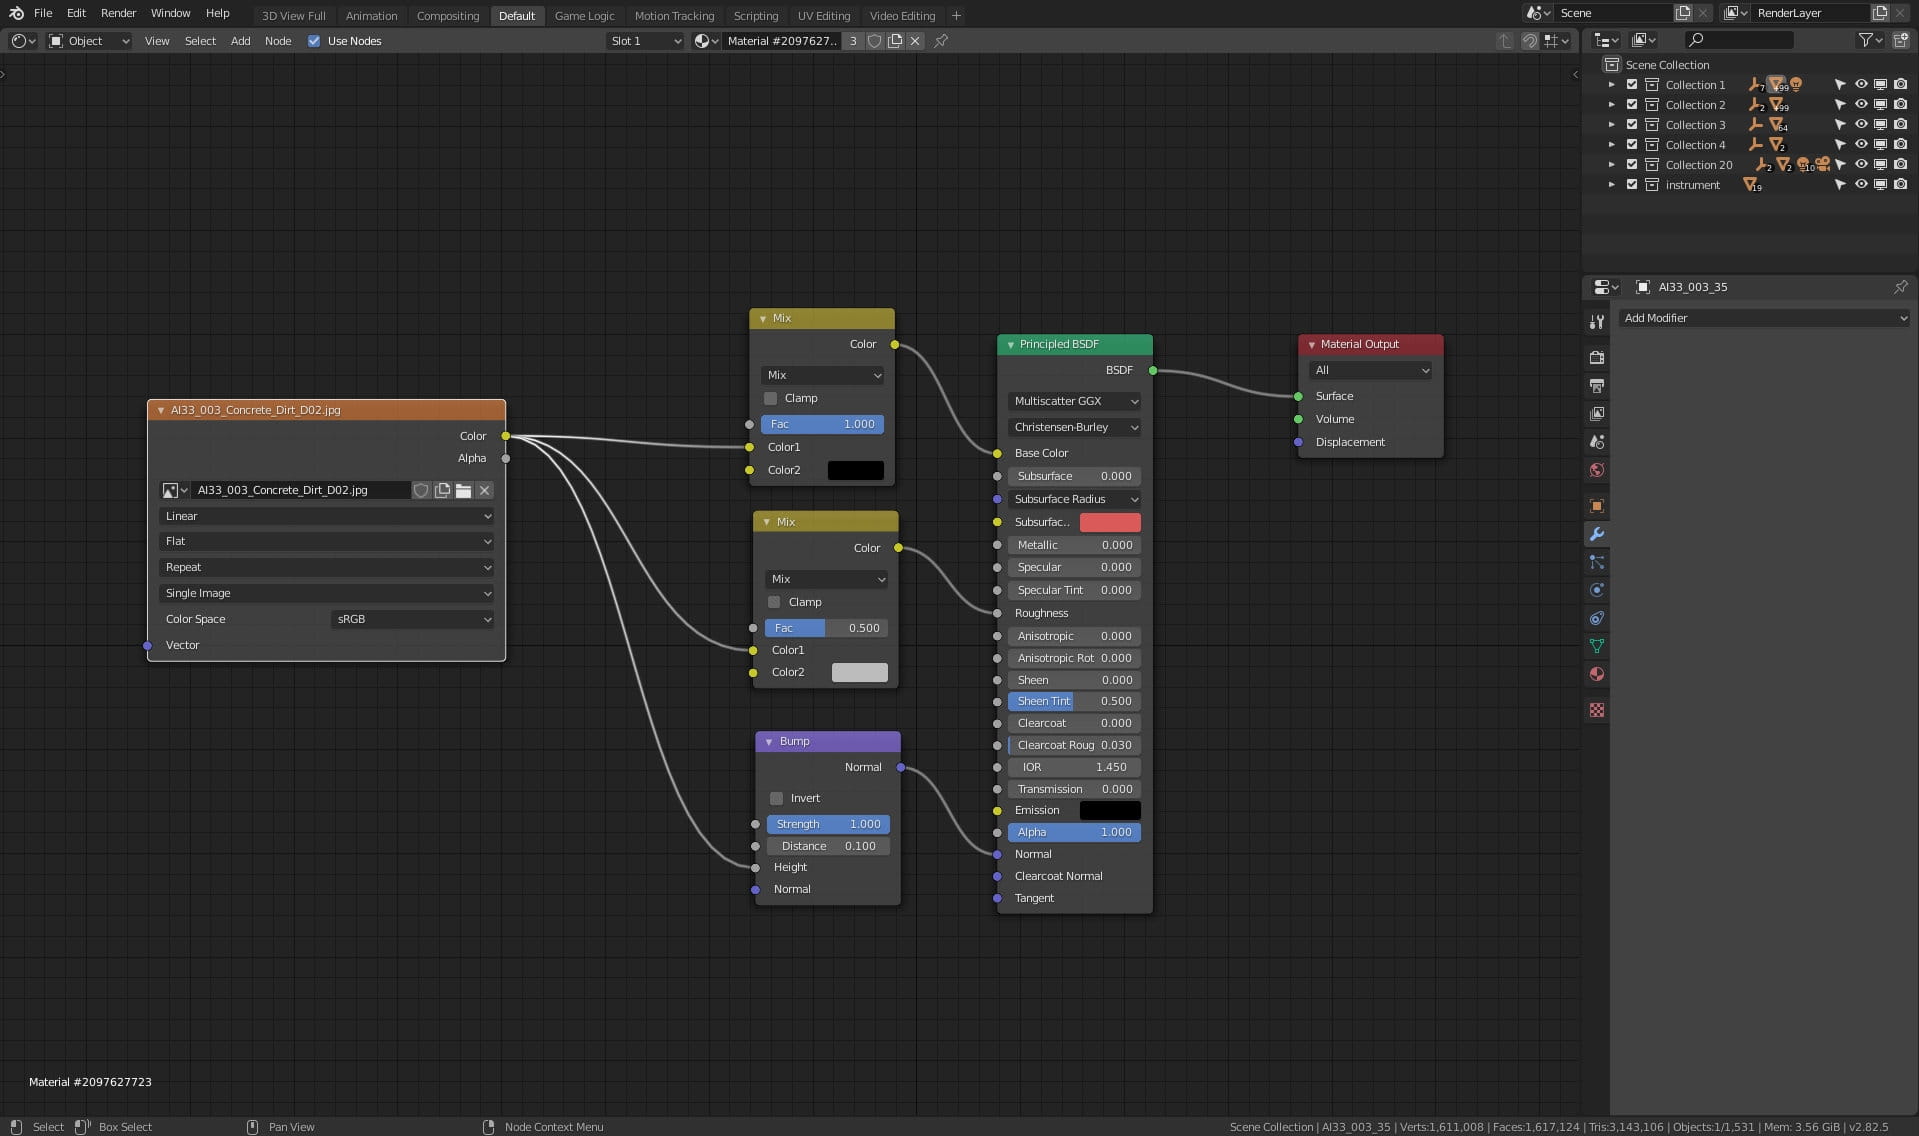
Elevation decoration material. Again - very simple, just textures in material slots. The simpler material, the quicker rendering.

Light portal is placed in the place of this large window hole. It does not generate the light on its own, but it speeds up the rendering.
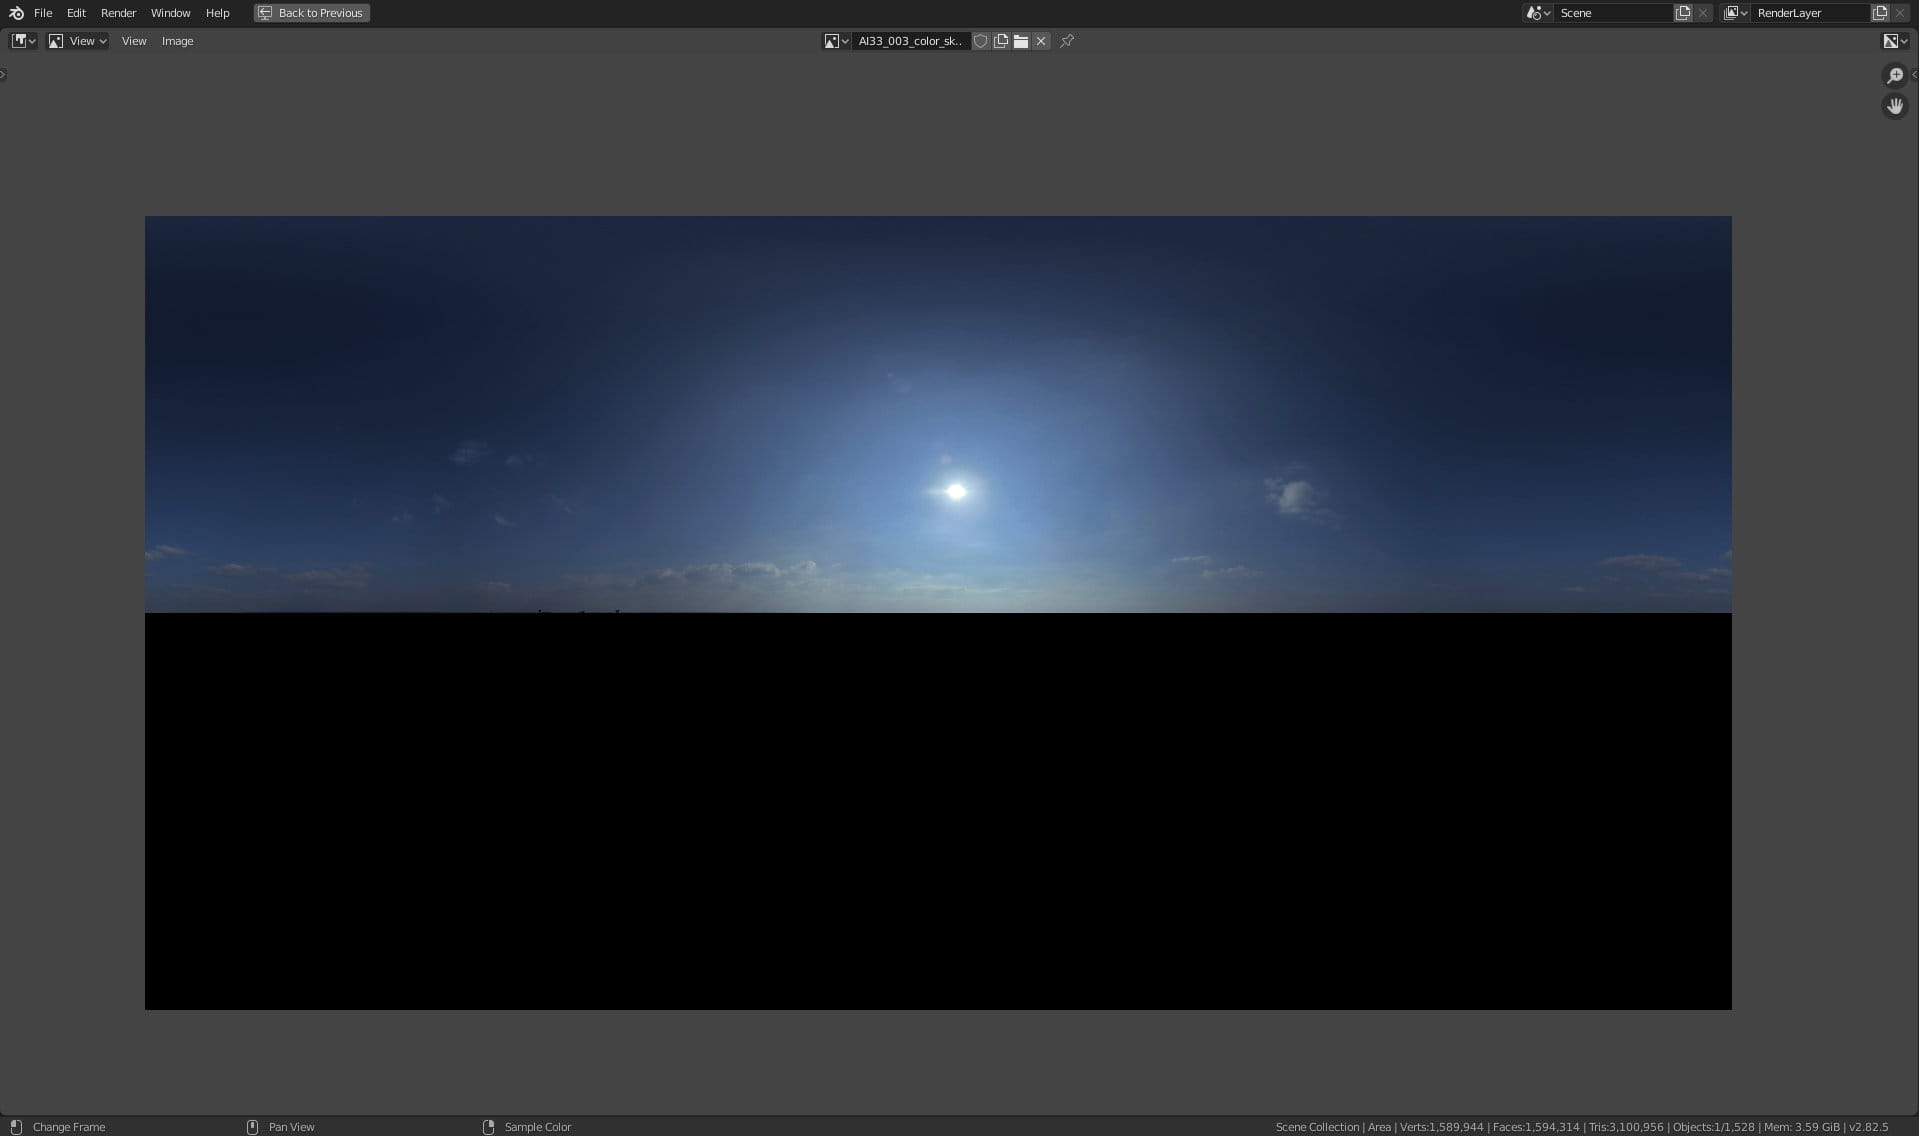
Environment map - our only source of light. It is placed in the World Background slot.
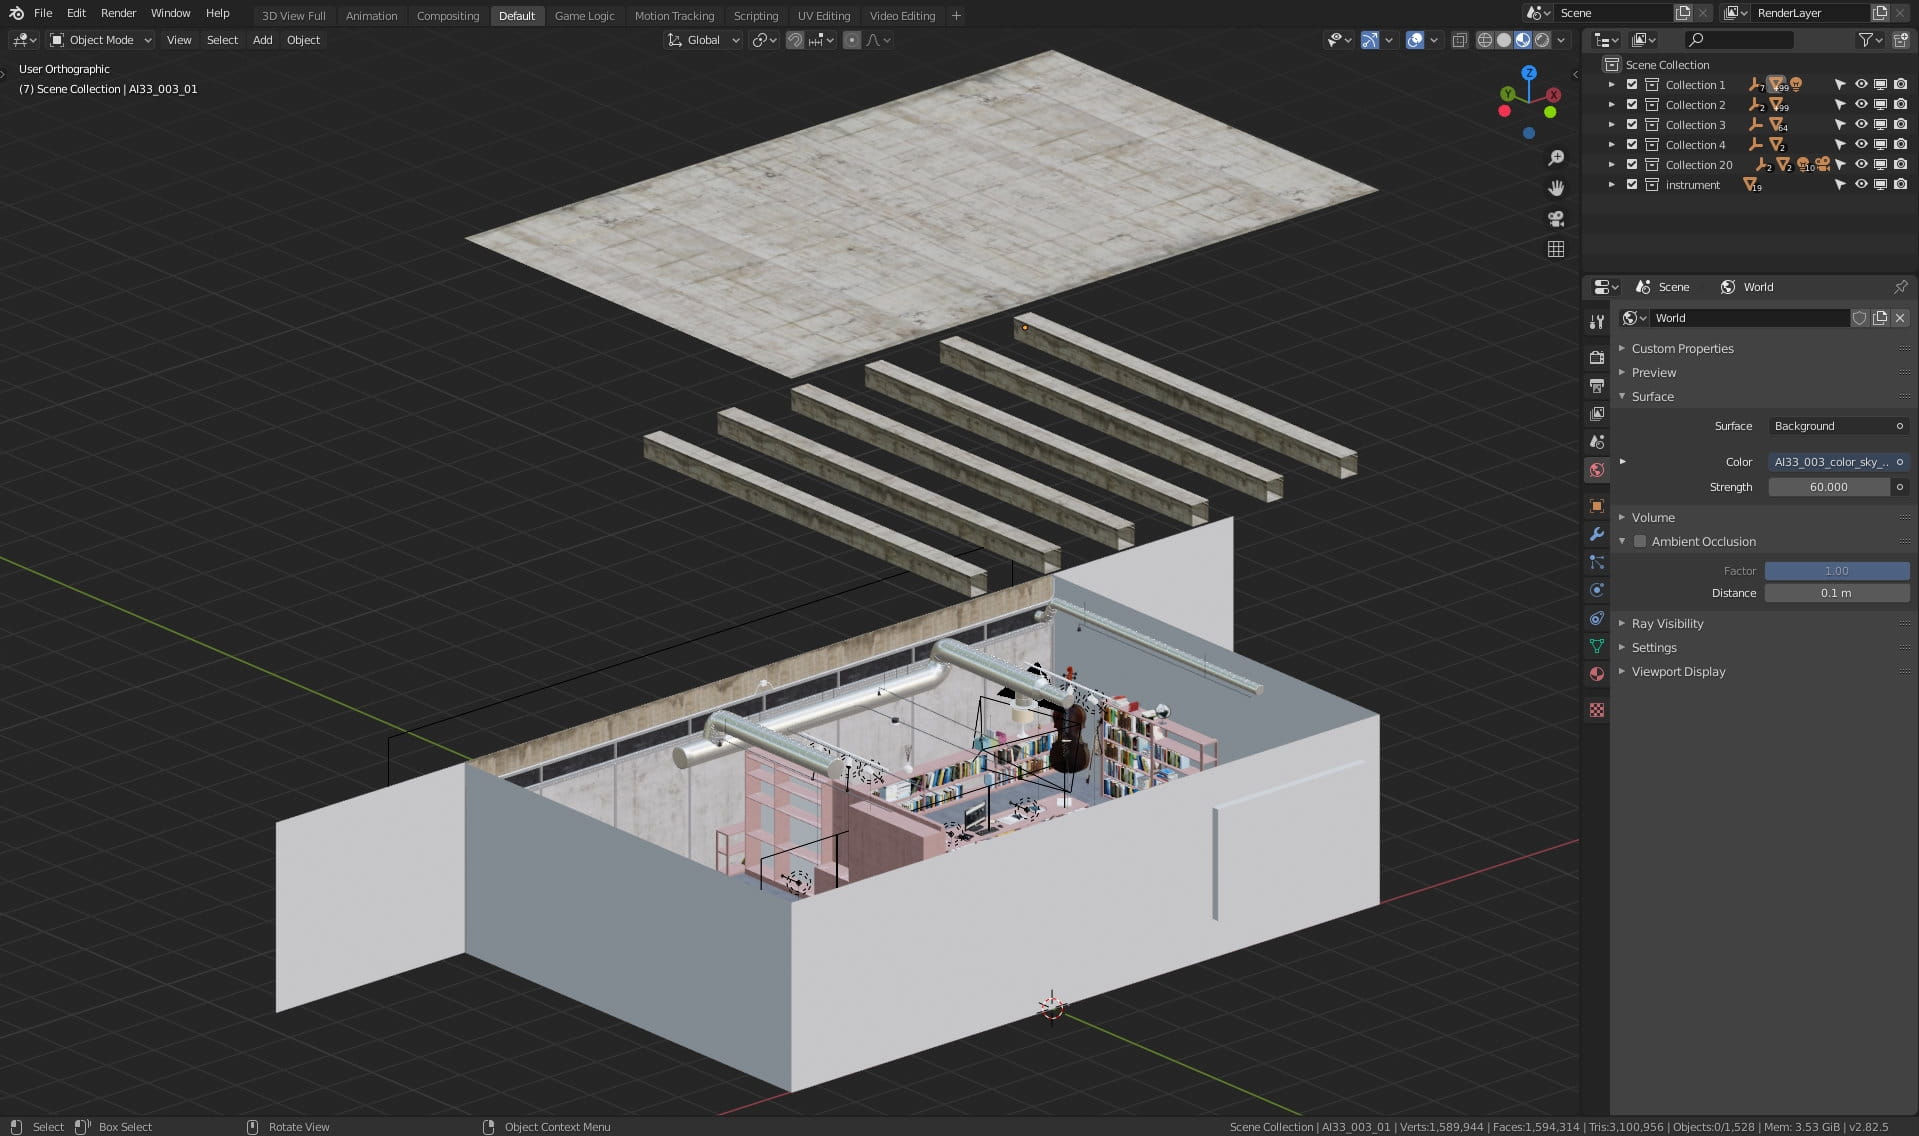
Building torn apart.
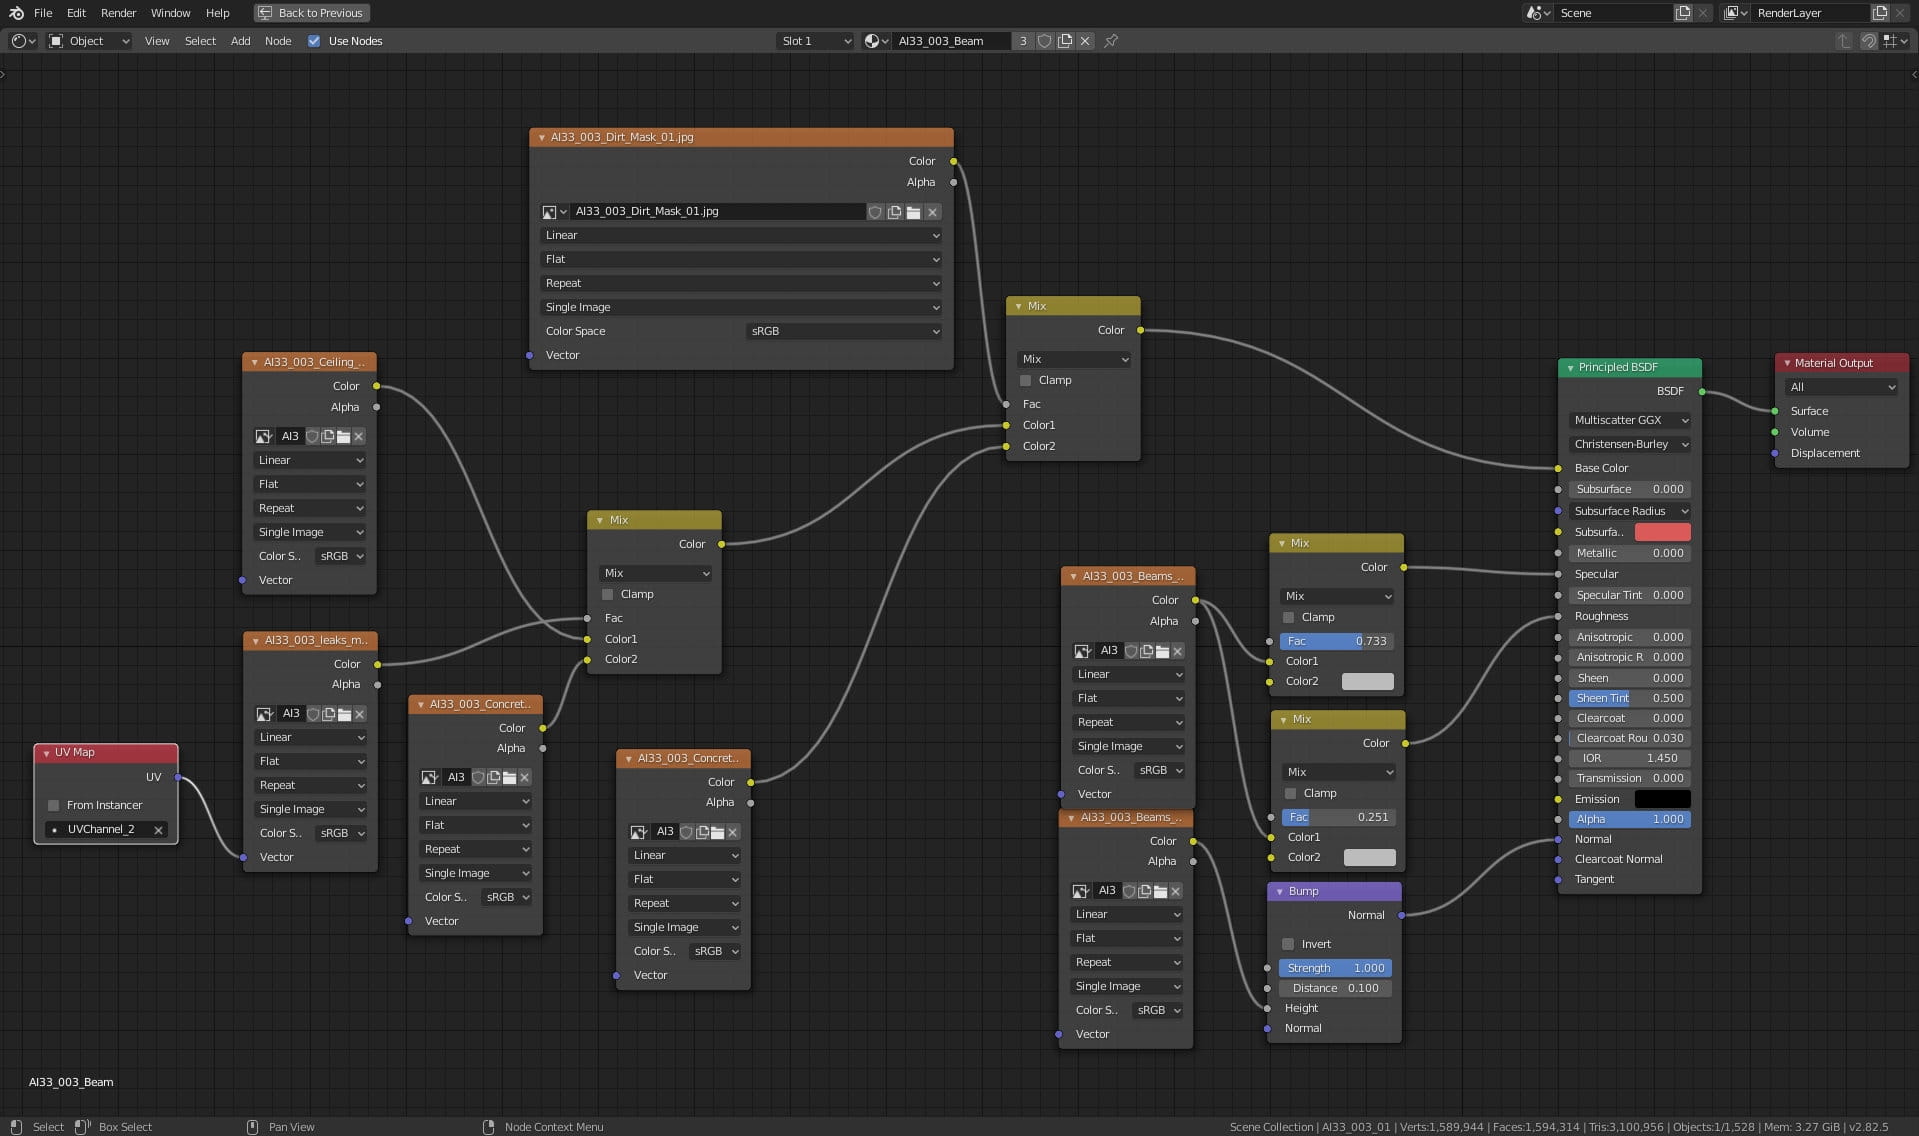
Concrete ribs material. This is a bit more complicated when it comes to Base Color slot - we mixed two different color maps using dirt mask map as a mix factor.
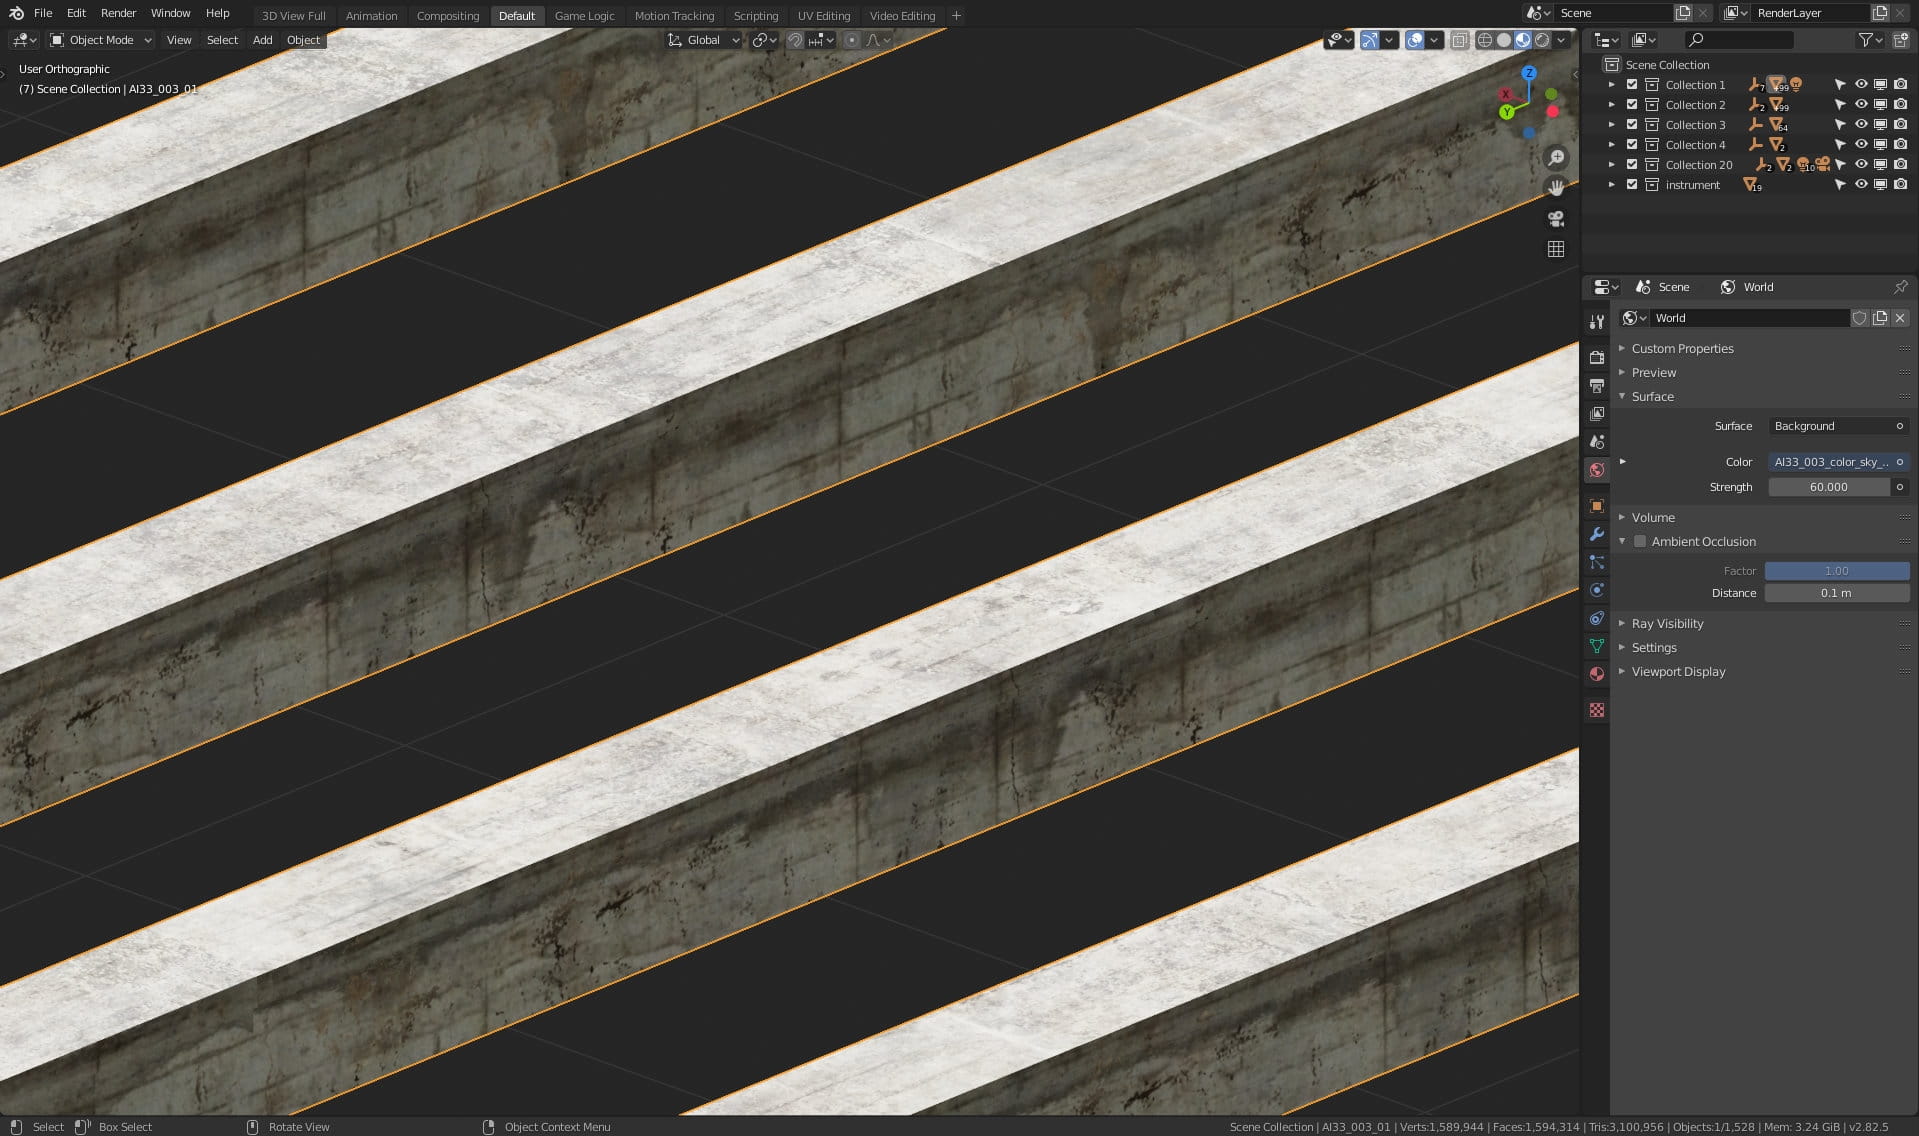
Concrete material - close up

Some props inside the office.
LCD screen

LCD screen from the side that is not visible to the camera - there is no backface, because it will never be seen from this side.
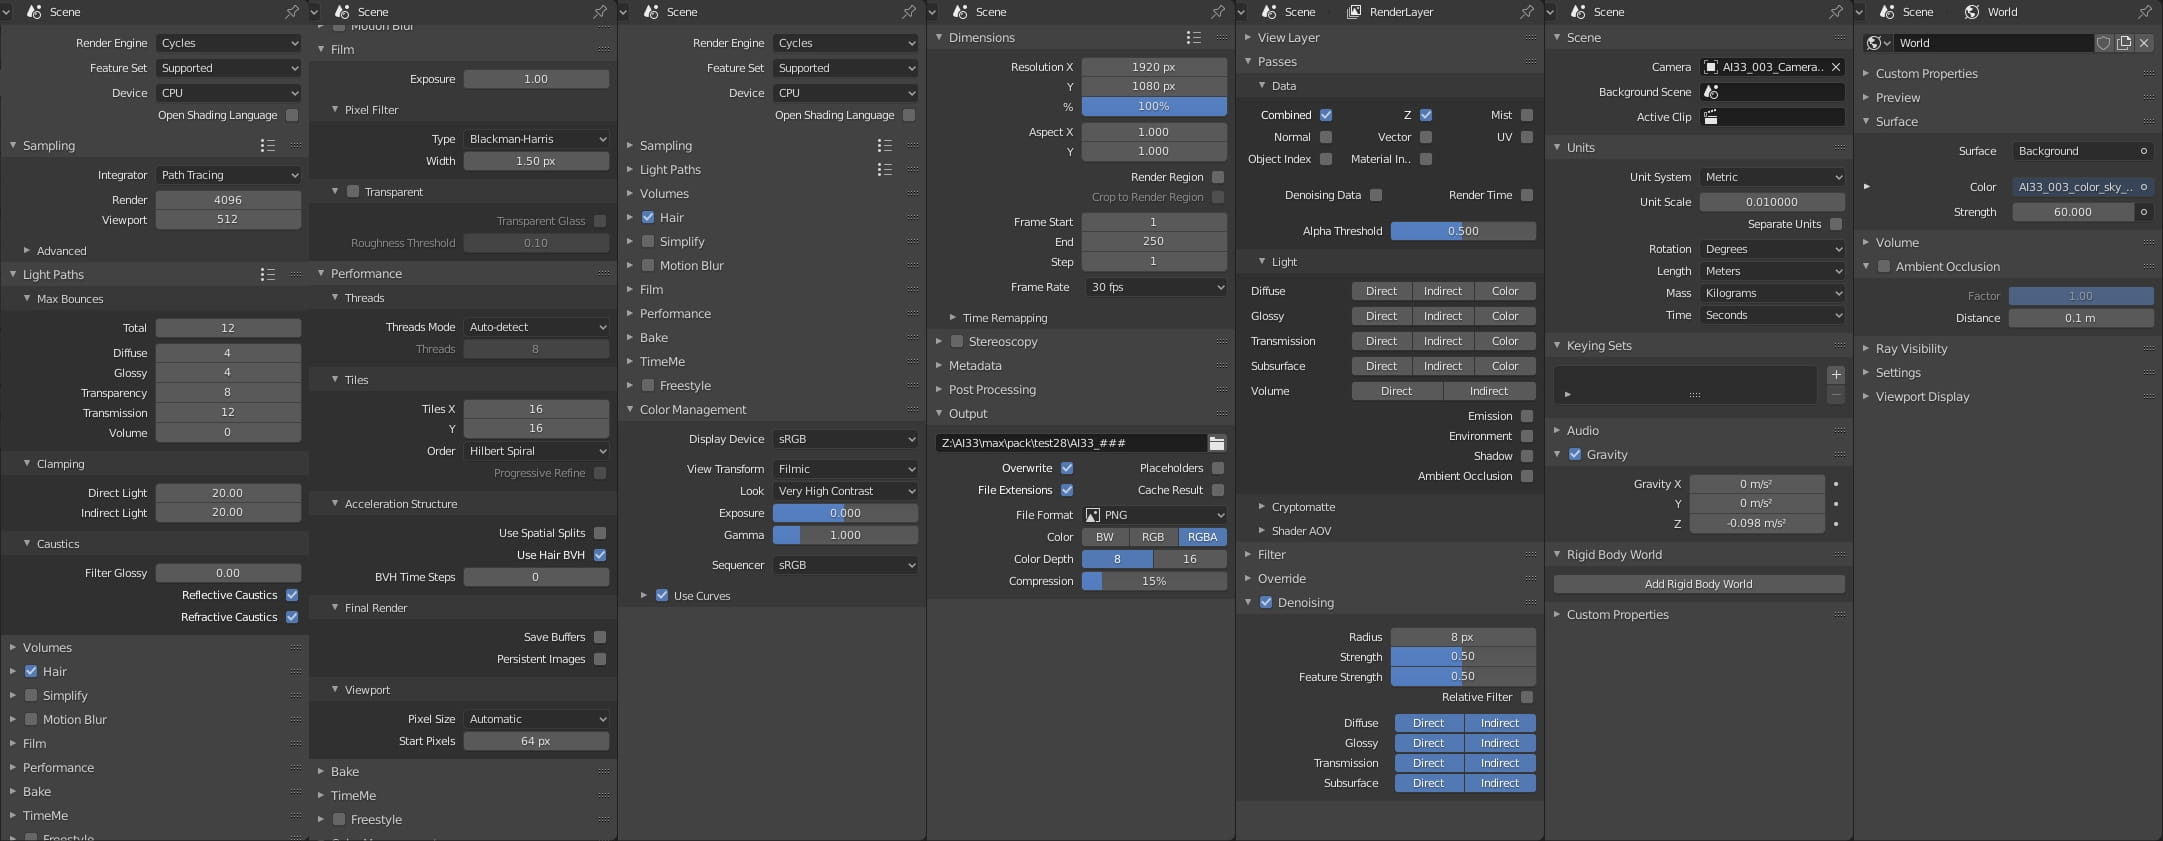
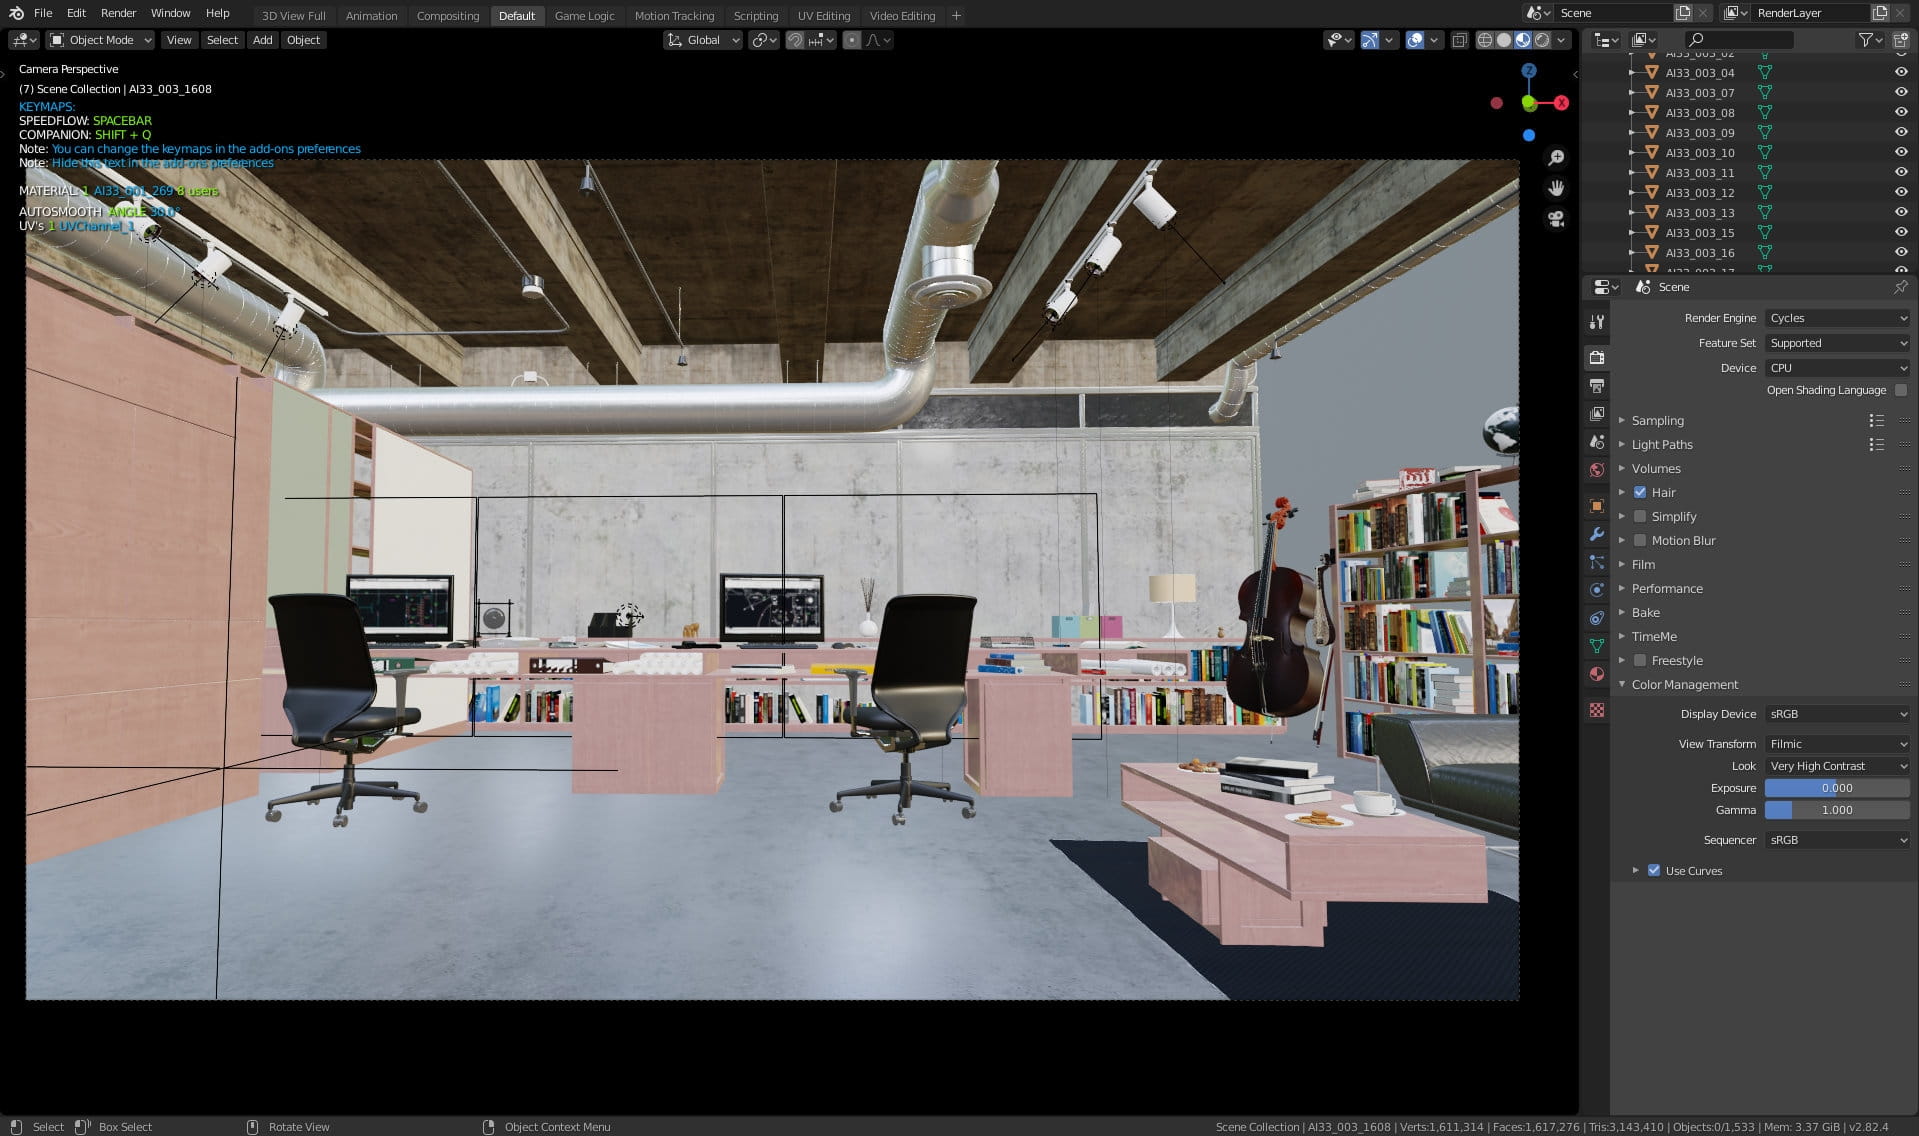
Render settings. We used Cycles render engine and CPU rendering, although this scene can be rendered on (powerful) GPU too. We used 4096 samples but with new Denoiser node you can use smaller value. If you want to use GPU for rendering, change tile value for something bigger (256 for example) to speed up the process. We used Filmic color space for the final output and Very High Contrast look. render is HD, we use built-in denoiser, but I would also to check out new Intel Open Image Denoiser that is built-in in Blender 2.81+ - it sometimes gives beter results and it is used as a post-process which is handy (you can turn it on / off after rendering is done).

Post-process settings. Just small corrections.
Final render again. Thanks for reading! :)


LEAVE A COMMENT


|

|

|

|

|


COMMENTS