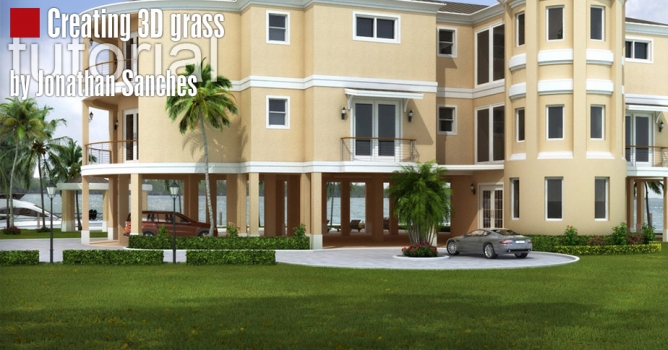
Artists have developed many methods to create grass such as post-photoshoping it into the image, using displacement maps to simulate grass strands, or actually modeling 3d grass. It seemed a couple of years ago that displacement mapping was the way to go, but with the recent leaps in processing technology, and the efficiency in high poly rendering of max and renderers such as V-ray, 3d vegetation, including grass, is becoming more and more the prime method for artists worldwide. There are many different ways to go about modeling the grass, and many different ways to go about spreading it. There are recent plug-ins that do the work for you such as "Autograss" by happy digital, ltd. However, as you will see in this tutorial, you might not need to shell out a couple hundred bucks for something you can do yourself once, and re-use on render after render. So I researched various methods taught online, and found an excellent grass tutorial by Peter Guthrie. His method involves creating 3d grass patches and spreading them out as proxies, a method that is creating great results for many.ÂIn this tutorial, we will expand on the method of distribution. Using Groundwiz (free plug-in) we will paint the grass patches (proxies) onto the ground. This tutorial is based on the V-ray renderer, but the concept can be used with any other renderer. The basic steps are as follows:
- Create Patch of grass
- Convert to V-ray Proxy
- Paint proxies onto ground plane
This method allows for viewports to display only v-ray proxies (very light on memory usage), and since you are painting the patches, you can paint more near the camera, and less as you get further into the view where less detail is necessary, allowing for more efficiency. The first part of this tutorial is basically identical to Peter’s and James, and the second half is where I expand a little on the Groundwiz plug-in. Hope you find it useful.
FIRST STEP: CREATE A GRASS STRAND CLUTTER
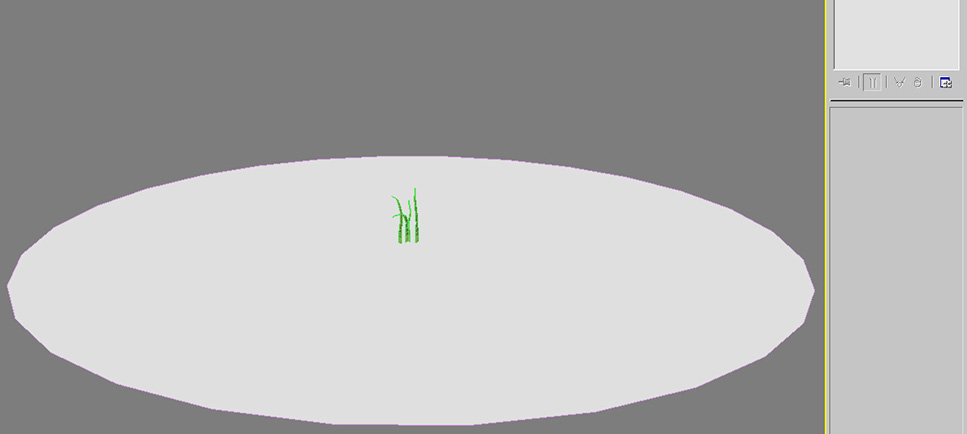
Okay, we will begin by modeling a cluster of 4 or 5 grass strands that we can later use to create a patch.Â
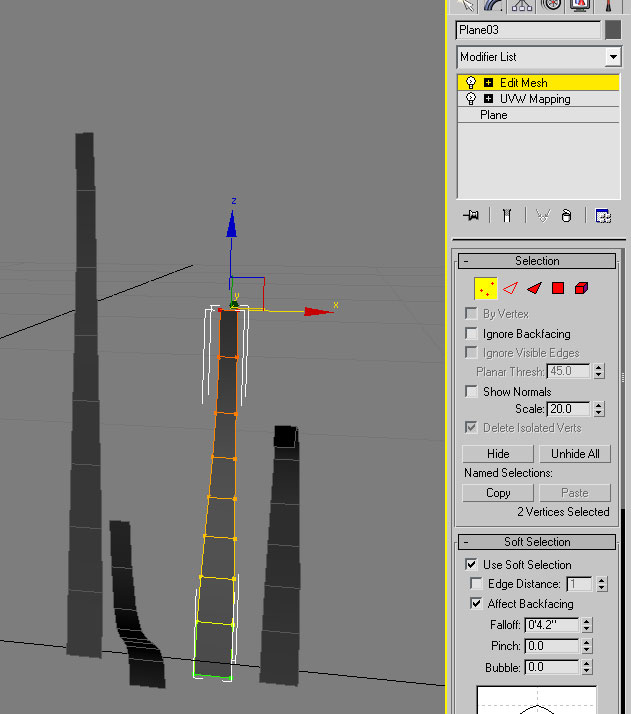
- Create a plane to represent an individual grass blade. I made mines about 4 (inches) high and about 1/4 wide. Give it multiple segments lengthwise so that you can shape it.
- Apply a UVW Map to it now before we shape it.
- Apply an edit mesh modifier
- Copy this blade over 3 or 4 times so that you can have different shapes of blades. Using soft selection, taper, stretch, and bend each blade as you like to represent the actual curvatures of real grass. Get as creative as you want here.
- Rotate each blade as you wish to create some variation
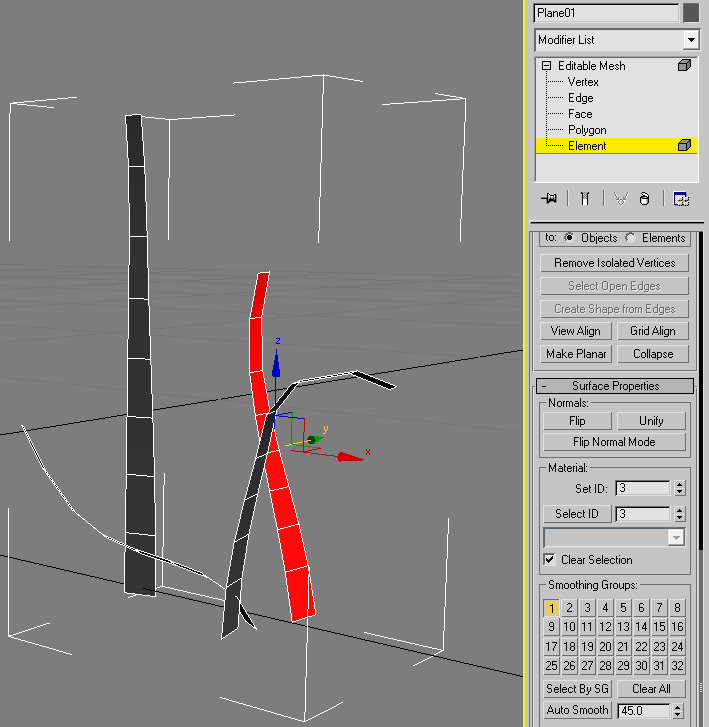
- Collapse the modifier stack and attach all the blades to form one object. Give each blade a different material ID from 1 through 4.
- Create a multi/sub-object material with 4 material slots (or 5 depending on how many blades you created). Make each material a vray2sided material. This will allow for nice translucency.
For the next step, you can create your own grass blade texture, or use this one which I created:
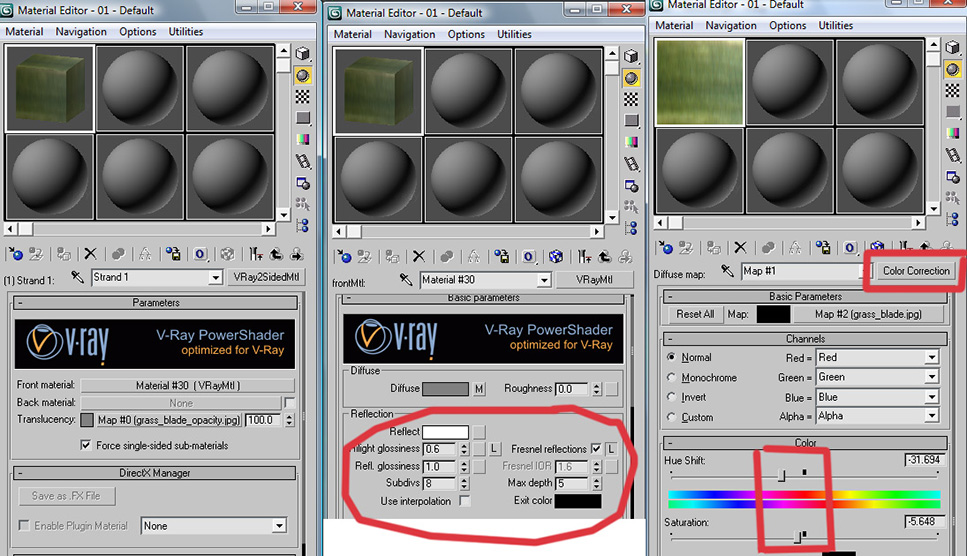
- Set the following material settings: reflect = white, fresnel checked, and highlight glossiness at .6 to create more efficient highlights.
- Create a "Color Correction" type on the diffuse box and apply the grass jpg to the map slot. This will allow you to add variation of tones to each blade.
- Play with the sliders as you like to create the hues you are looking for. Do this for each of the 4 material ids and apply this material to the cluster of grass we created.
- Optionally, set the opacity map on the translucency channel of the vray2sided material slot.
SECOND STEP: CREATE PATCH OF GRASS
- Begin by creating a circular patch of grass (circular will blend better then rectangular shape). Create a flat circular plane with about a 2 foot (~600 cm) radius. I just created a circle and extruded with 0 inches. Make sure your normals are pointing up. Should look something like this:
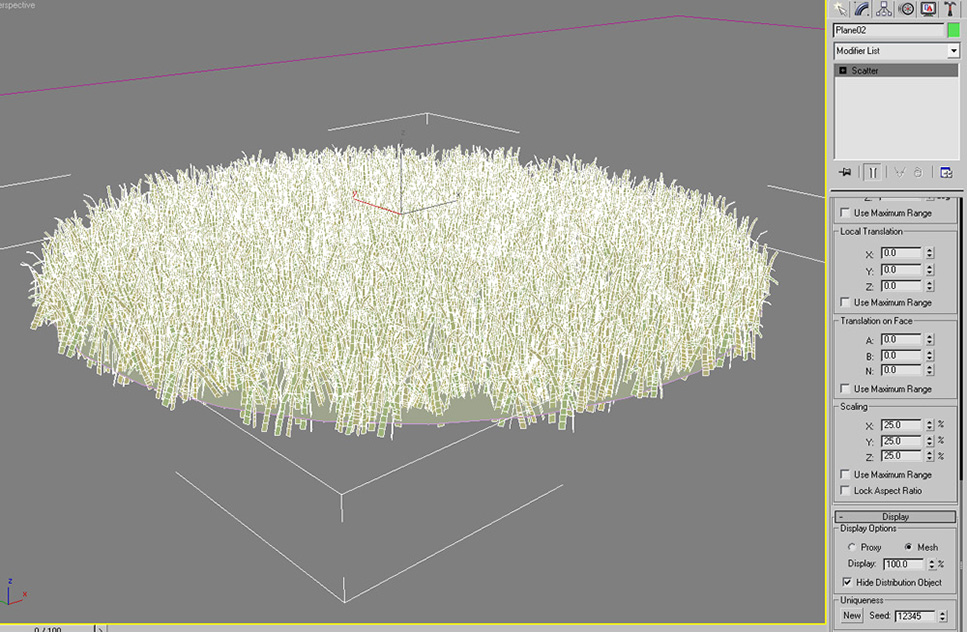
- Now select the grass clutter and under compound objects, apply a scatter modifier.
- Set the round plane as the distribution object.
- Set the following scatter settings: copies=2000, set distribution to area, uncheck perpendicular, hide the distribution object, set the rotation on your z-axis (or y-axis depending on your setup) to 360 degrees, set the scaling range to 25 percent across the board, and make sure your display is at mesh and at 100%.
THIRD STEP: CREATE A VRAY PROXY
Now we will convert this patch of grass we created to a v-ray proxy. We can forever use this proxy on all our drawings. If you are not familiar with v-ray proxies, you can find more information here.
- Start by deleting the circular plane, this was only to create the distribution area.
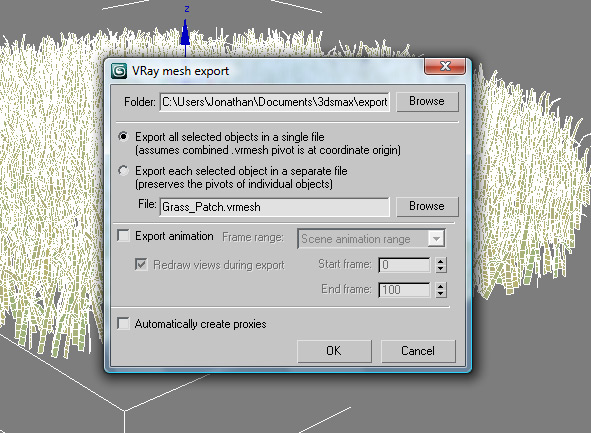
- Right click on the grass patch and select "V-ray Mesh Export". The Mesh Export dialogue will come up. Select a folder to save this proxy in. Remember you can to re-use this proxy on all your future drawings so you might want to make it an accessible folder. Select "Export all selected objects in a single file"Â Assign a name to this proxy and hit OK. Now you have your grass patch proxy saved.
- Make sure you save the material you created into the library for future use.
FOURTH STEP: SCATTER THE VRAY PROXY BY PAINTING
Alright so now we will expand further on the technique of spreading the grass patch by painting the proxies. For this we will use a very nice piece of software called GroundWiz by Gugila. You can download a free version of this software here. Although GroundWiz has many more uses then the one we are giving it, it serves our purpose nicely and it's very simple to use.
-
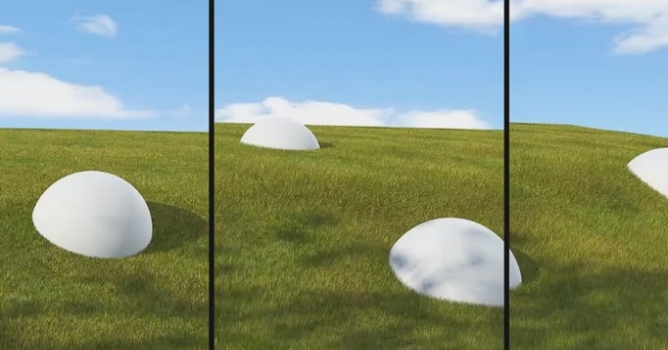
- Begin by inserting the proxy you created into the drawing. Do this by selecting "v-ray Proxy" under the "V-ray" category of geometry. Click anywhere in the 3d space and when it asks you, select the proxy you created. Set the display to bounding box, and you will see that the patch will display as a simple rectangular box (taking up less memory). However when rendered, it will render as the grass patch.
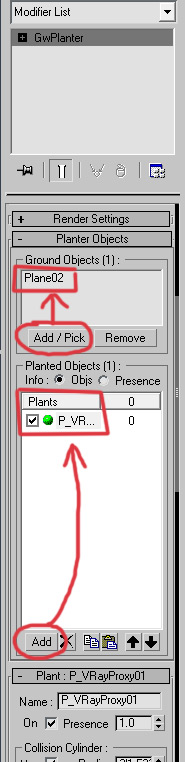
- Now go to the "GroundWiz" category of geometry and select "GW Planter". Create a planter anywhere on your drawings.
- Set the distribution settings as follows: First pick your ground plane to be the ground object, and the proxy (grass patch) to be the planted object.
-
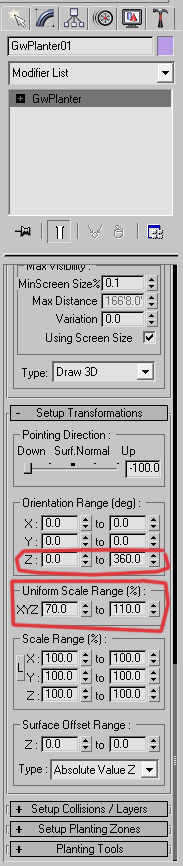
- Set the "Uniform Scale Range%" from 70% to 110%. This will fluctuate the size of the grass to create variety. Make sure the "Orientation Range (deg)" Z-axis is set from 0 to 360. This will create random rotation of the grass.
- Now we are ready to plant:
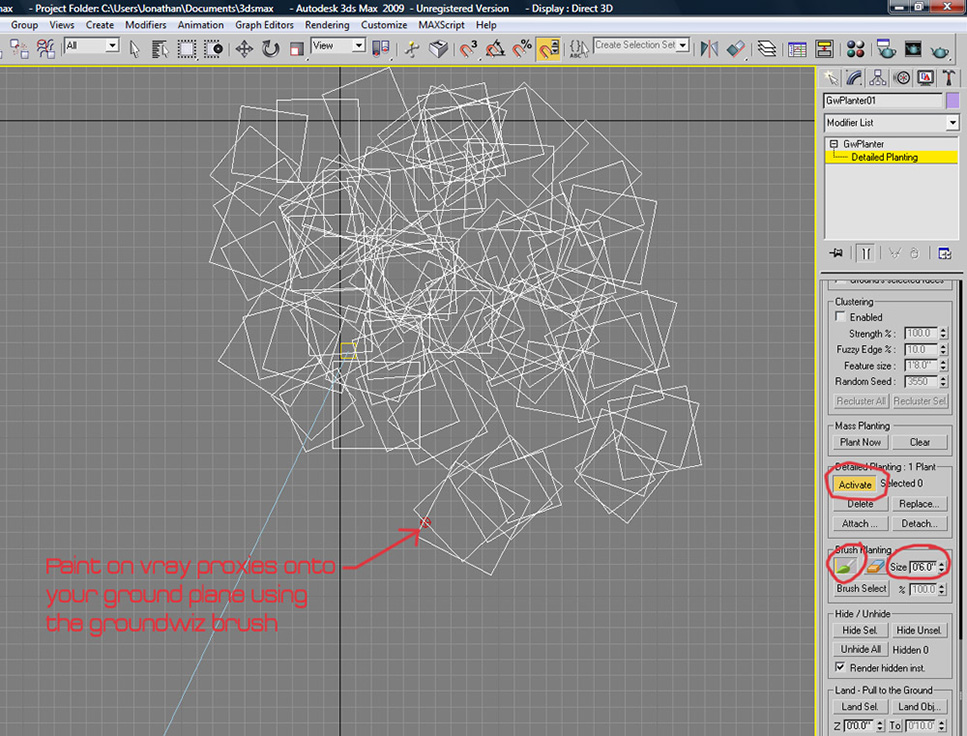
- Go down to the "Planting Tools" section and expand it.
- Select "activate" under "Detailed Planting". Set brush size to around 6'³ (the bigger the brush, the more proxies it will spread).
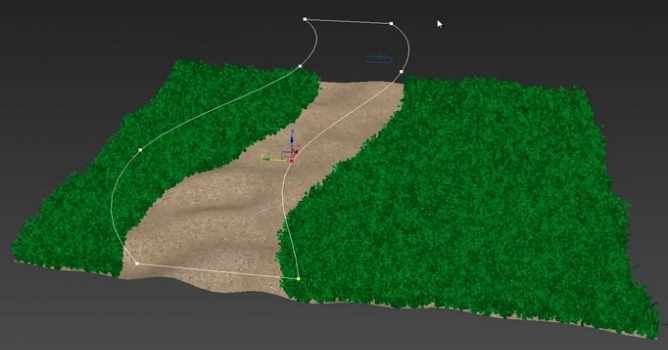
- Start painting proxies onto your ground object. Paint more near the camera where you need more detail, and less as you get further. Also, stay within the camera's field of vision; there is no need to paint outside of it and use up resources.
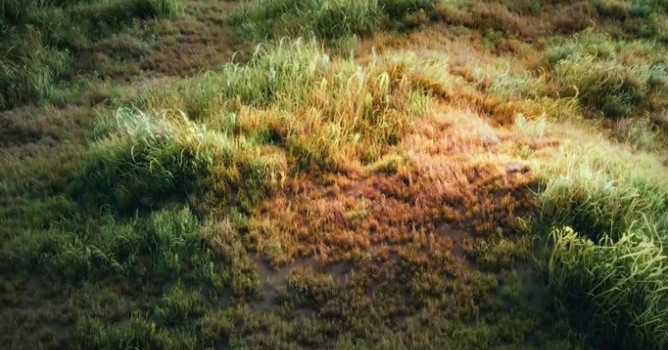
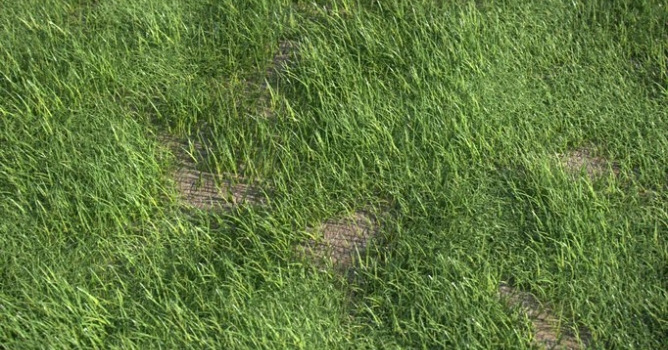
Once done, keep "Detailed Planting" on to allow you to edit your created proxies;you can erase the ones you don't need and/or move them if need be. Render. You should have something like this:

If you have bald spots, go back and paint proxies in. Also, make sure to give your ground plane some sort of grass texture so that any areas of it visible through the grass can blend in. As you can see, the grass spreads out very nicely and seamlessly. To create a more realistic carpet of grass, you might want to create different patches, some with longer strands and others with shorter strands maybe even flat-looking. You can use this same technique to scatter falling leaves from nearby plants. You can scatter flowers bending in the wind. You can get as creative as you like. Observe real-world grass and you'll notice that there is great variety of grass styles and shapes. Good thing about this technique is that once you create a patch, you can reuse it however many times you like.
Jonathan Sanchez
CGSketch.com/blog


 Customer zone
 Your orders
 Edit account
 Add project
 Liked projects
 View your artist profile
COMMENTS