Chaos Corona 12 Released
What new features landed in Corona 12?


Total: € 0
Continue Shopping
In accordance with the art. 13 section 1 and 2 of the European Parliament and Council Regulation 2016/679 of the 27th April, 2016 on the protection of natural persons, with regard to the processing of personal data and on the free movement of such data, and repealing Directive 95/46/EC (General Data Protection Regulation), hereafter RODO, I hereby inform that:
1. EVERMOTION S.C., 8 Przędzalniana Str., 15-688 Białystok, Poland is the Administrator of your Personal Data (APD)
2. Data Protection Inspector can be reached through e-mail: iod@evermotion.org
3. Your personal data are to be processed on the basis of art. 6 section 1 letter a, b and f of RODO in order to:
a) prepare, conclude and execute the agreement and for other purposes approved by you,
b) to execute the legitimate interest like marketing of products and the agreement, claim assertion or defence against claims resulting from the law regulations.
4. Entities entitled to the reception of your personal data may be the authorised public bodies; mail providers; providers of the services covered by the agreement; responsible for debt recovery, keeping the archives, document utilization, legal consulting, technical services, IT services and accountancy.
5. Your personal data shall not be transferred to the third country, nor to the international bodies.
6. Your personal data shall be processed within the period of the agreement and upon your additional consent until you withdraw it. APD shall keep the data for the period of any civil law claim execution connected with the agreement.
7. You have the right to demand an access to your personal data, to correct or to delete the data if there is no other basis for the processing or any other purpose of such processing or to limit the processing of the data, to transfer the data to another administrator and to raise objections to the further data processing if there is no legal basis for further processing and to withdraw any previous consent.
8. You provide the personal data voluntarily, however they are necessary to conclude the agreement. The refusal of providing such data may result in the refusal of the agreement conclusion.
9. You have the right to lodge a complaint to the Personal Data Protection Office when in your opinion the data processing violates the regulations of General Data Protection Regulation of the 27 April, 2016 (RODO).
10. Your data will be automatically processed, including the form of profiling.
11. You are obligated to forward above mentioned information to your representative, especially if you appointed this person in the agreement as the contact person or as the representative for the agreement execution.


Have you ever dreamt about making LEGO animation? You probably seen many stop-motion LEGO shorts, made with traditional camera and some stop motion software (like for example Dragonframe). But as we are on CG site, we could use our daily tools for that and create some animated short using PC. Of course, animations made with offline path-tracing renderers (like V-Ray, Corona, Octane) are very time-consuming and almost impossible to master without great processing power that comes with render farms (and a lot of money!). Luckily for us, there are game engines that provide realtime rendering and they are better with each version.
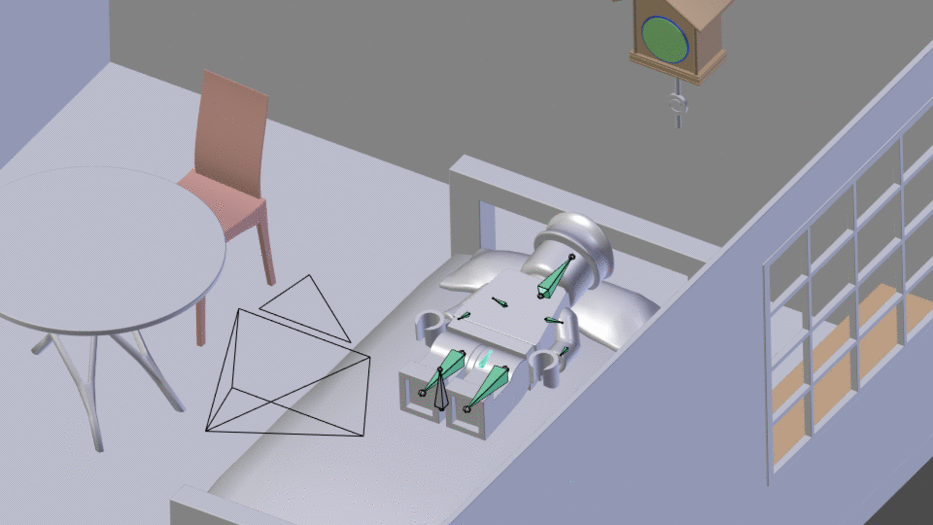
In this tutorial I want to show you how to export rigged animations from Blender to Unreal. As an example I will use simple LEGO figure in cardboard room that I created earlier.
I don’t want to go through all the process of creating the scene below. It wasn’t that complicated after all. I created LEGO figure using LEGO Digital Designer software (free to download) and then exported my model to LeoCAD and re-exported as OBJ file to Blender. I heard that you can also use nice web application - MecaBricks for these steps.
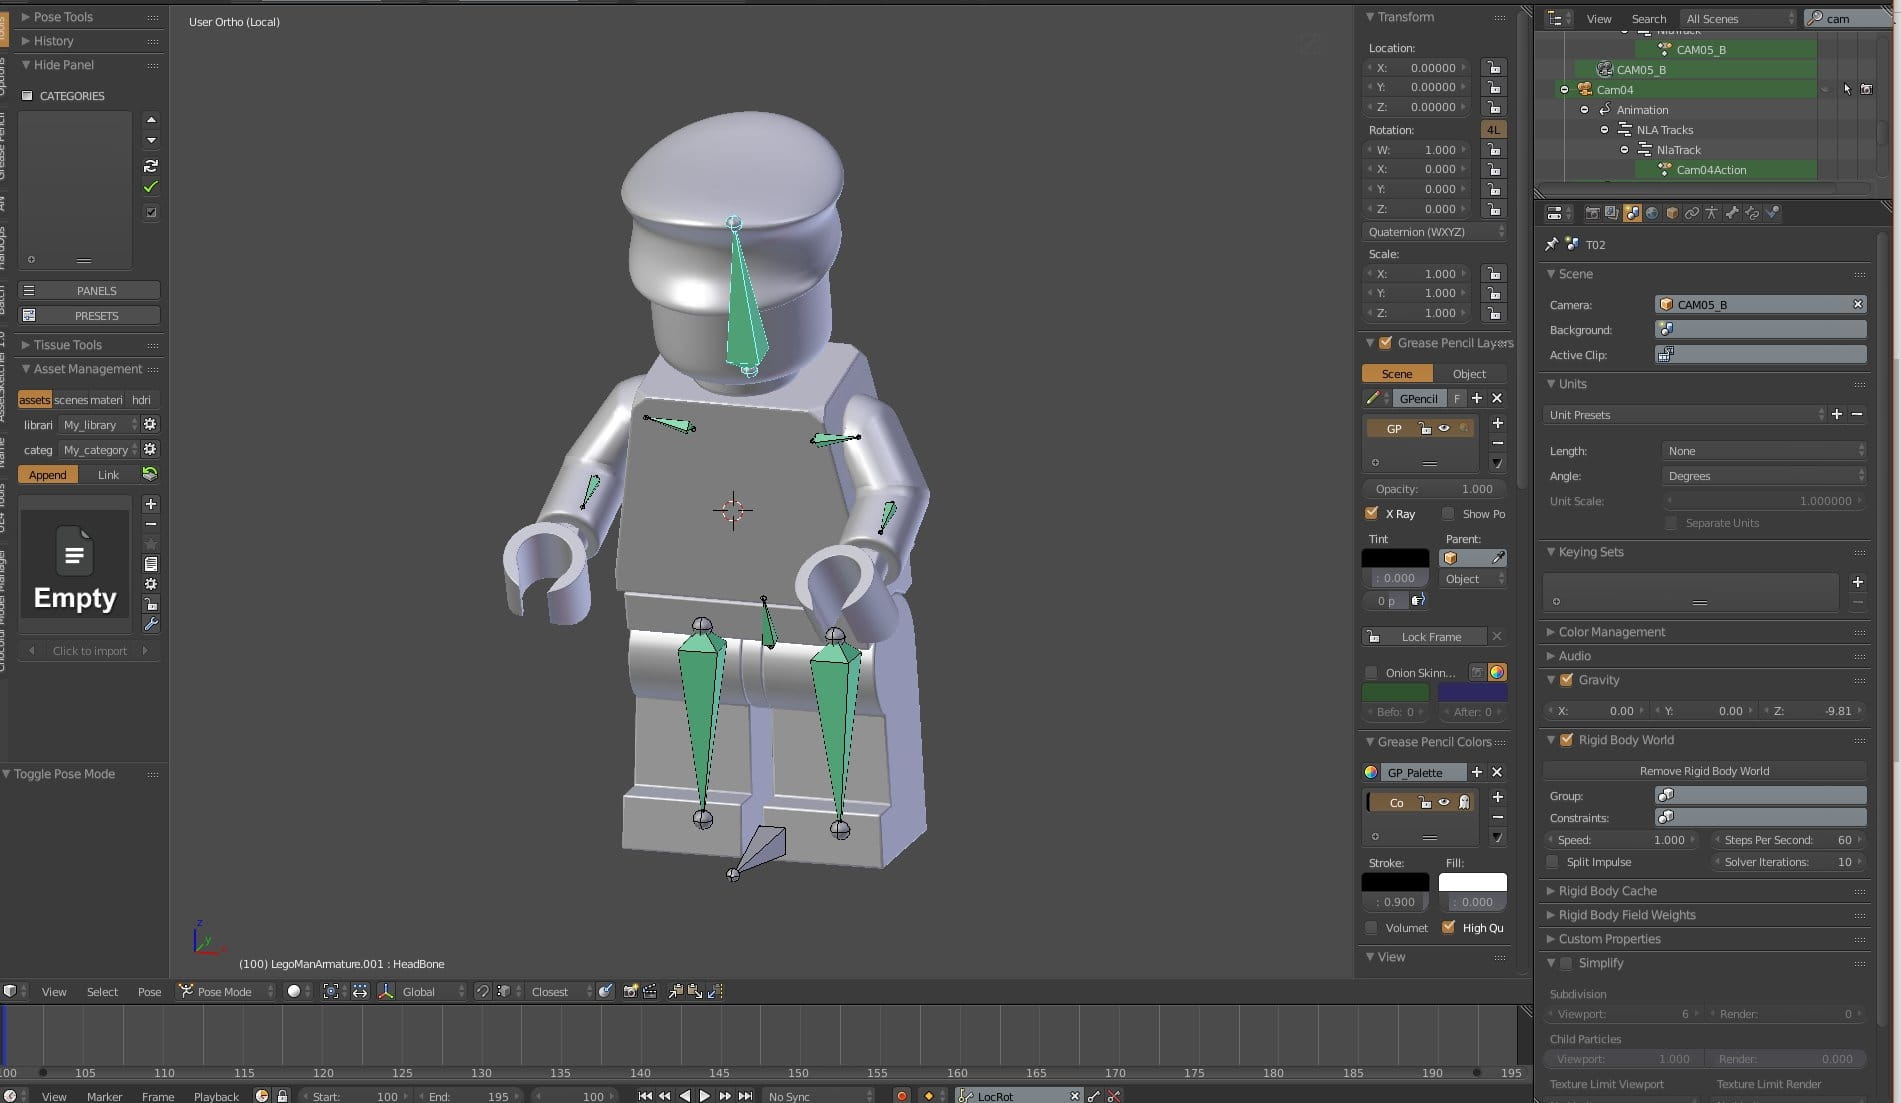
I had to retopologize imported model a bit and unwrap it, because I wanted to texture it in Substance Painter. I also rigged it in Blender.
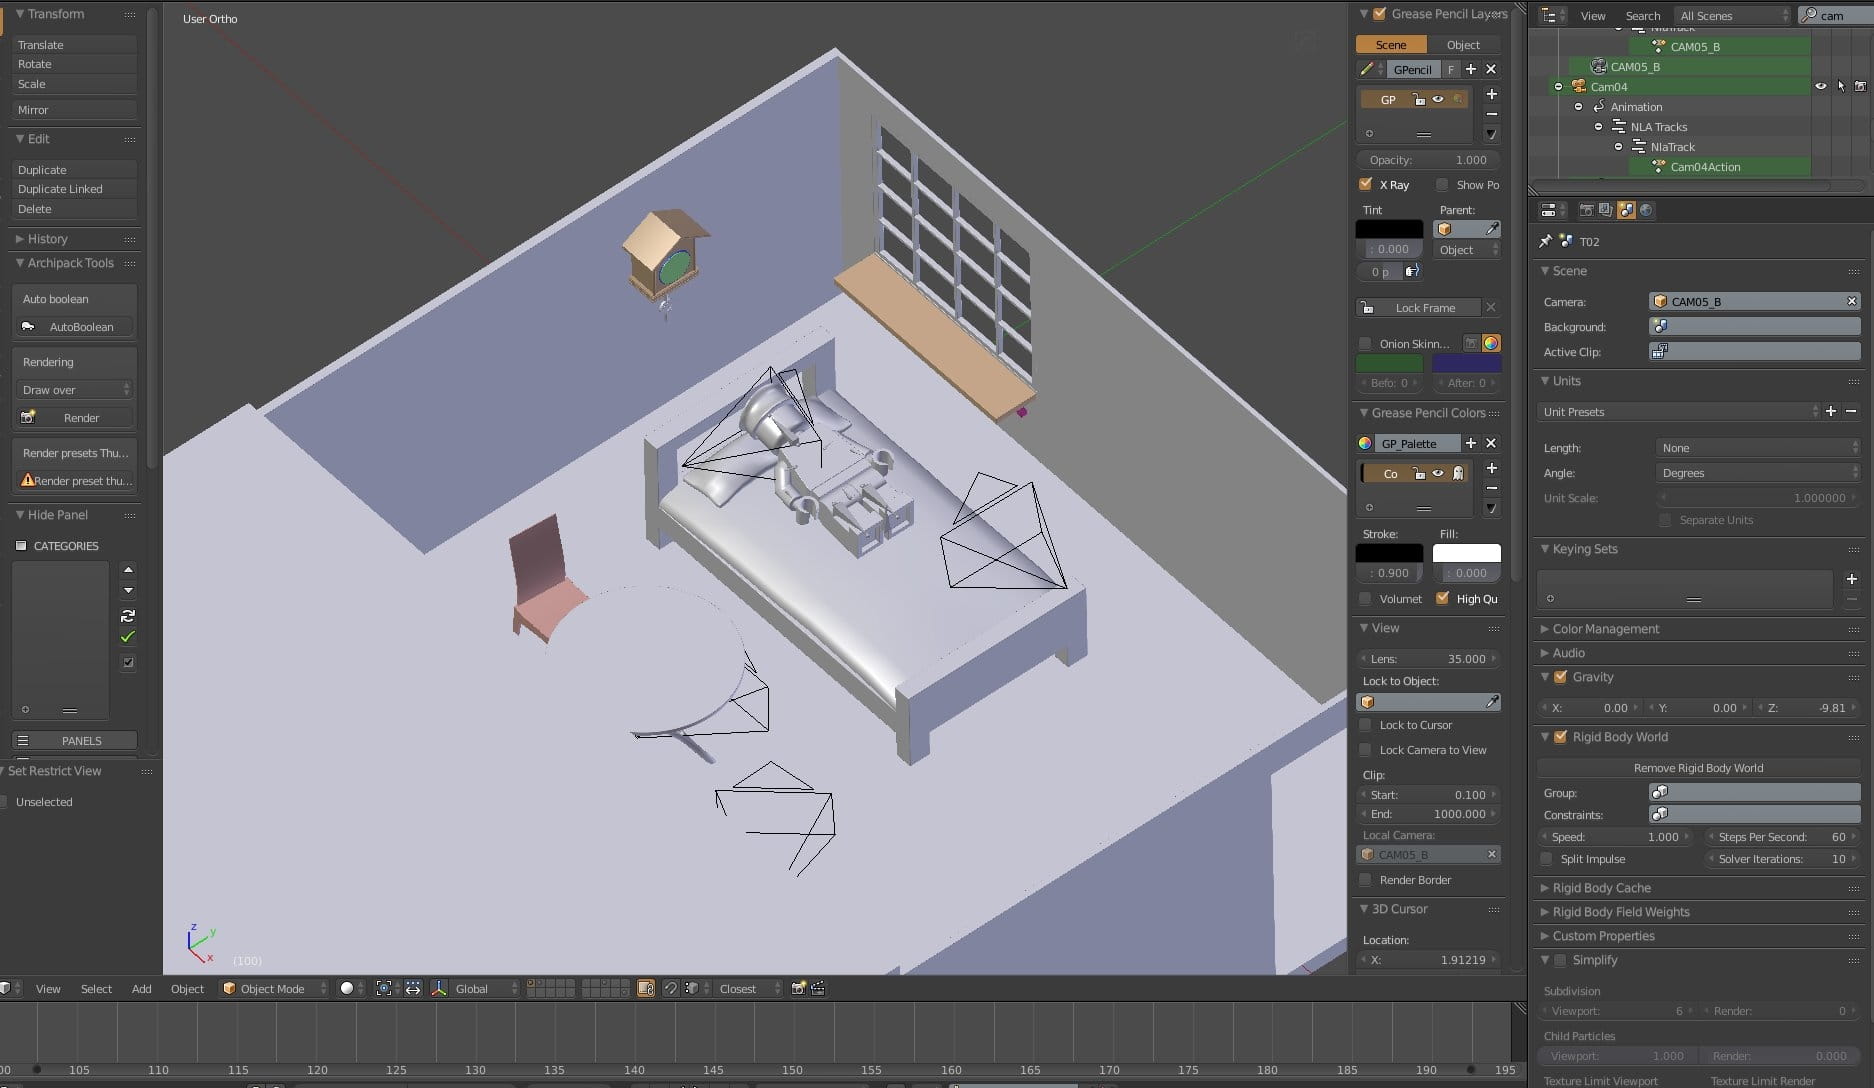
Rest of static meshes were made in Blender also, then I unwrapped them and imported to Unreal.

Unreal: I decided to go "cardboard" style. It is not finished animation yet, the most of objects are shaded with standard Cardboard Material from Substance Source. I only added Texture Coordinate Node and multiplier to control tiling of the material inside Unreal Engine. But this tip is not about texturing, but animation, so I will not explore this topic further. If you want to know some rules when texturing with Substance Painter for Unreal, read "Get maximum details from your textures" tutorial.
Exporting rigged object to Unreal
First, select your animation range, animate your object by rotating / moving bones and set keyframes in Pose Mode. Make sure that your object is properly unwrapped, has good smoothing and you assigned materials to it and named them properly.
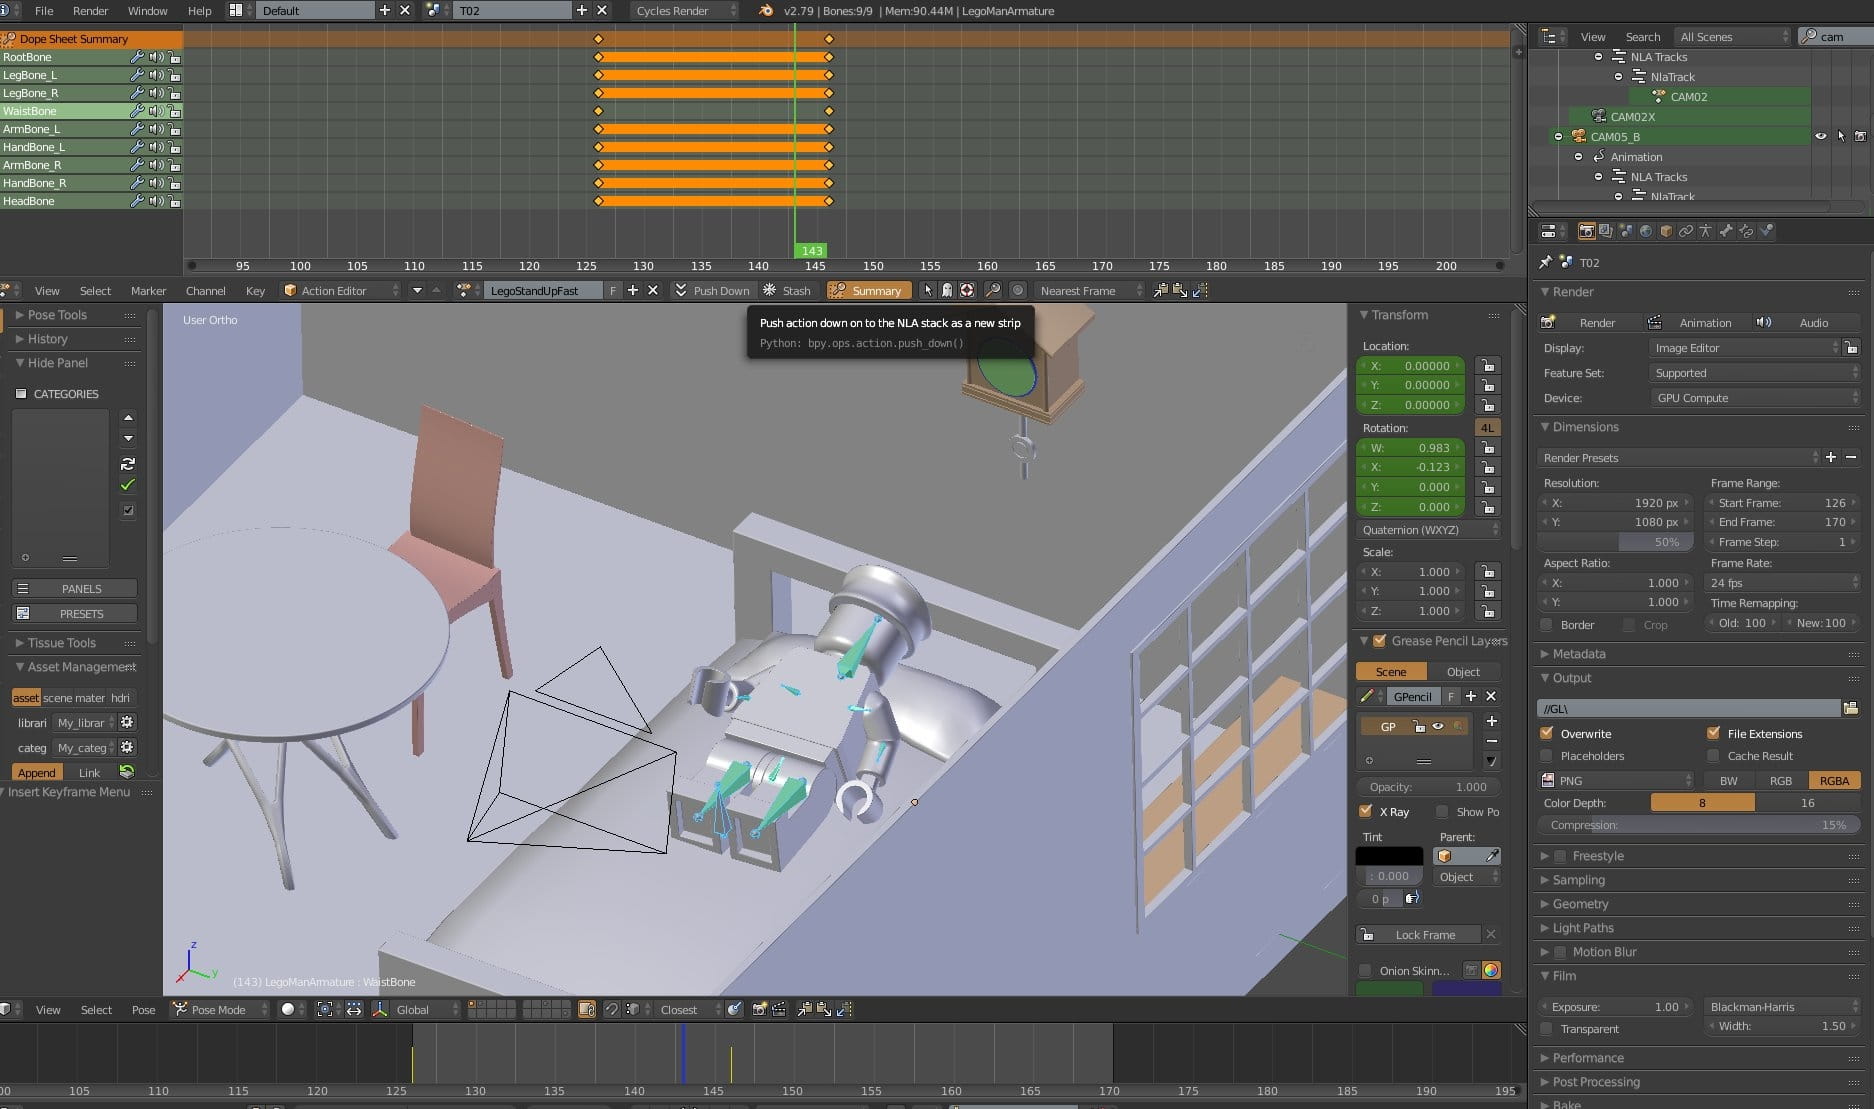
Name your animation and push it to stack.
If you used auto keying, disable it, because you don’t want to accidentally mess with your object.
Make sure that your model and your rig have 0,0,0 as location and rotation and they are in scale of 1. Do it in Object Mode. Go to the first frame of your animation – this pose will be used by Unreal when importing your mesh.

Now you can begin your export – select your object (in our case there are many objects that are connected with rig) and all your rig. It’s very important that you don’t miss any element, or you will have „Merge failed!” error in Unreal. Export to FBX.

Now, with the mesh and rig still selected, export it again, but deselect „Mesh” (SHIFT-click on "Mesh" button) in Main tab from FBX Export Panel in Blender. Name the file „LegoMan animation”.
The reason that we want to export animations separately is that Unreal sometimes messes with animation scale when it imports mesh, skeleton and animation in one run. So it is better to keep it separated. It is also more convenient on later stages, when you will able to import only new animations, not the mesh itself.
Exporting camera
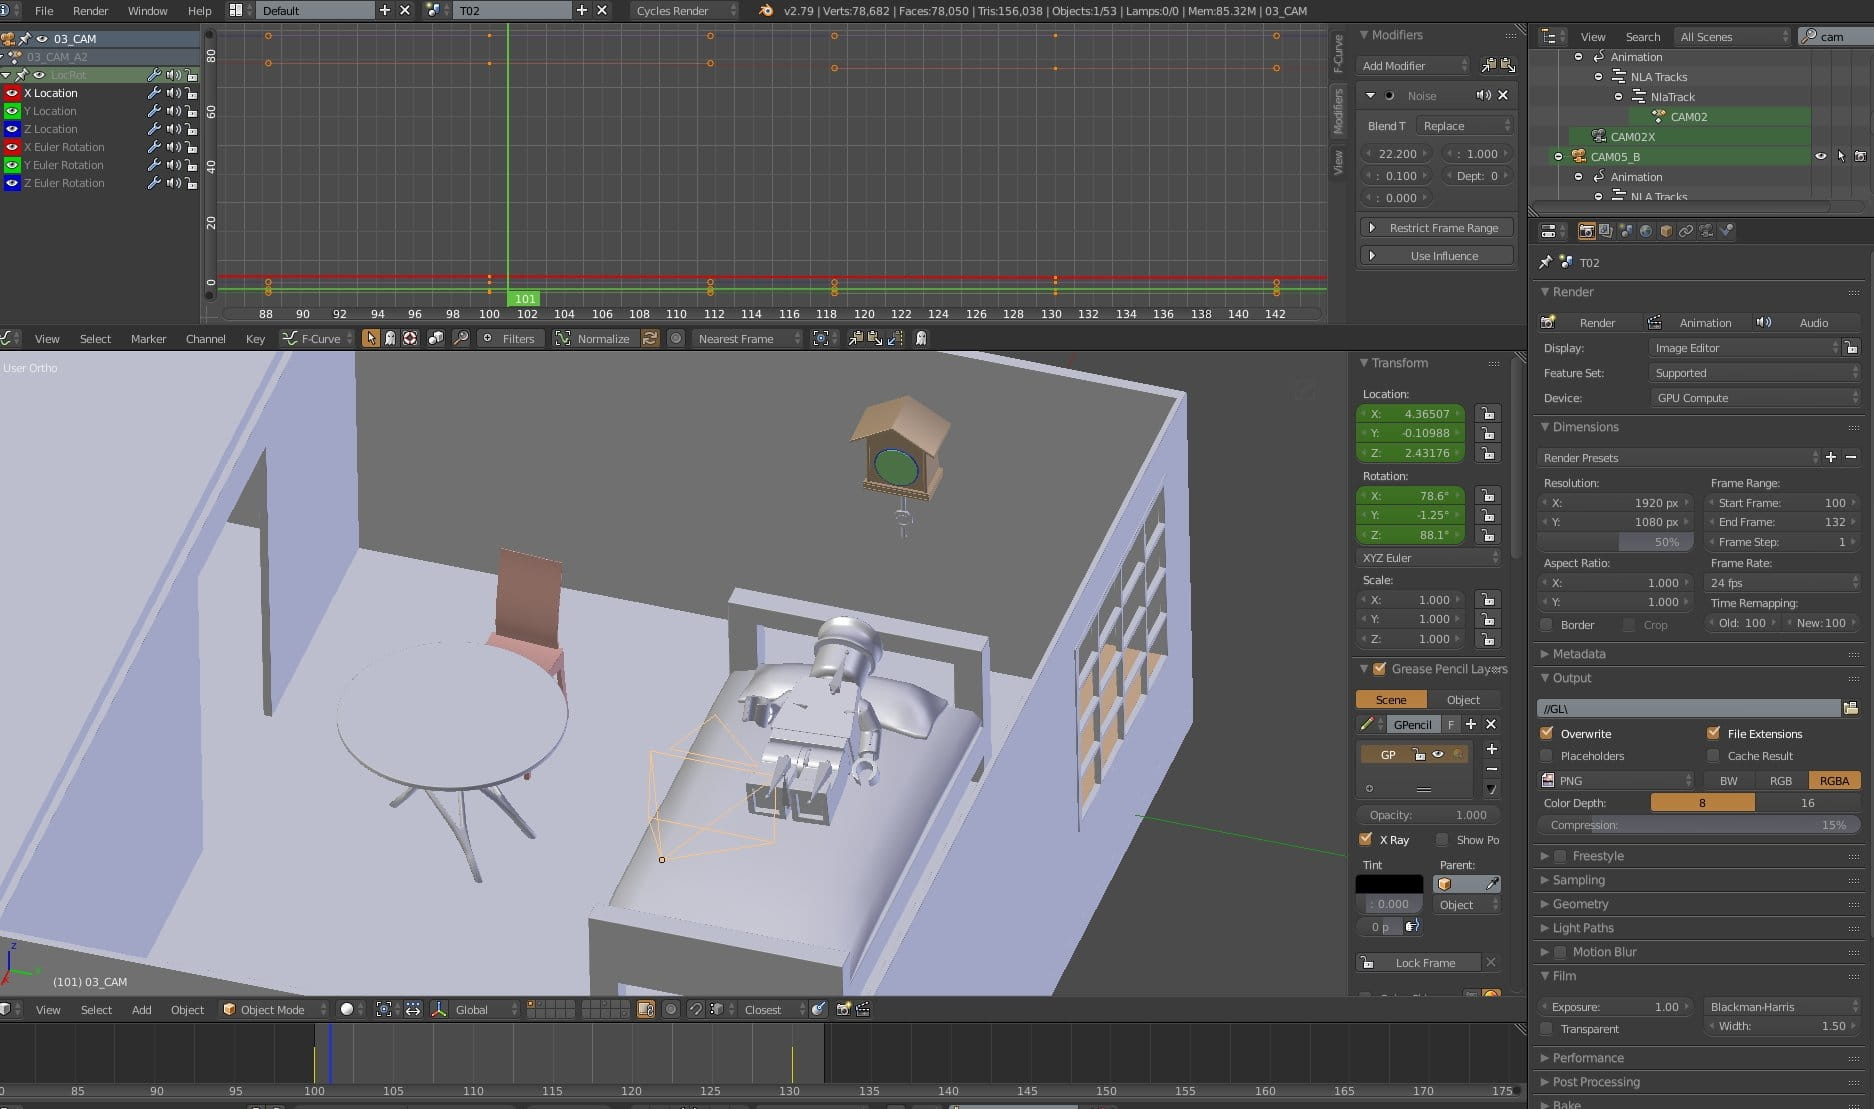
If you animated your camera in Blender (which I do, because Blender has great noise modifiers that simulate handheld camera) you need to export it separately. Make animation on your camera, assure that there are at least two keyframes in the export range and push animation to stack. If you do not push it, Unreal will not recognize animation of your camera.
Now, let’s go to Unreal
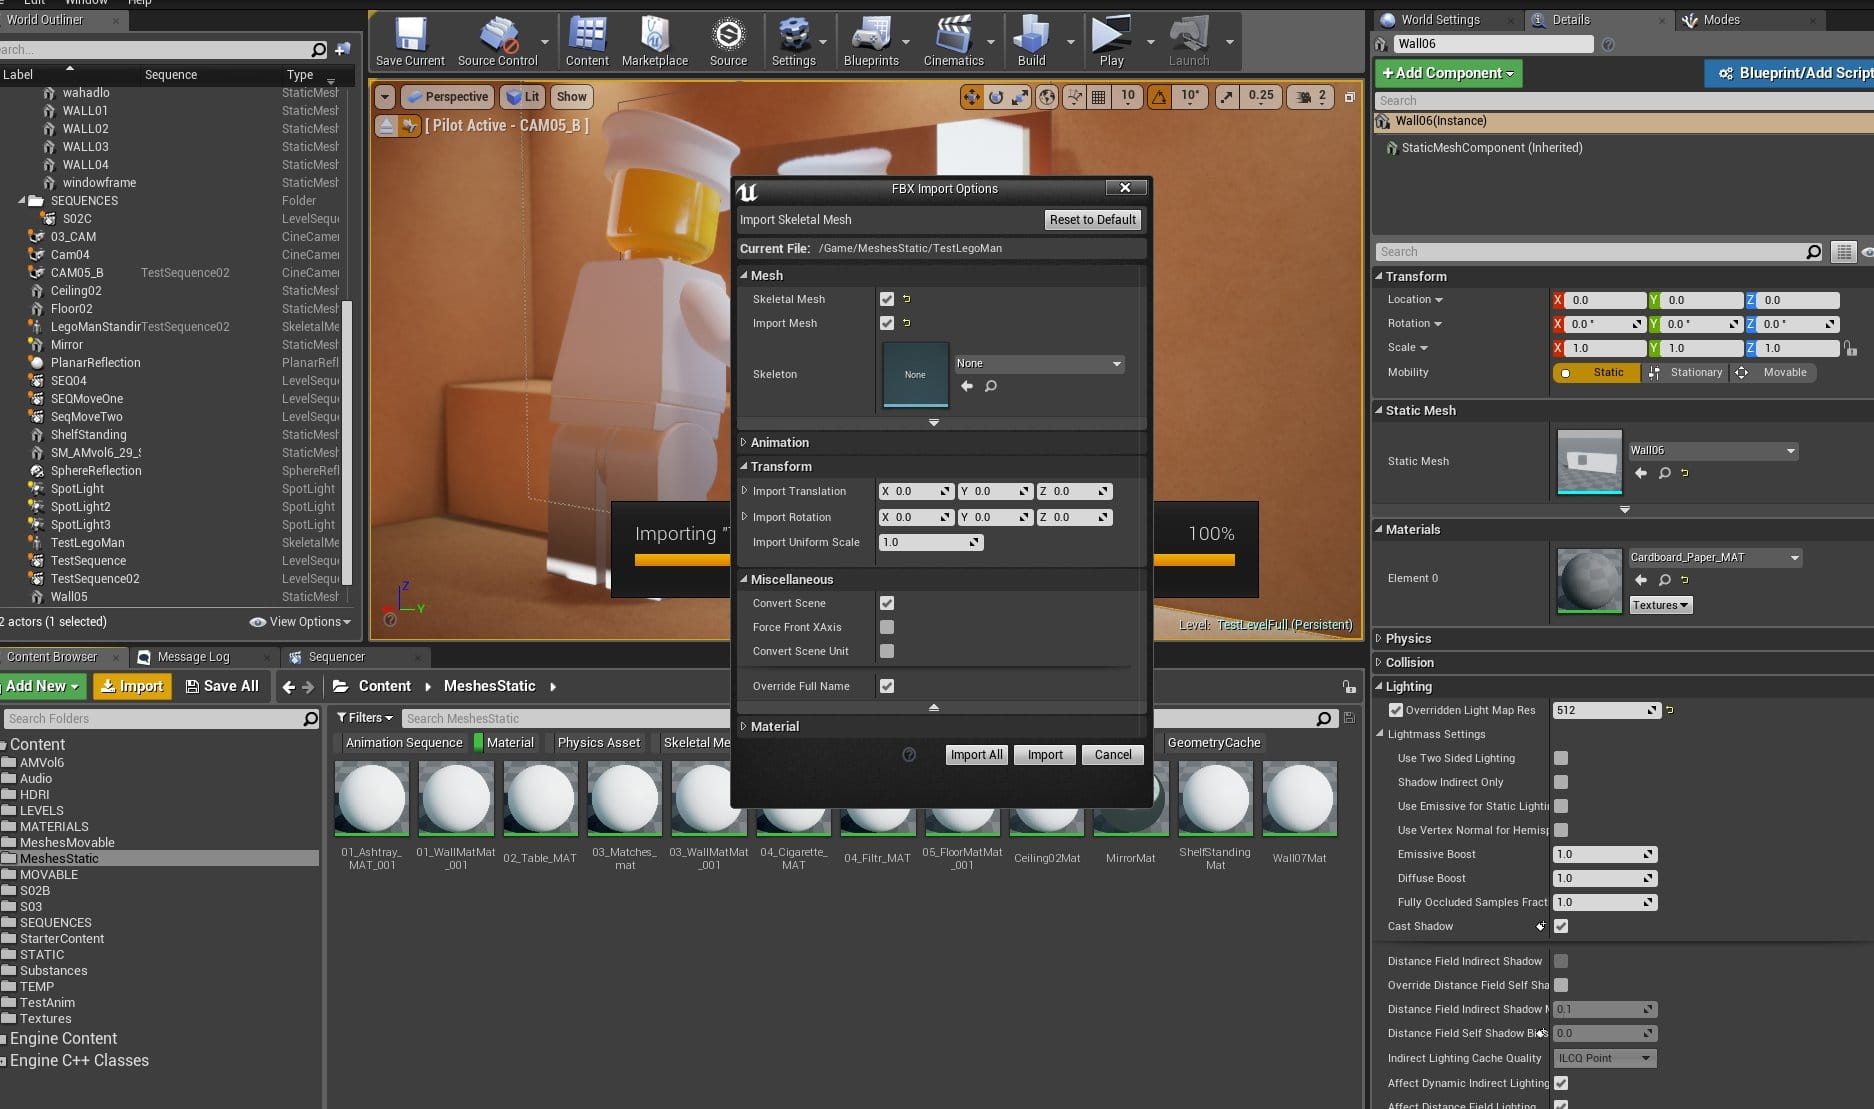
Import your mesh first, you do not need to make some special changes here. I would recommend to select „preserve local transformations”. You also want to disable „Import animations” checkbox (I folded entire Animation dialog, because we do not import animations here). Drag your object to viewport, create some lights.
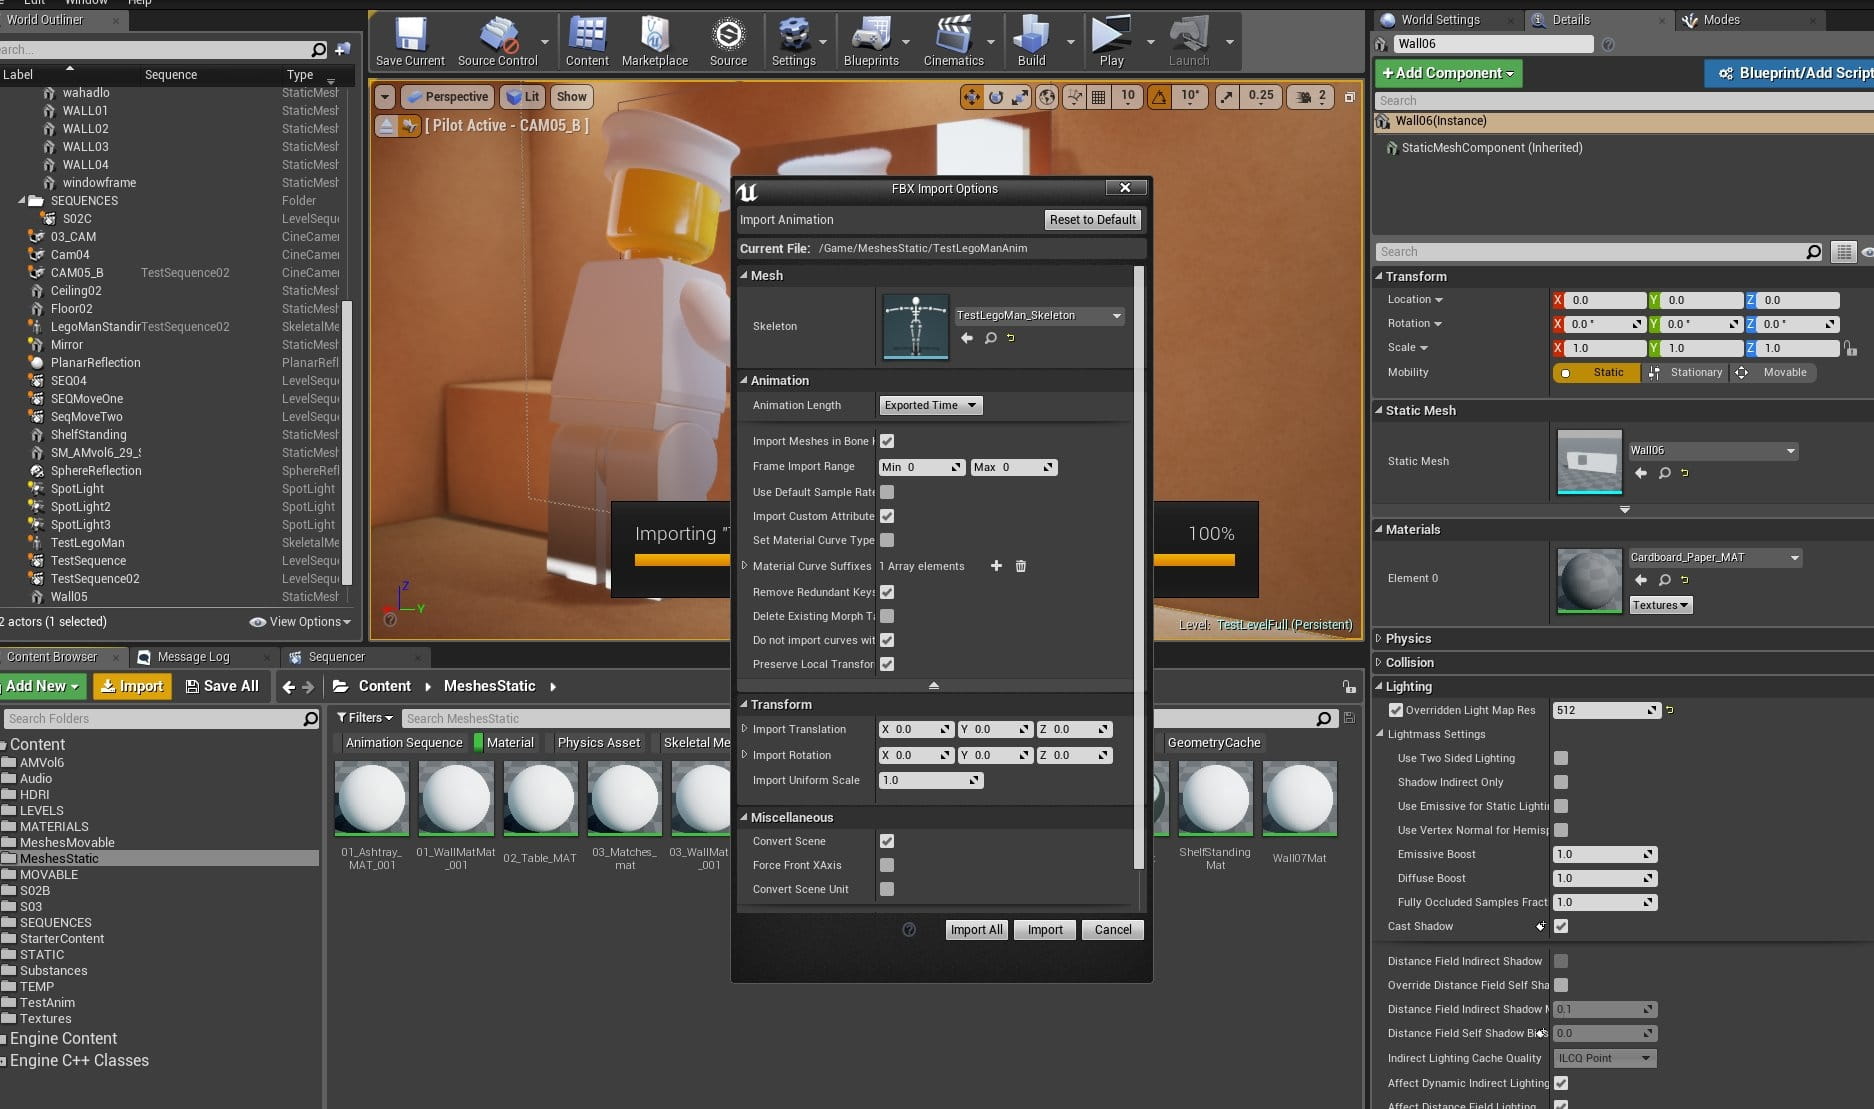
Import your animation file. It should automatically have right skeleton selected in import window. Sometimes it happened that I needed to scale my animations by 100 to work properly. If you use metric units and scale 0.01 you probably will need to input „100” in scale box. If you used normal, generic Blender scale, you can just press „Import”.
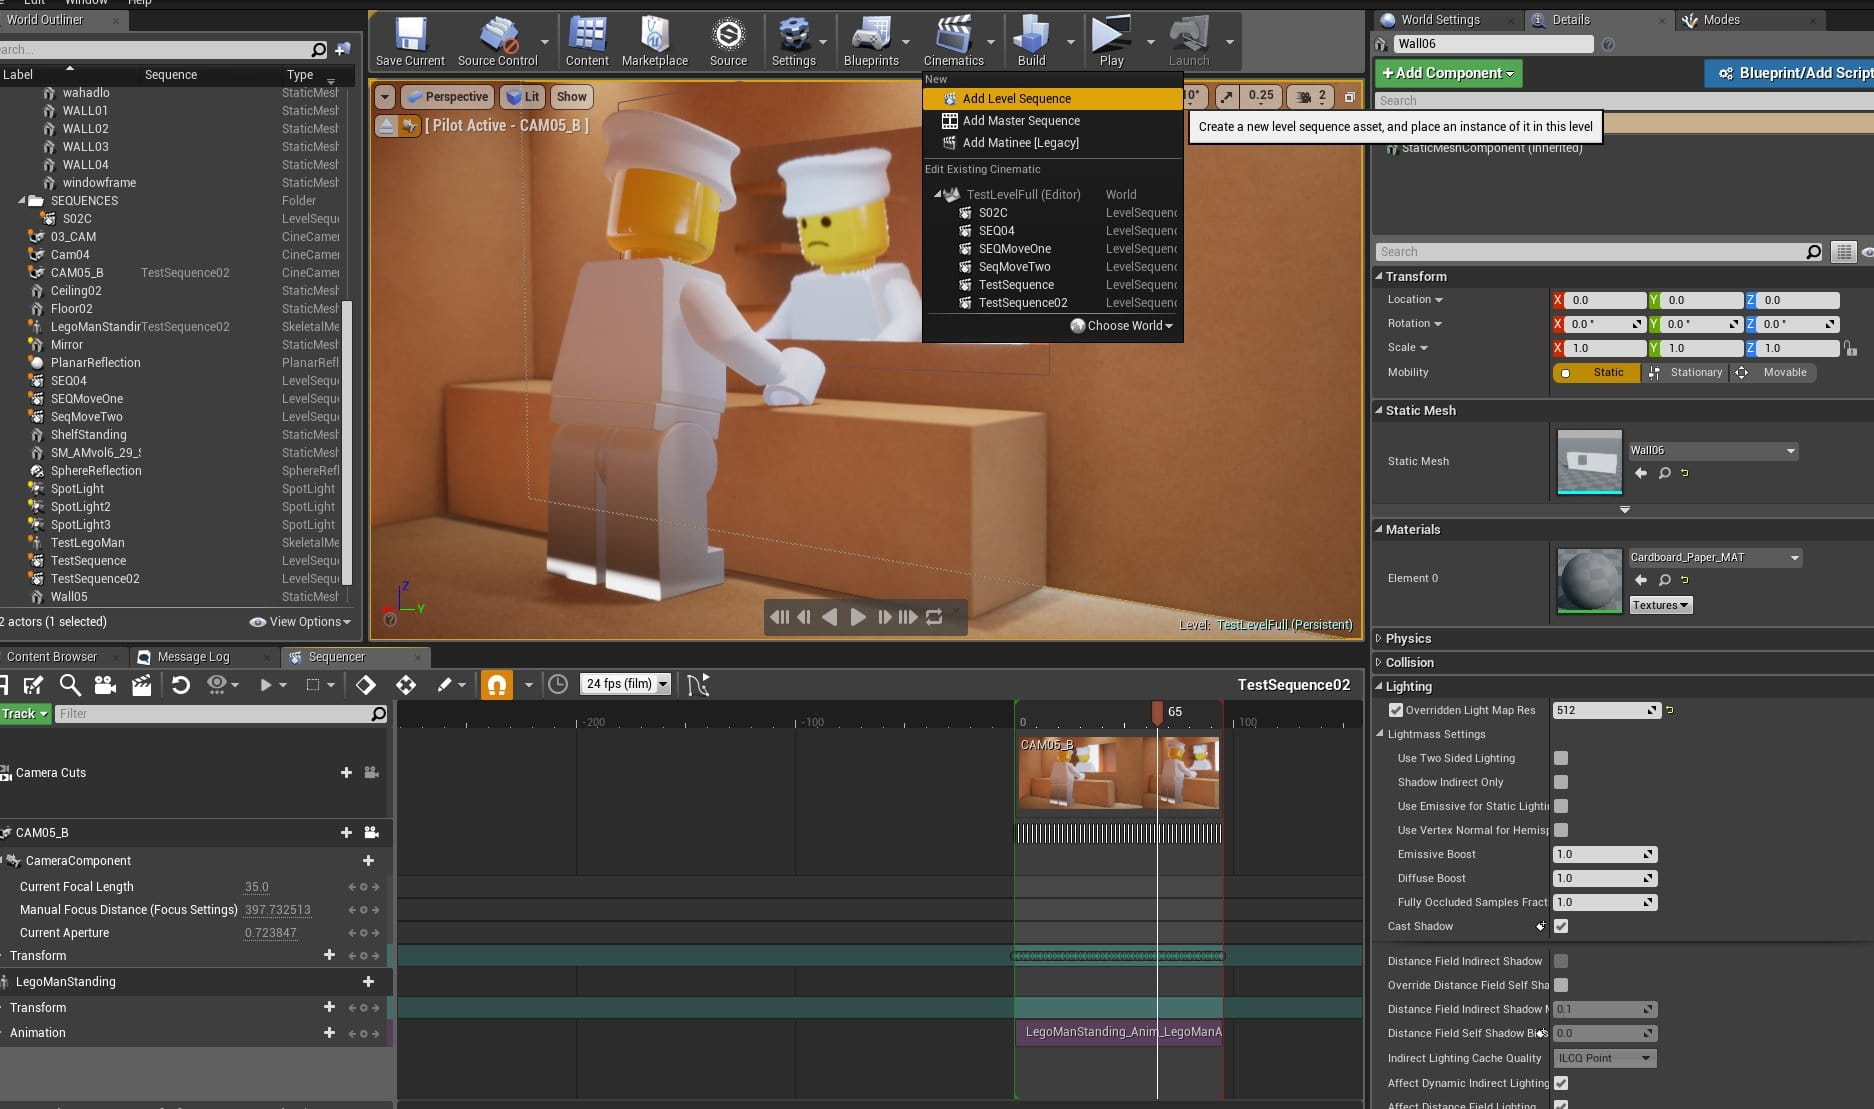
Create new Level sequence
Create new Cut track and new camera with a single button.
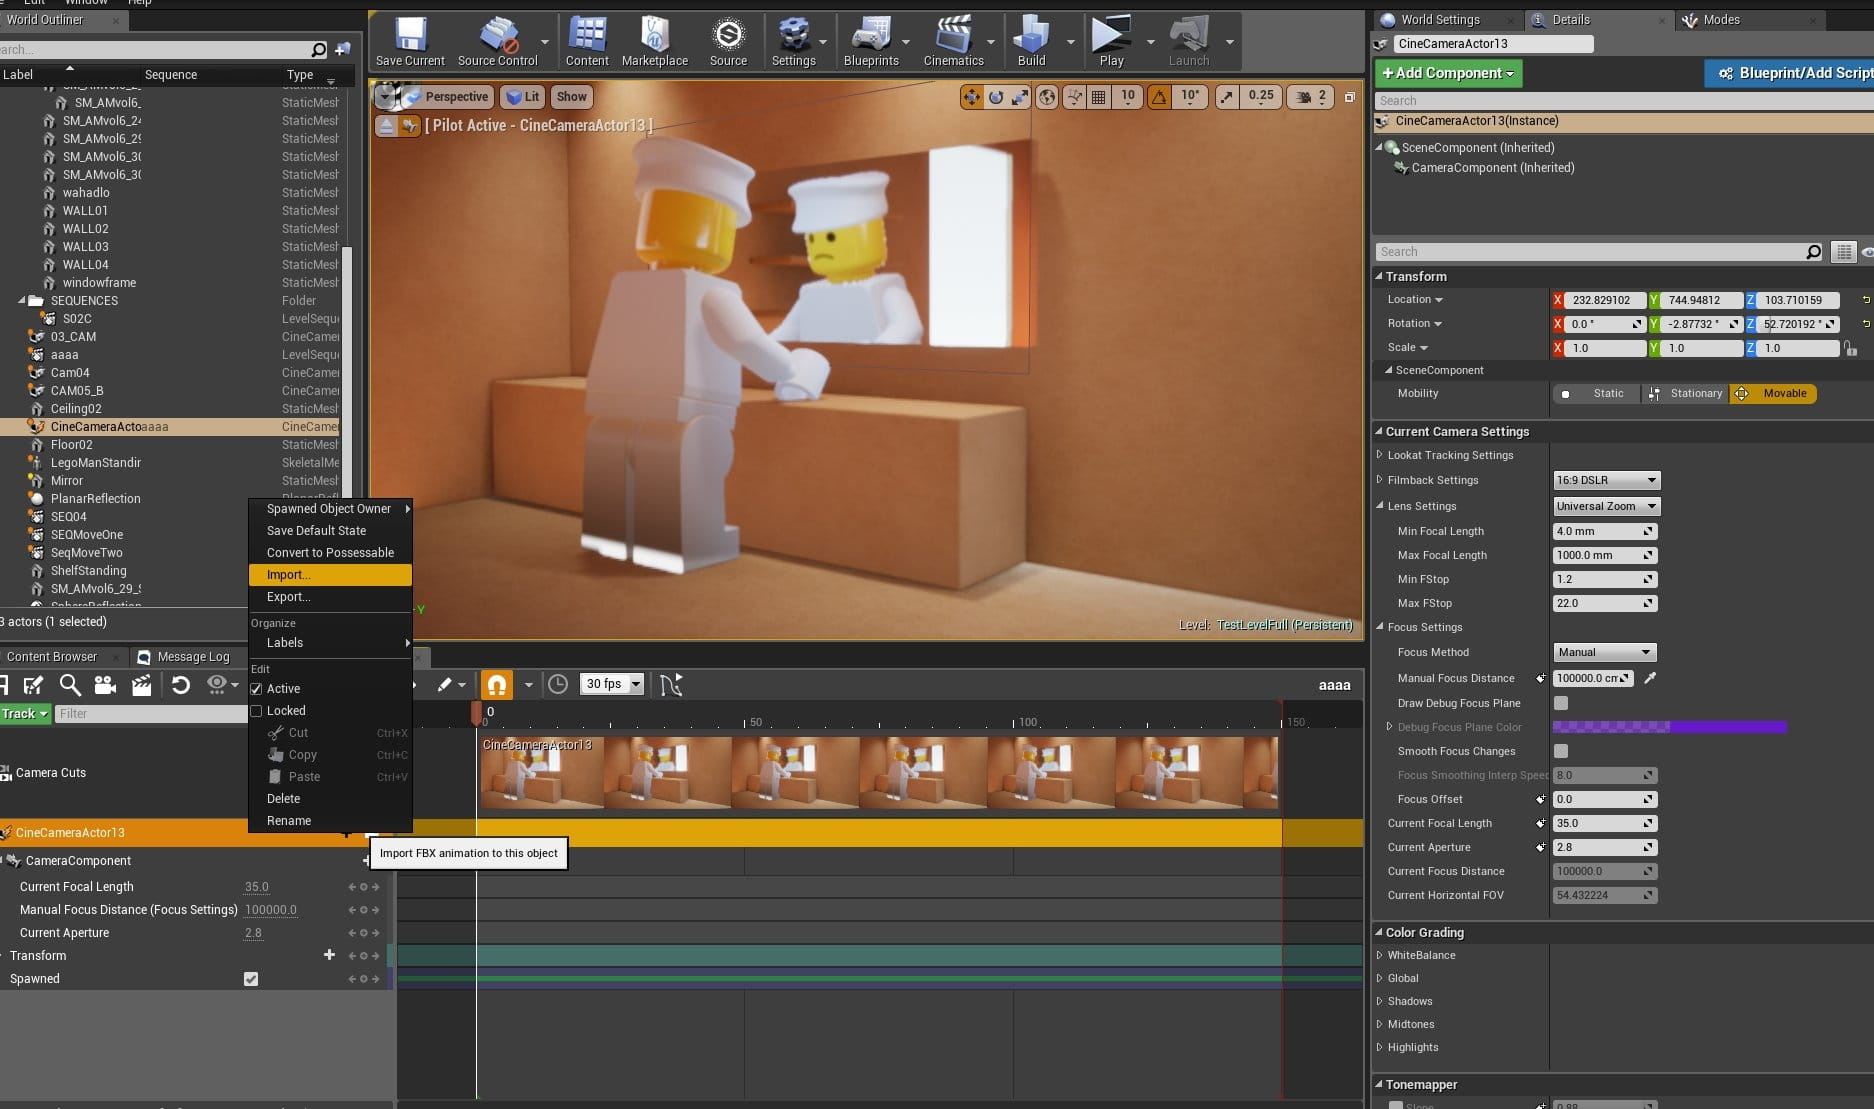
Right click on camera and select „Import”.
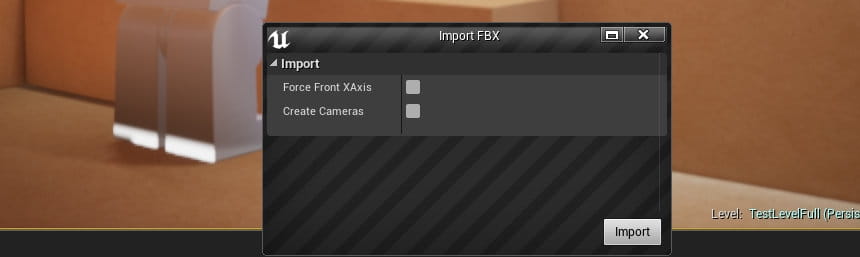
Select your FBX file with exported camera and import it, do not force X forward axis. If you check „Create new camera”, Unreal will make another cam in sequence with camera animation that you made in Blender. If you deselect this option, it will import camera animation to existing camera. The decision is up to you. In this case I just imported animation to existing camera.

Select your Lego figure mesh and import it to animation.
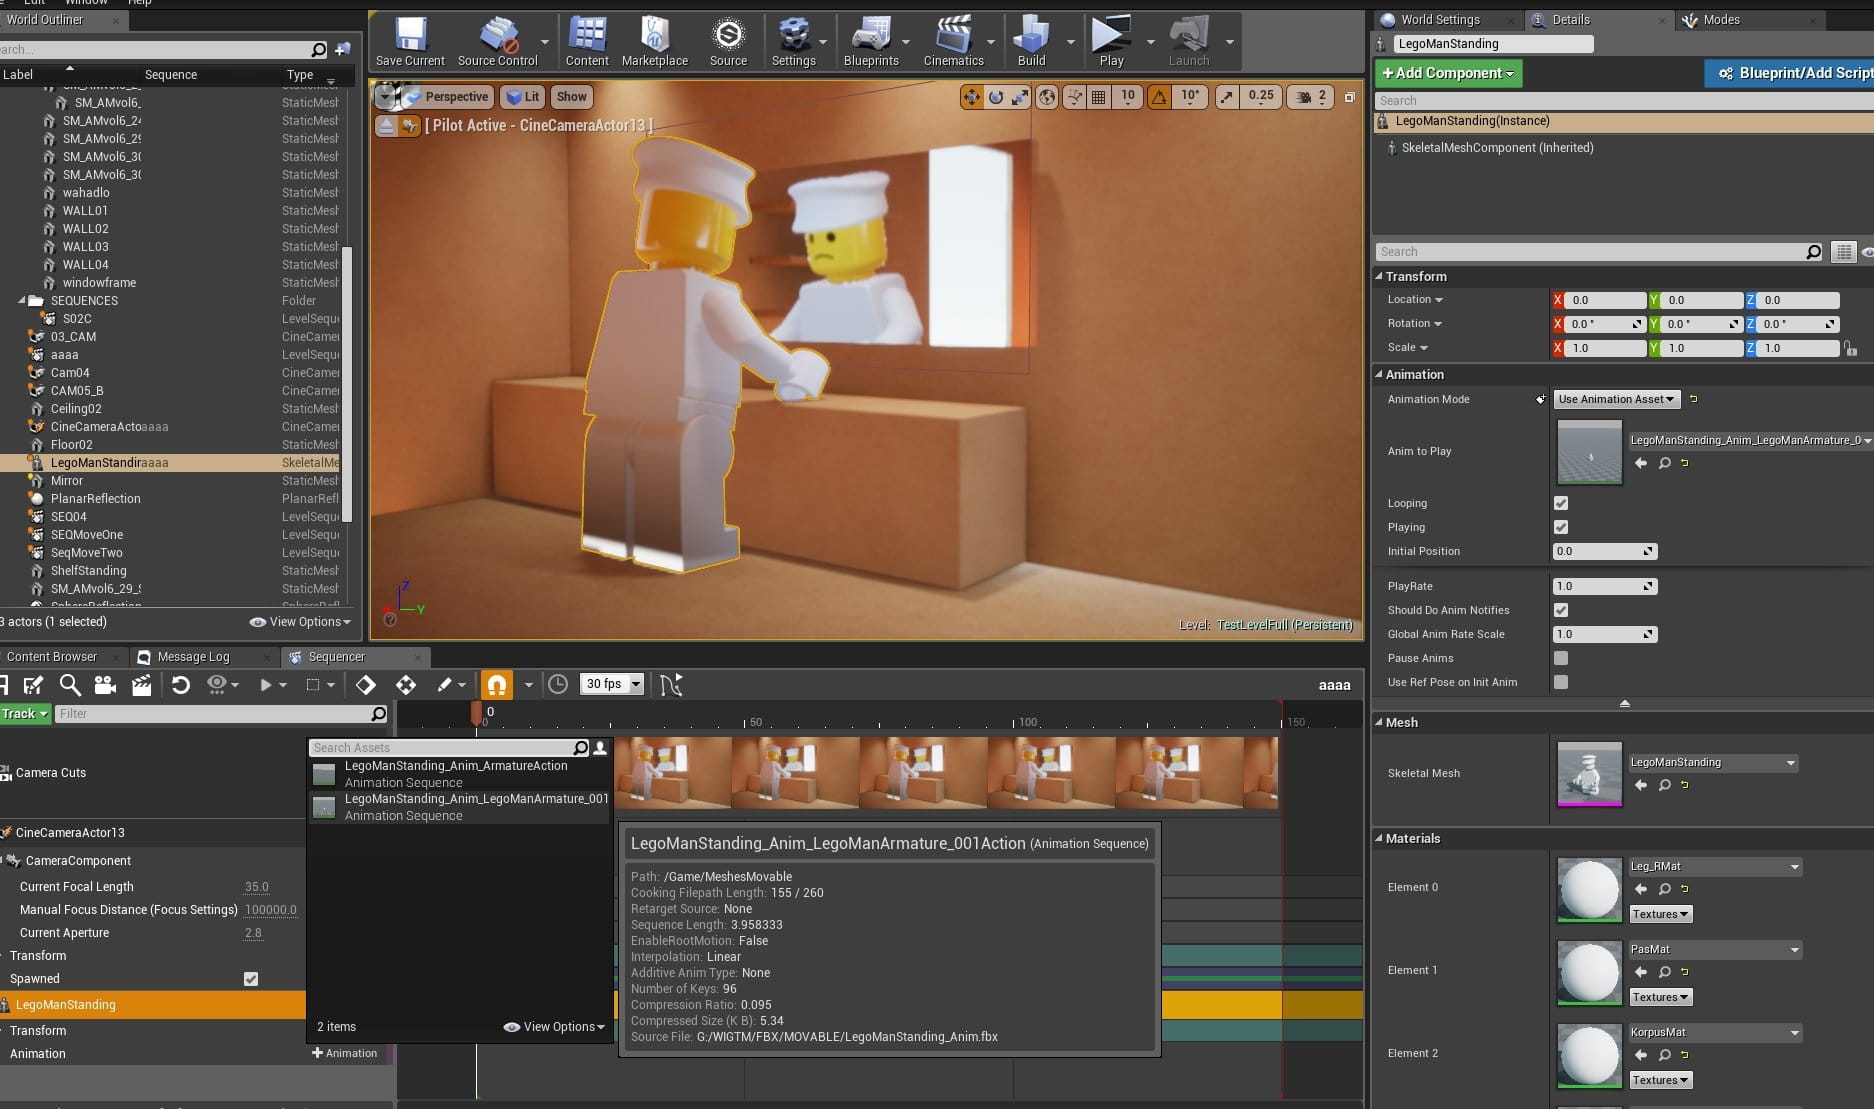
Under „animation” option, select your animation. Now you have a sequence with camera and actor movement. The first step made, now you can go further from here :)
If you like this article and would like to see more details about creating LEGO animation, say it in comments.
Have fun!


LEAVE A COMMENT


|

|

|

|

|
 Customer zone
 Your special offers
 Your orders
 Edit account
 Add project
 Liked projects
 View your artist profile
COMMENTS