Evermotion: More Than an Asset Library
How Evermotion became a full-scale production partner for archviz, automotive and synthetic data.


Total: € 0
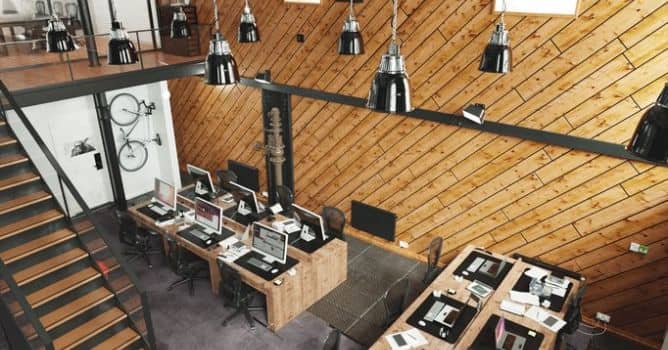

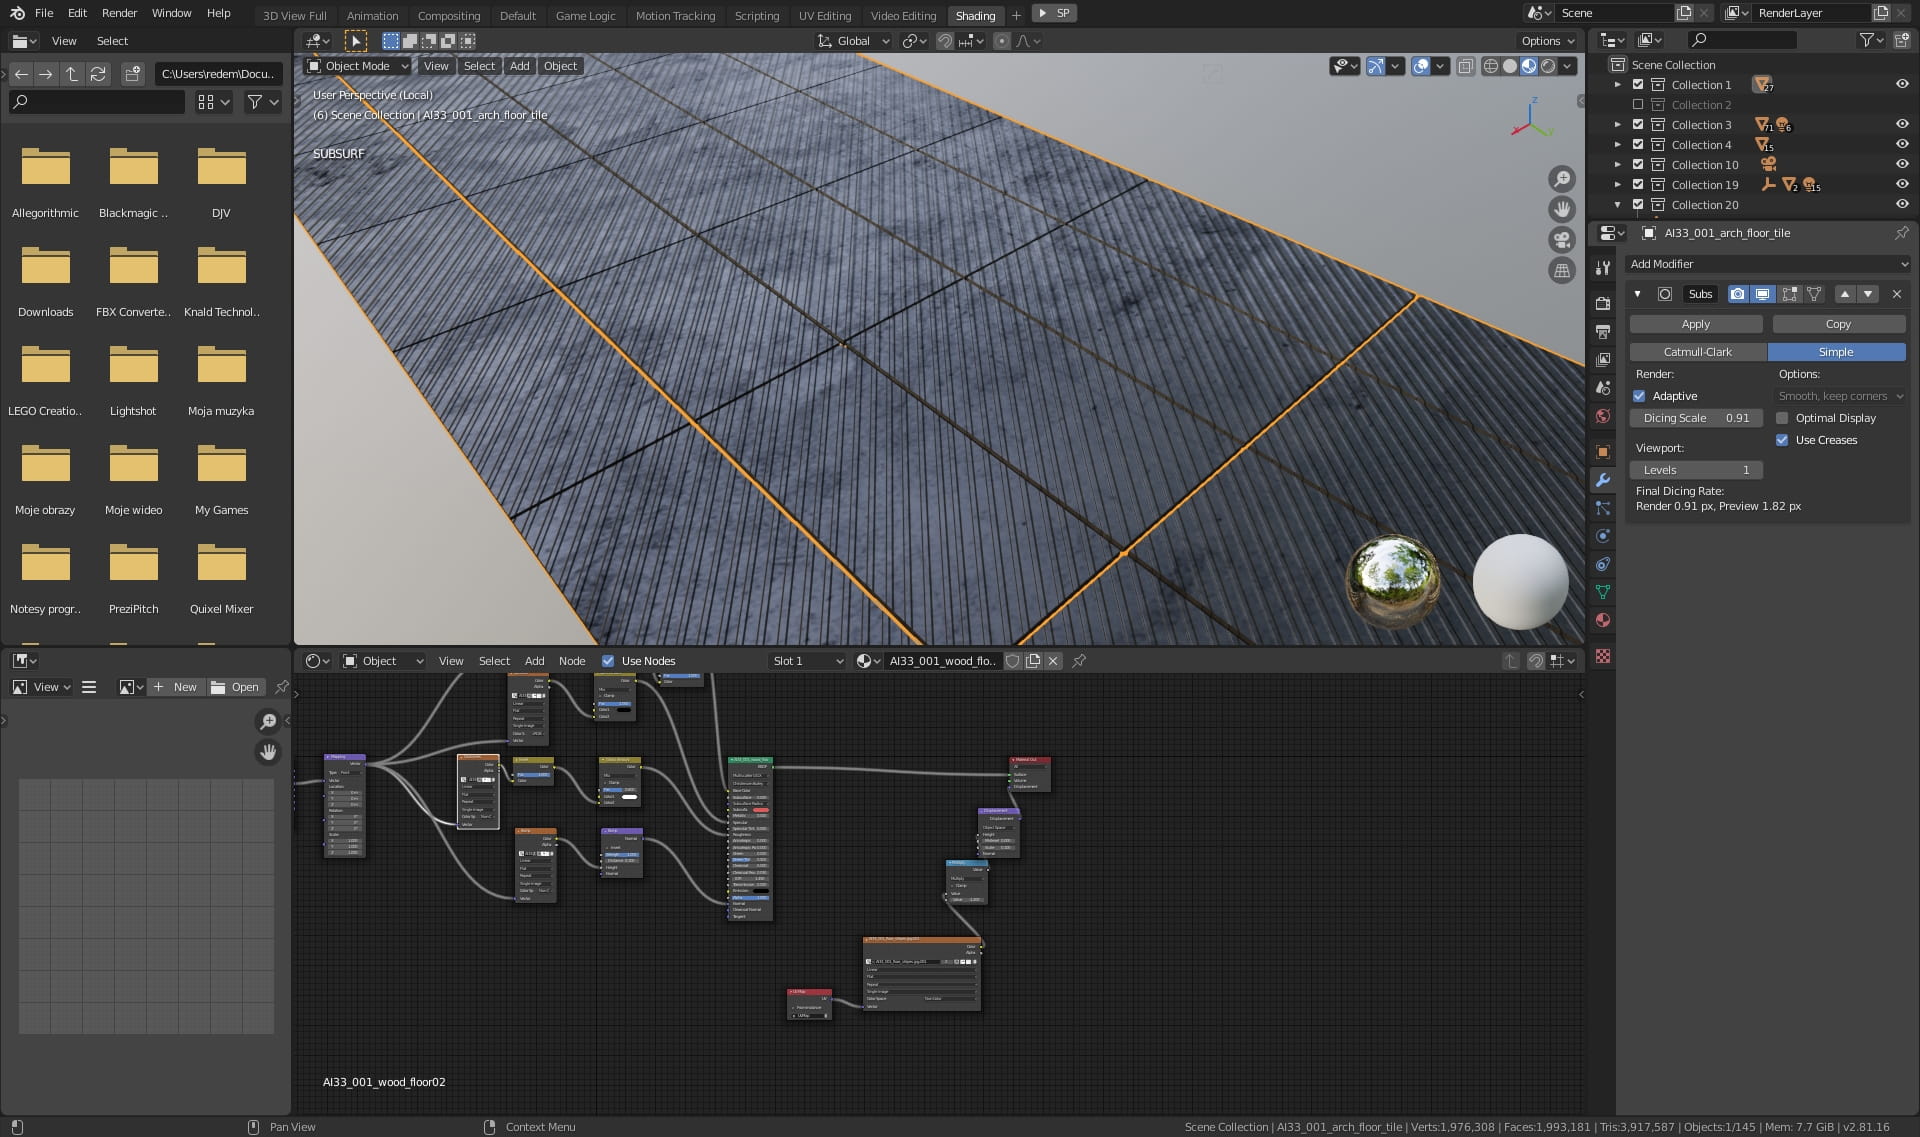
This is a scene from Archinteriors vol. 33 for Blender, the collection consists of ten office scenes for architectural visualizations. It is our third collection of interios for Blender. You can brose its contents and other Blender scenes made by Evermotion in our shop.

The scene rendered in blender Cycles, without external post-production tools. It is small office space with wooden wall, some indsutrial-looking lamps and a gallery.
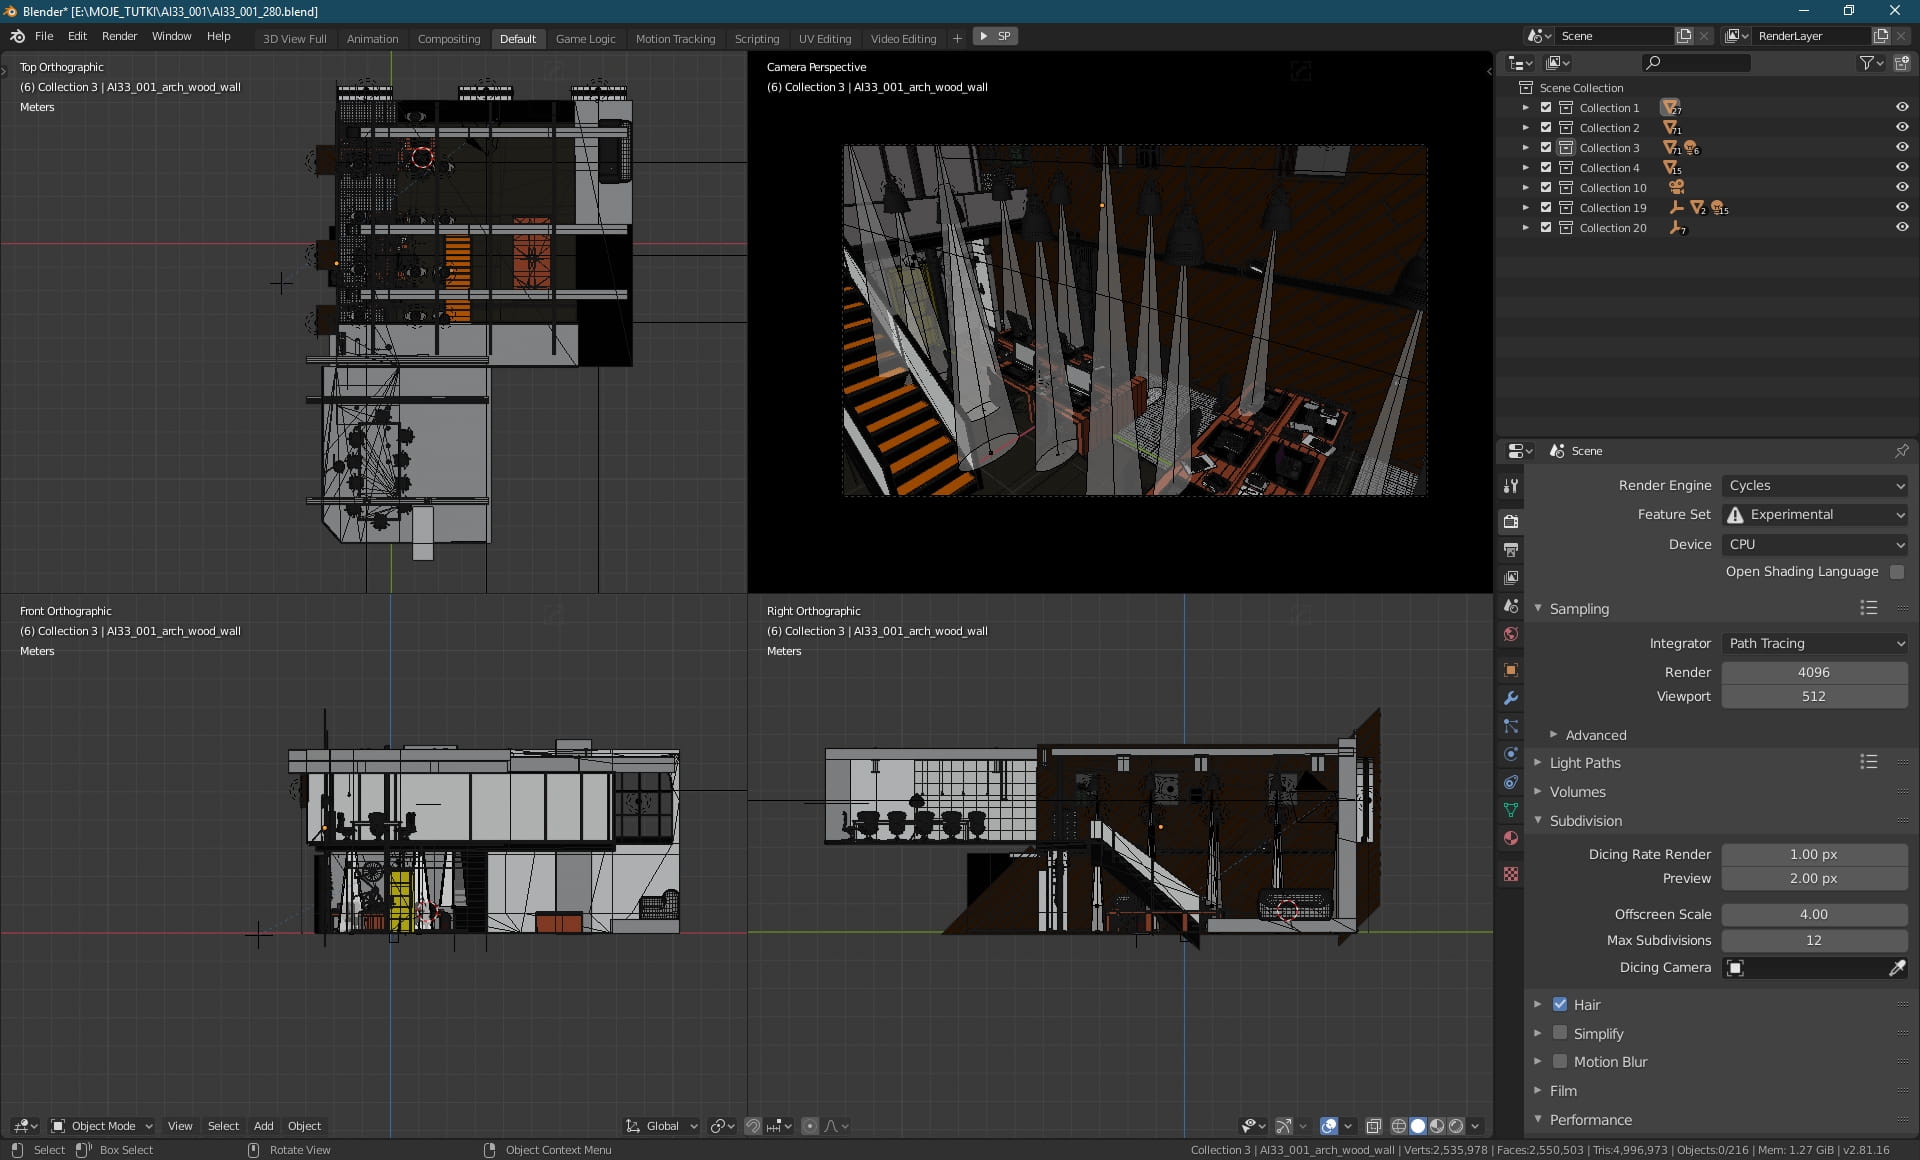
There is only one building here, you can see its layout in Quad view in Blender.

Scene in Blender viewport. We used Cycles for rendering this scene. As you can see, there are 4096 samples set in render sampling box. The rest of settings is on default. We used filmic color management with "High Contrast" setting and Exposure set to 3.0.
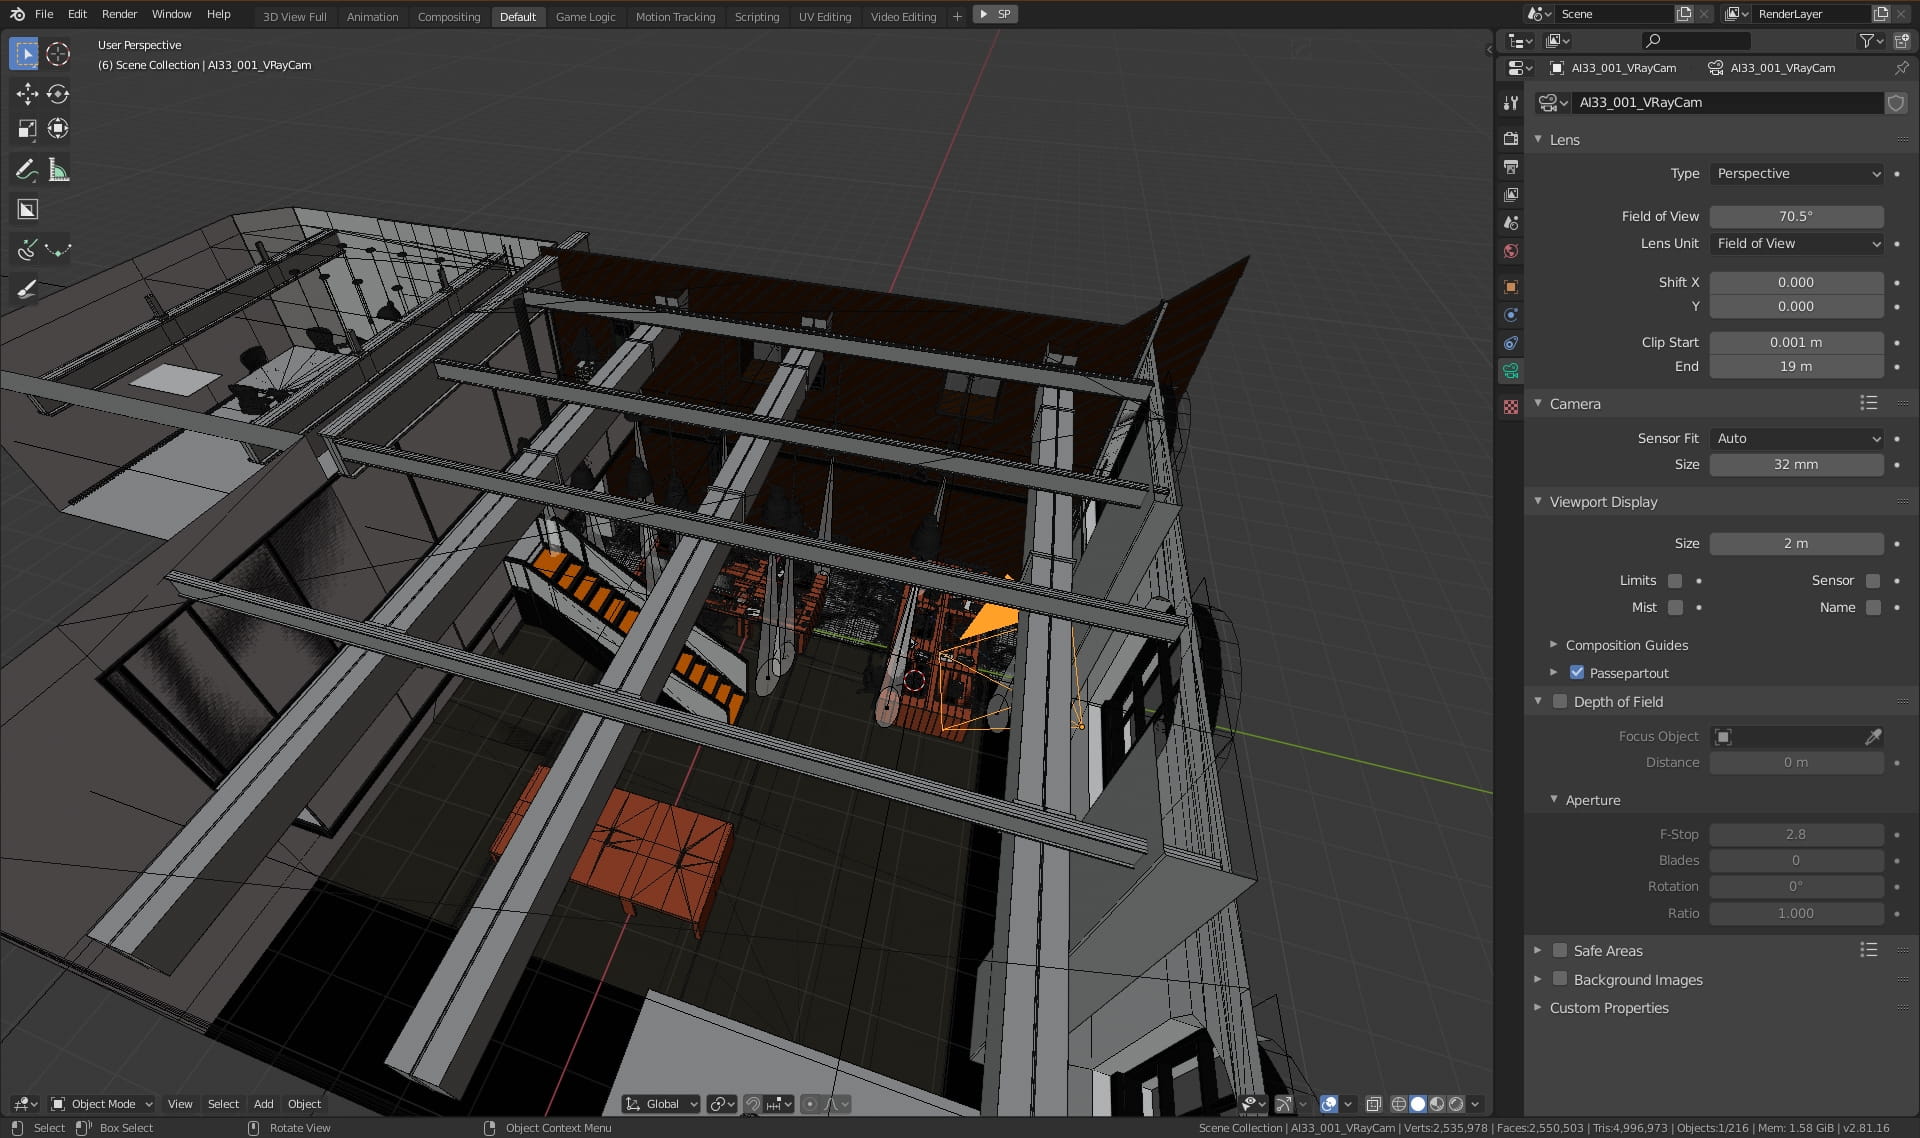
Camera settings. We used 70.5 FOV setting, with standard 32mm sensor.
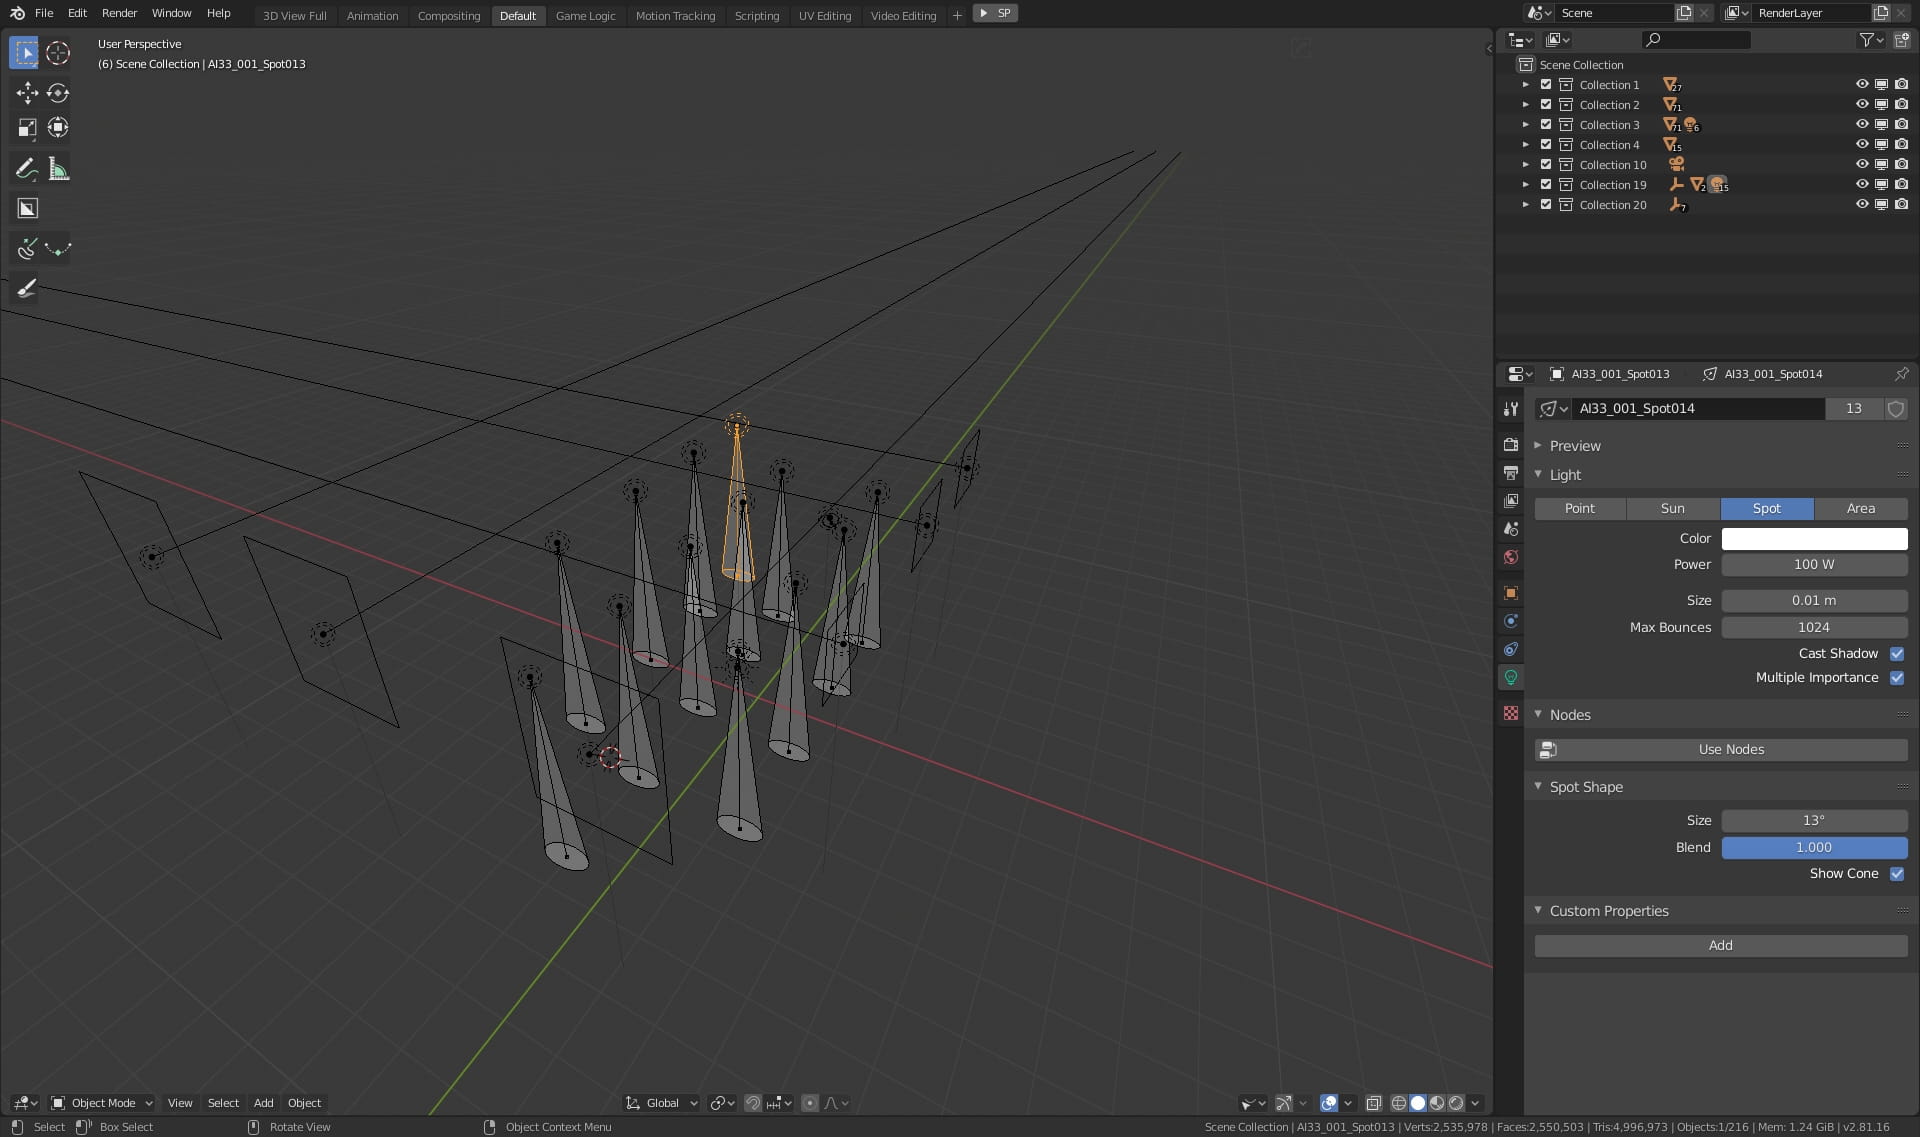
Lighting - there are many ceiling lights, those are spot lights (Power: 100W, max bounces: 1024) with 13 degree cone..

Lighting - the most of light inside the building does not come from earlier mentioned spotlights, it comes from outside. We placed rectangular light portals in windows. They gather the light from World background.
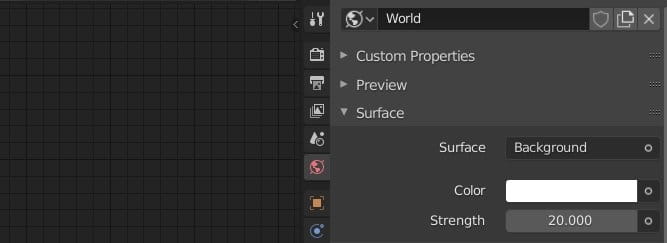
World background is pretty simple - just a white color with 20 units of strength.

We have some metal floor panels in this corner of the room.
Metal panels - close up.
Metal panels material. We have standard texture coordinates nodes connected to PBR texture slots. We had glossiness map instead of roughness map, but, since glossines is nothing else than inverted roughness, we could use "Invert" node to get our roughness.
Metal panels material - continued. Additionally, we used also displacement map for creating 3d stripes on our mesh.
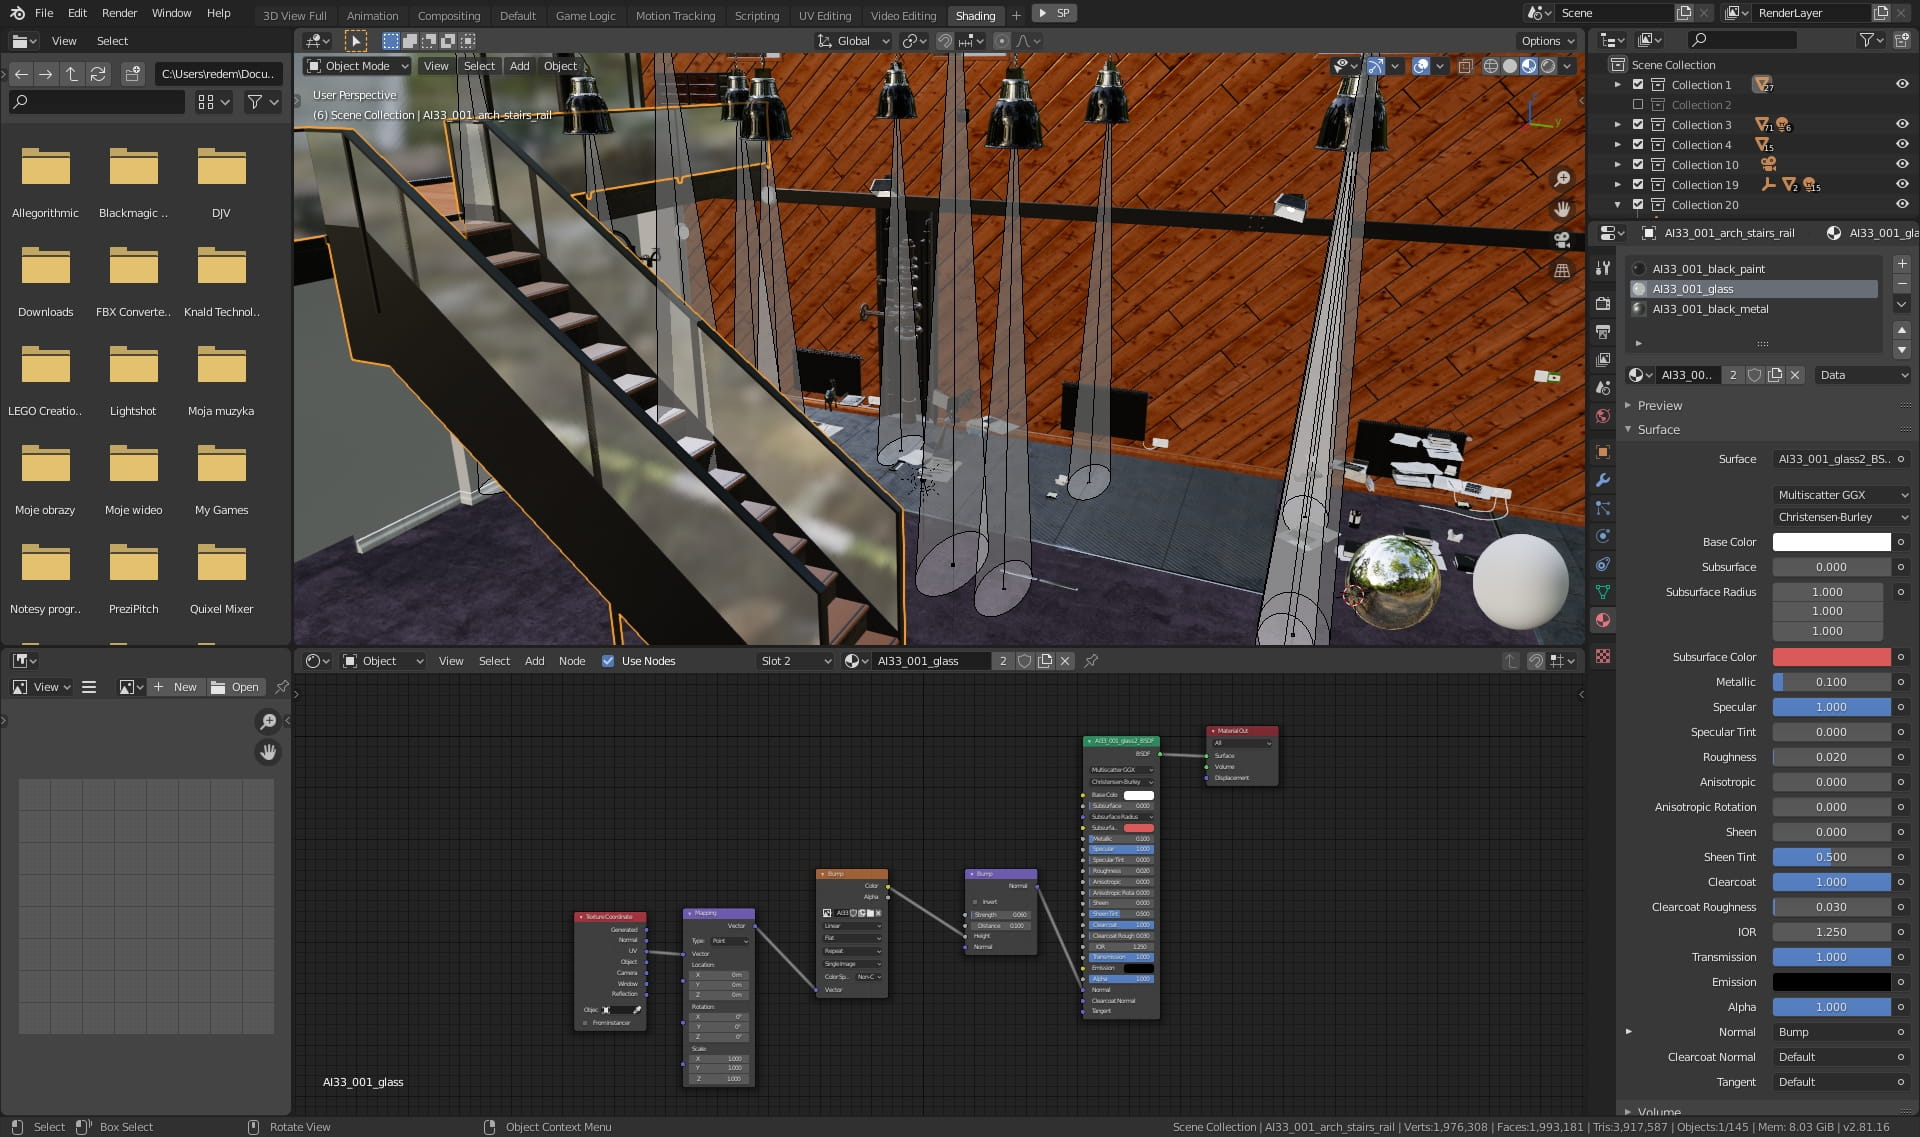
Staircase with glass sides.
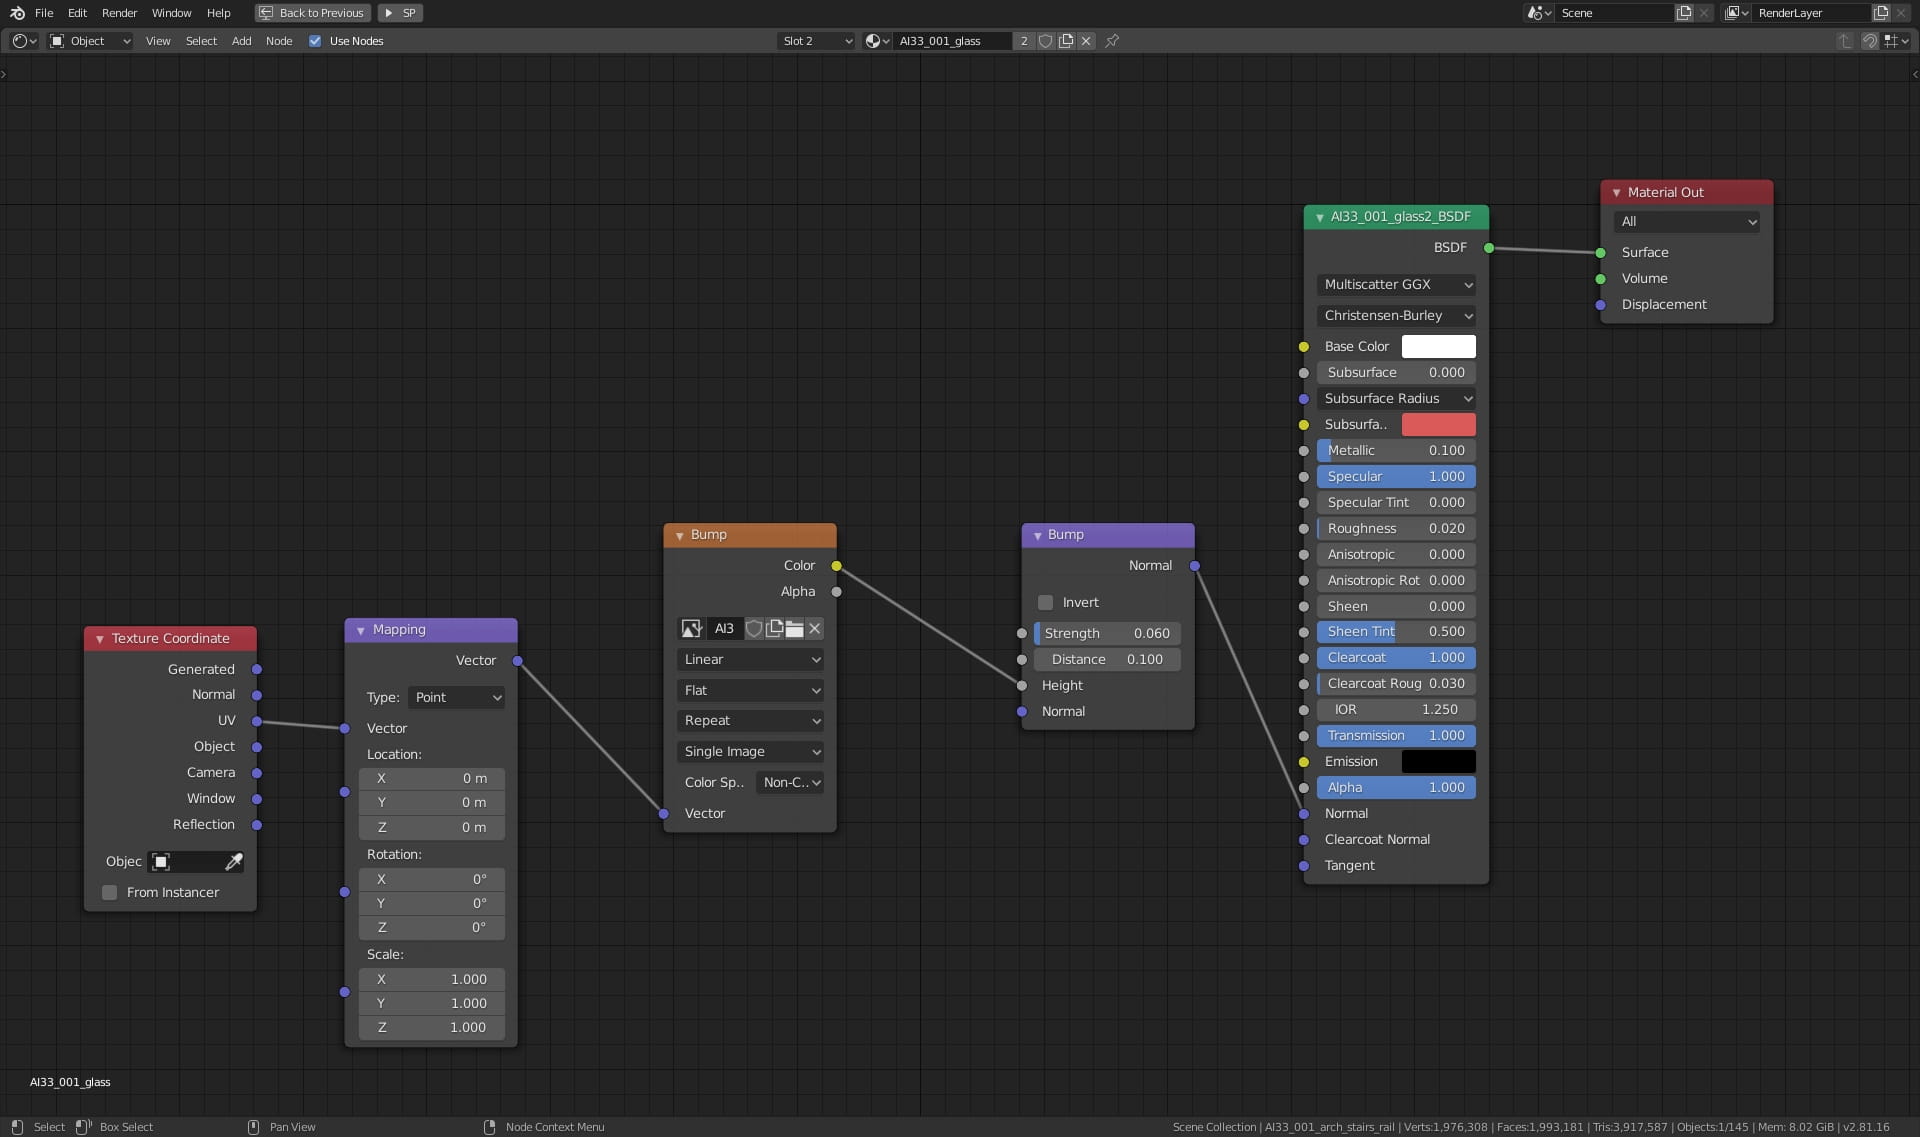
Glass sides material.
Wooden wall - close up. We used boolean operations to cut out some boards. Boards are also beveled.
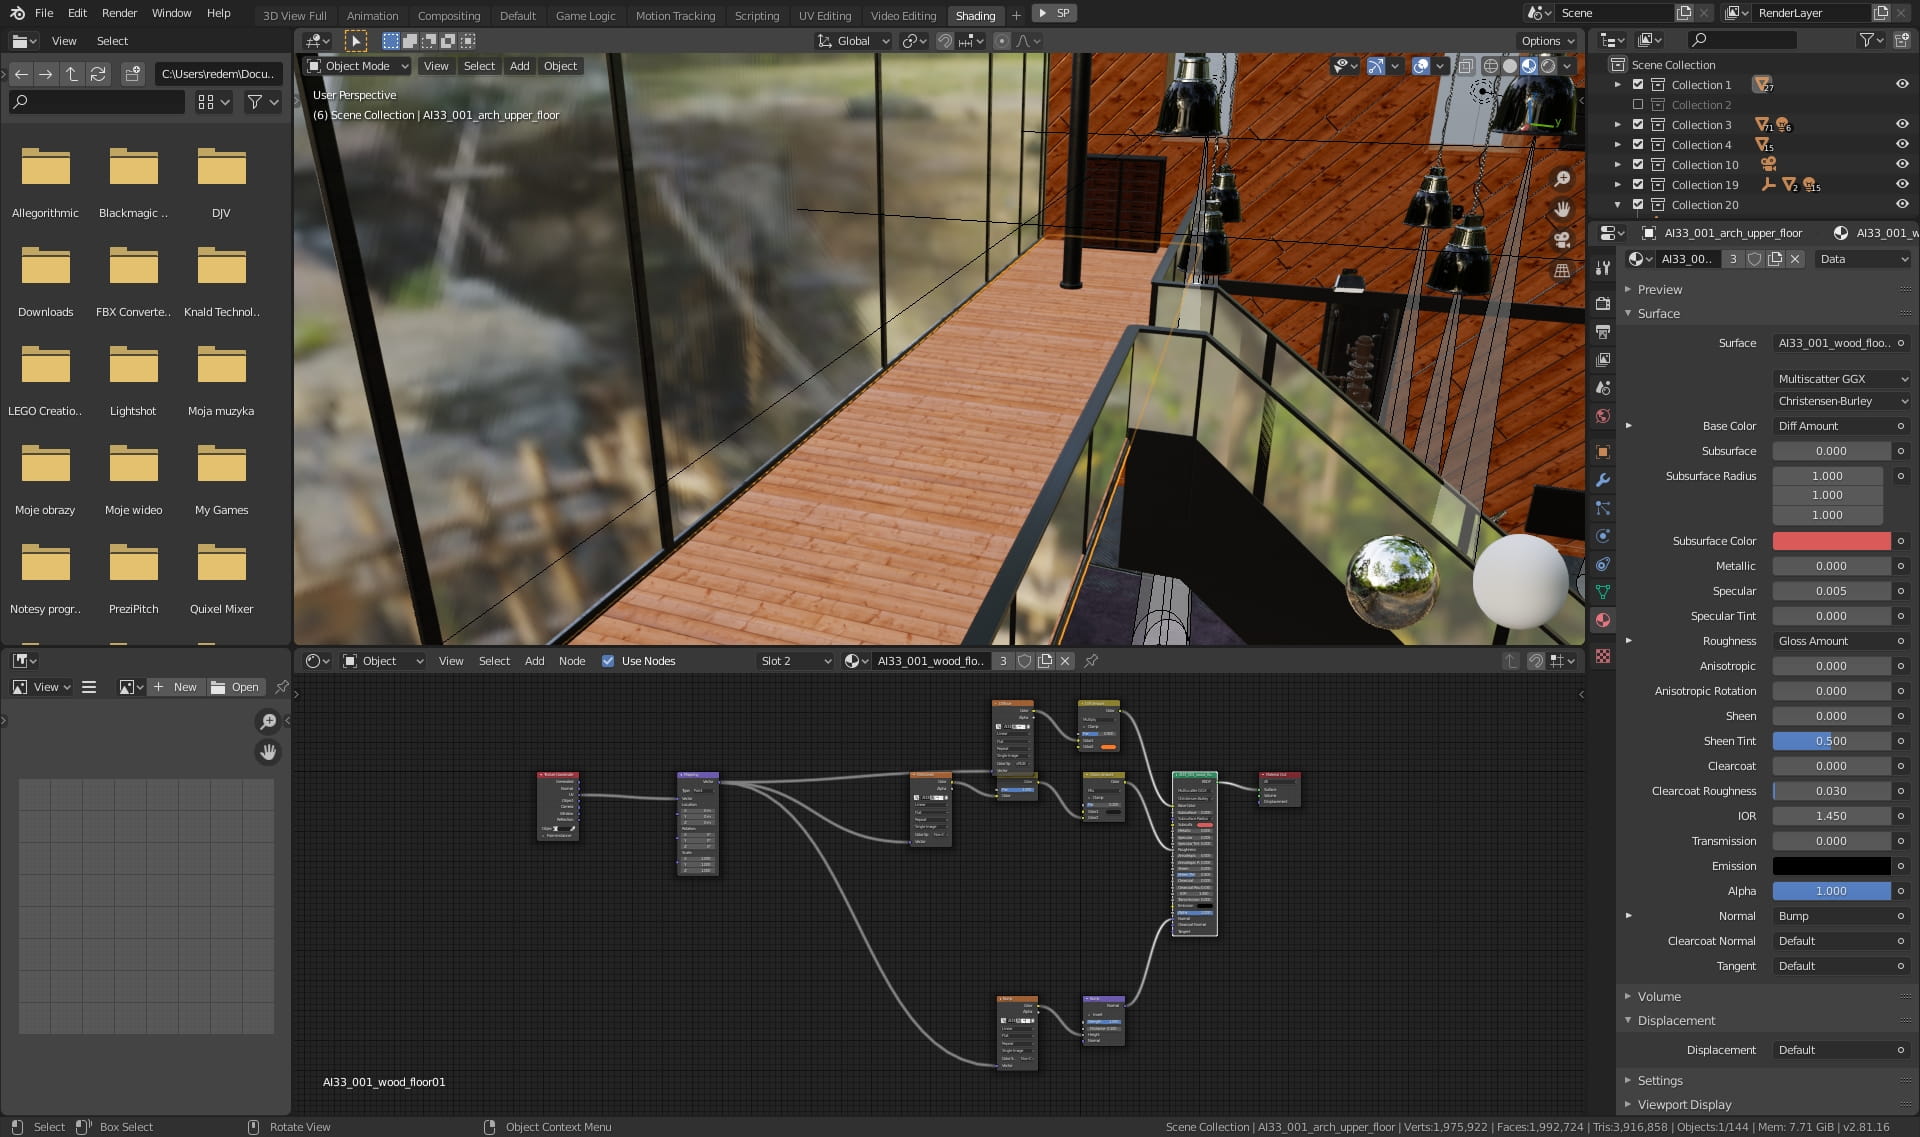
Wooden floor.
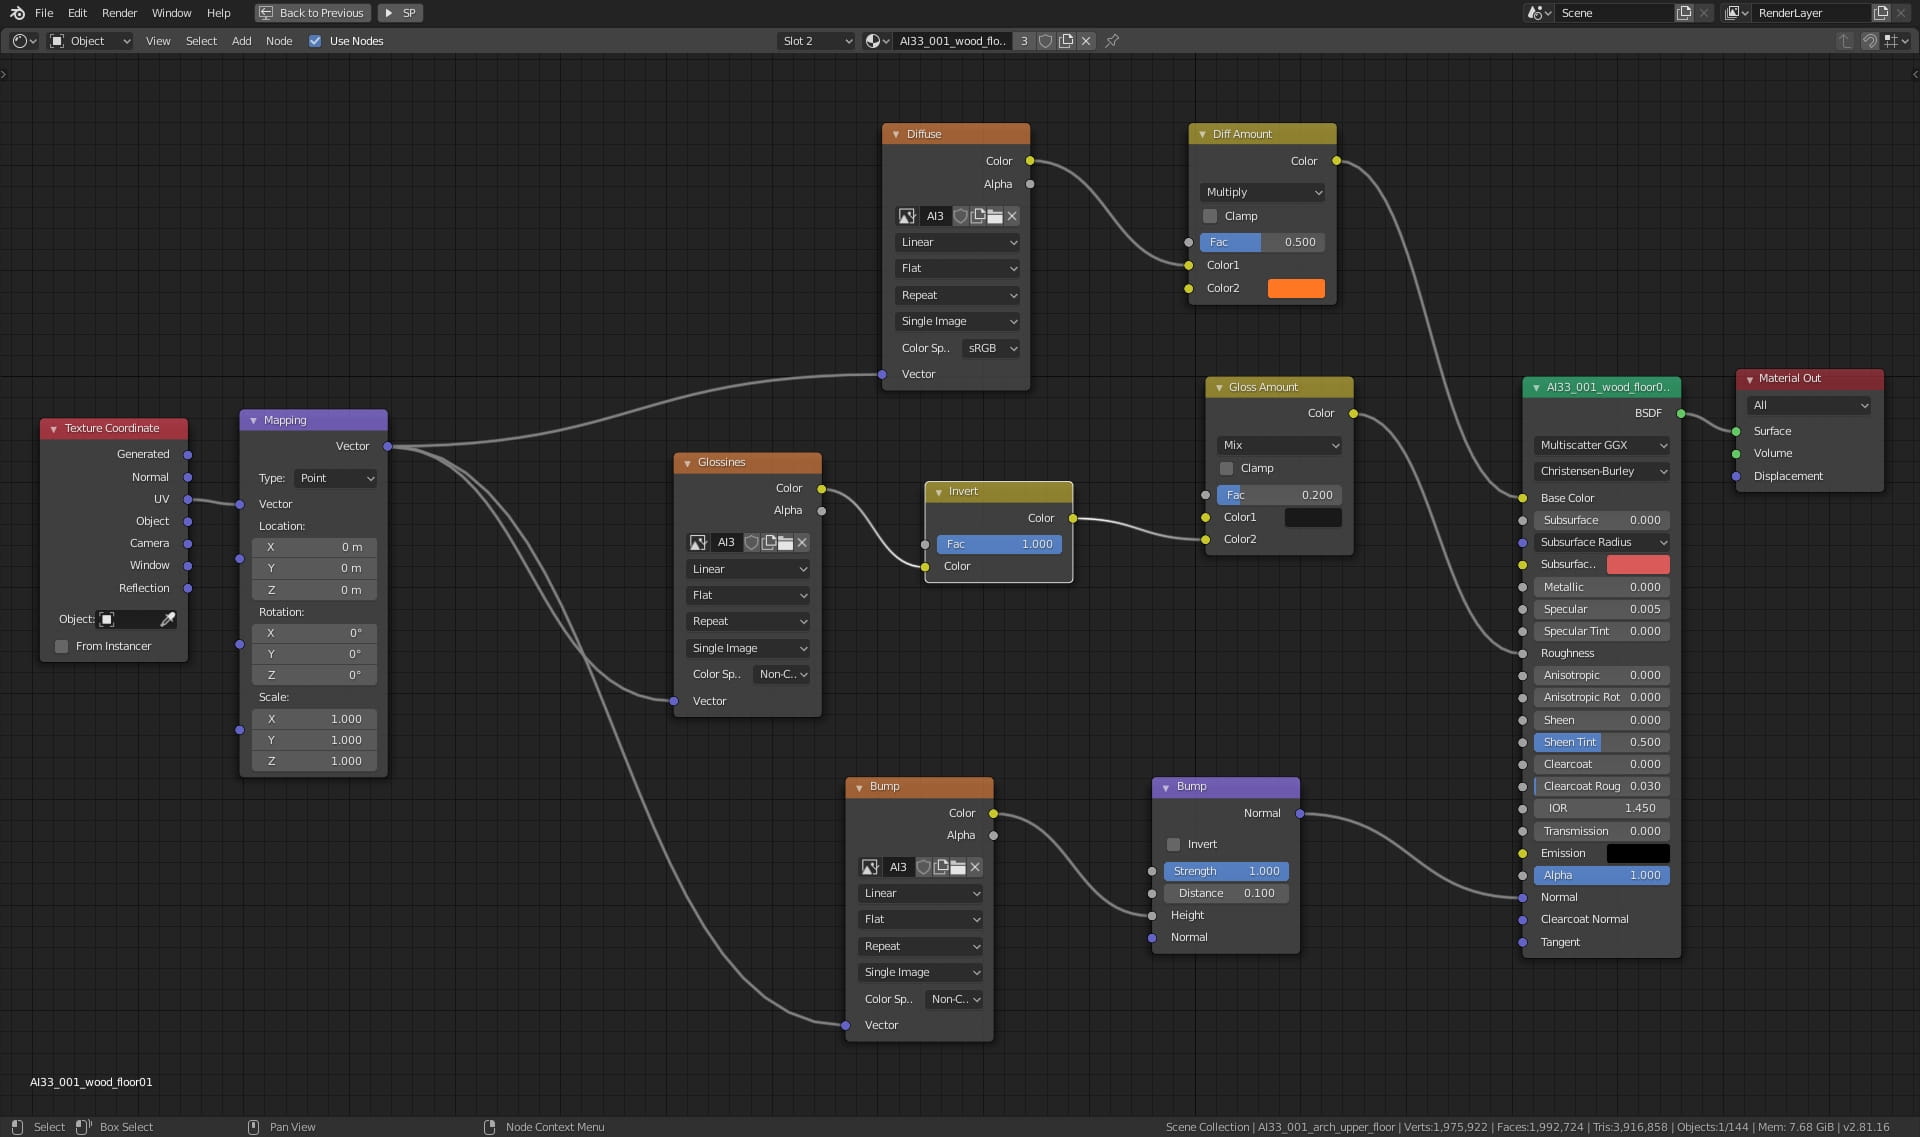
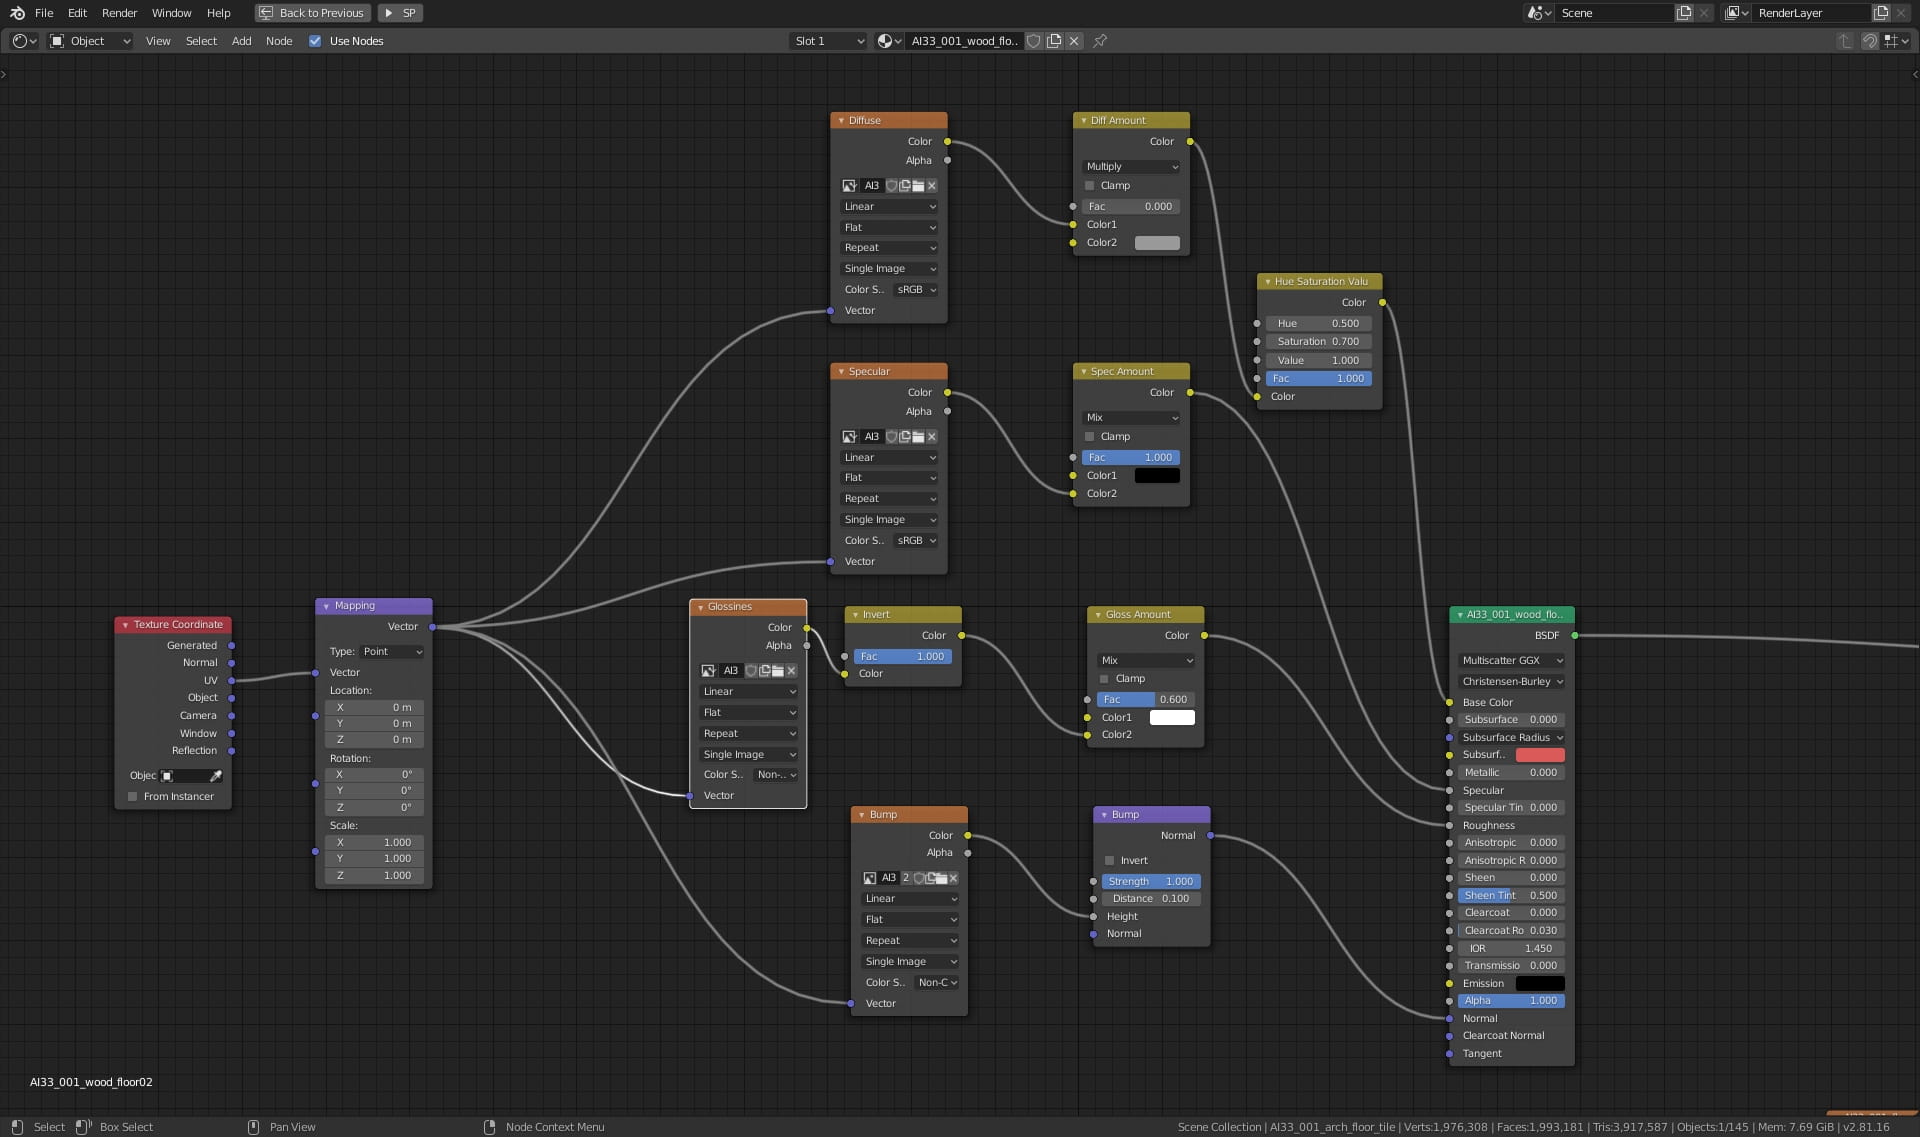
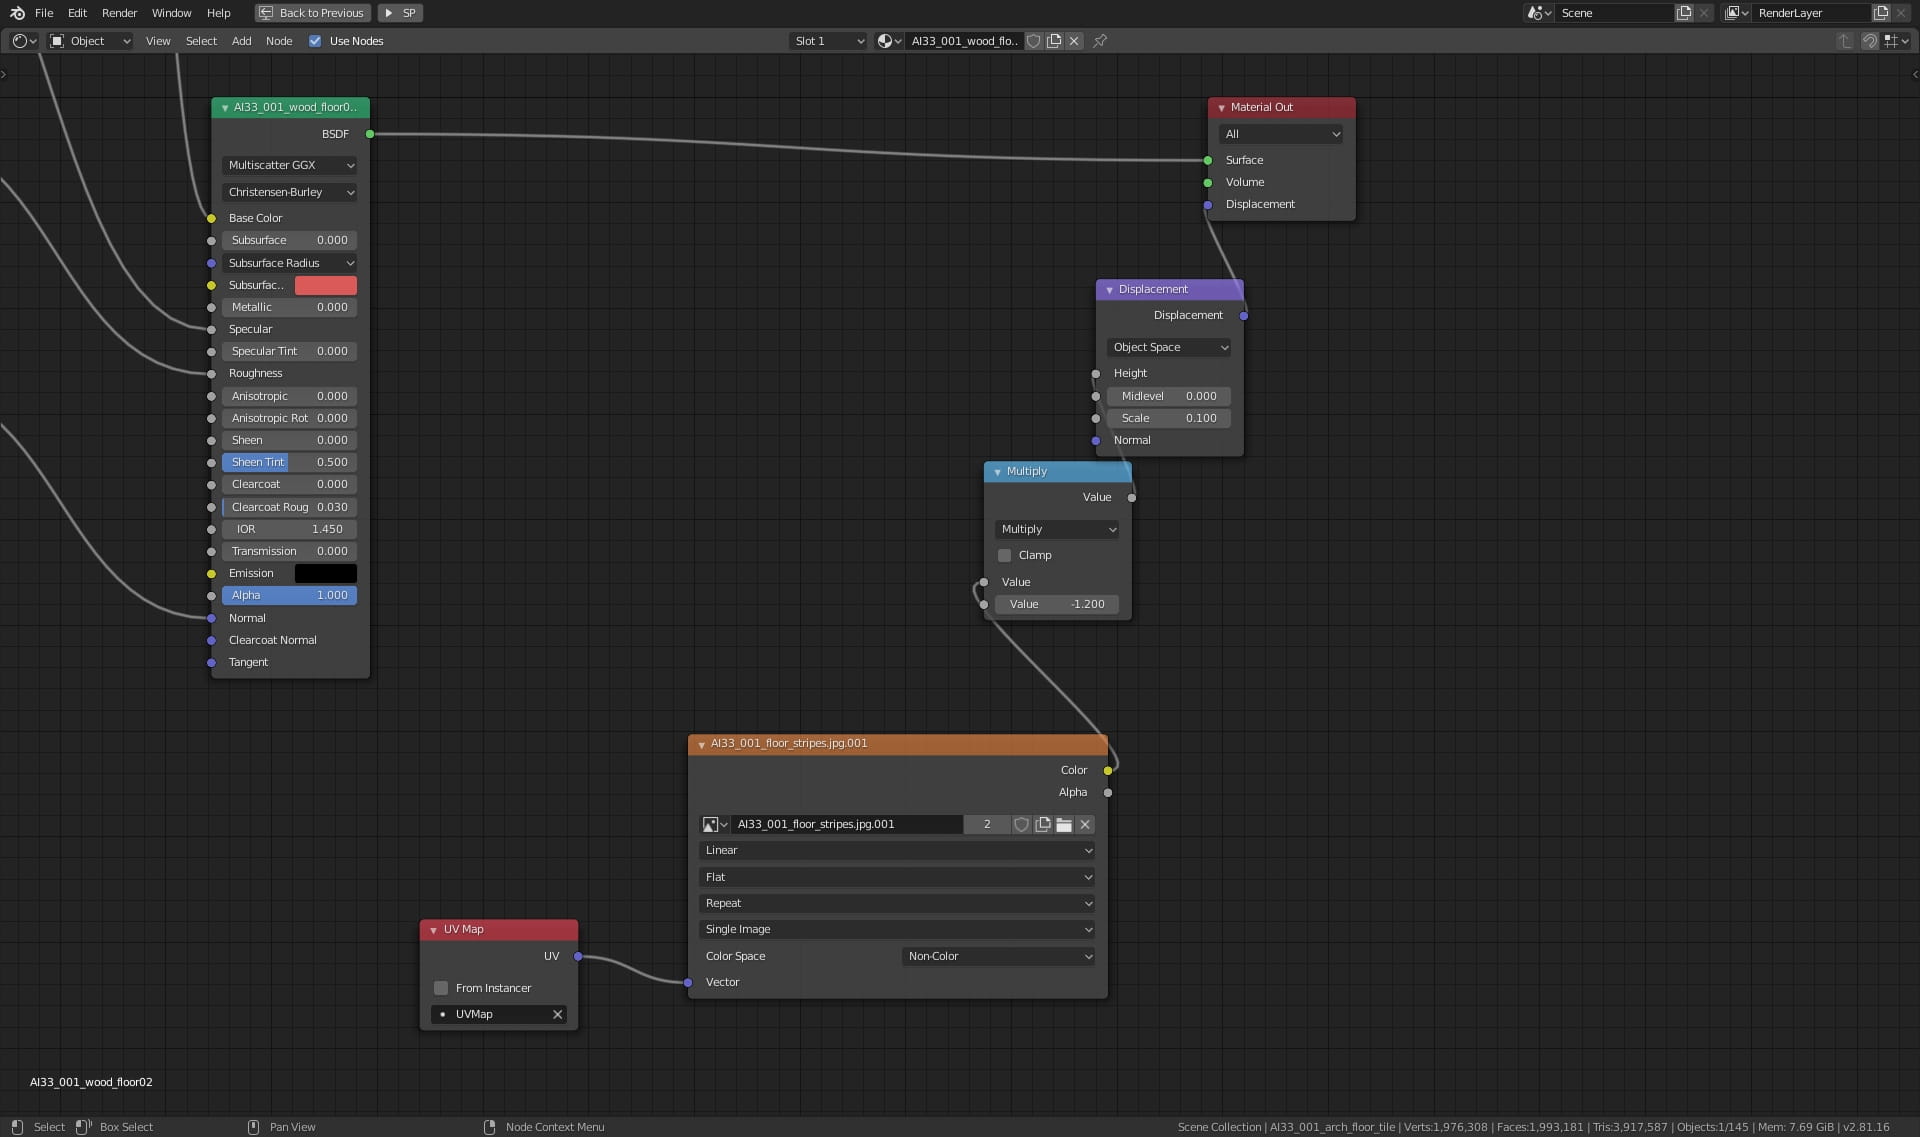
Floor material.

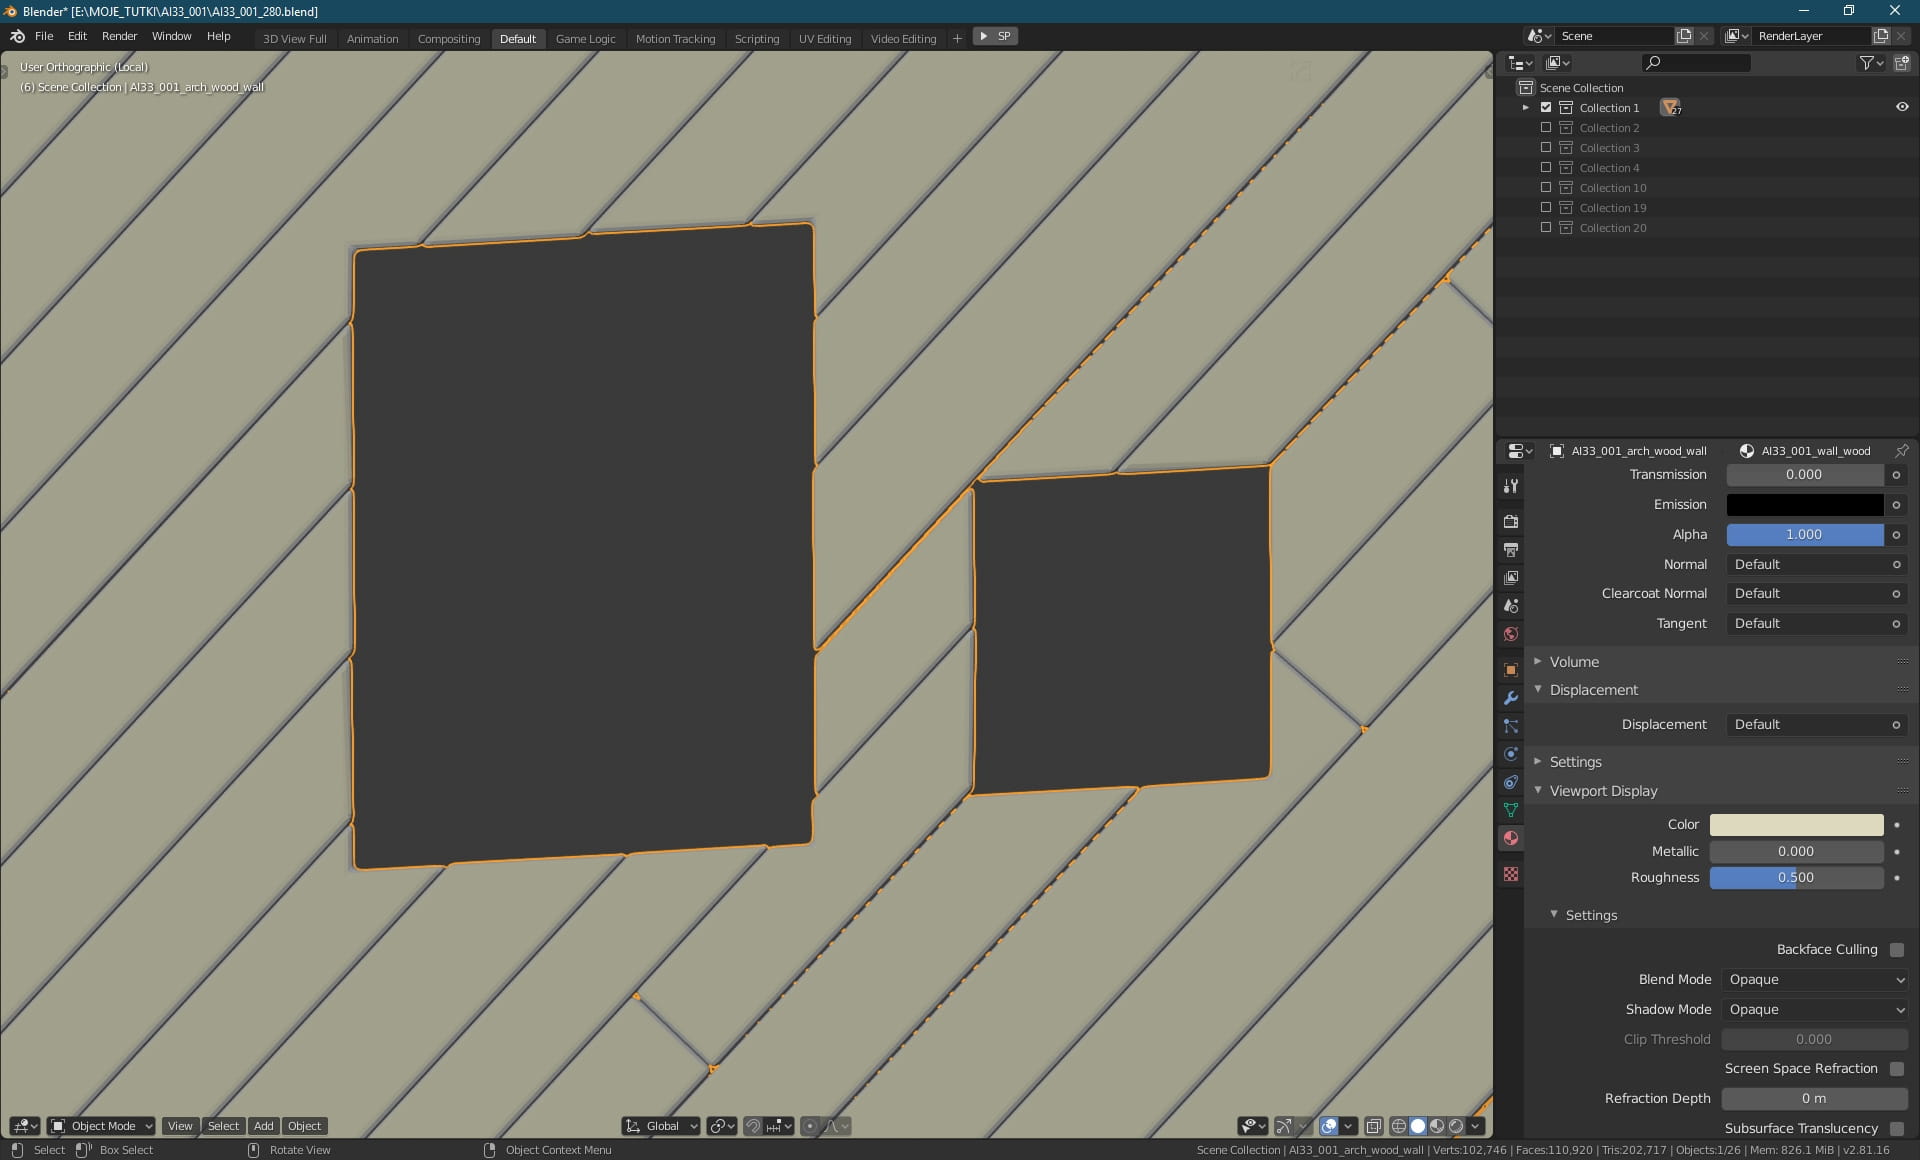
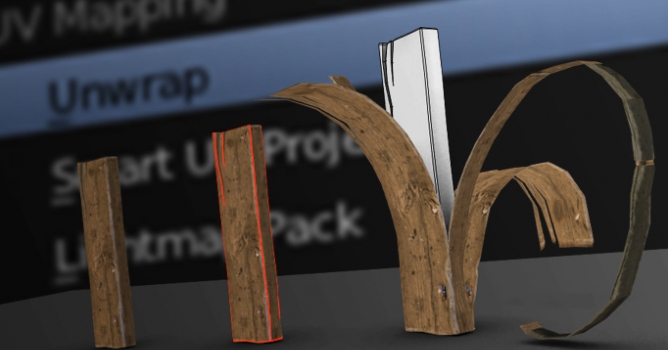
Wooden wall.

Wooden wall material.
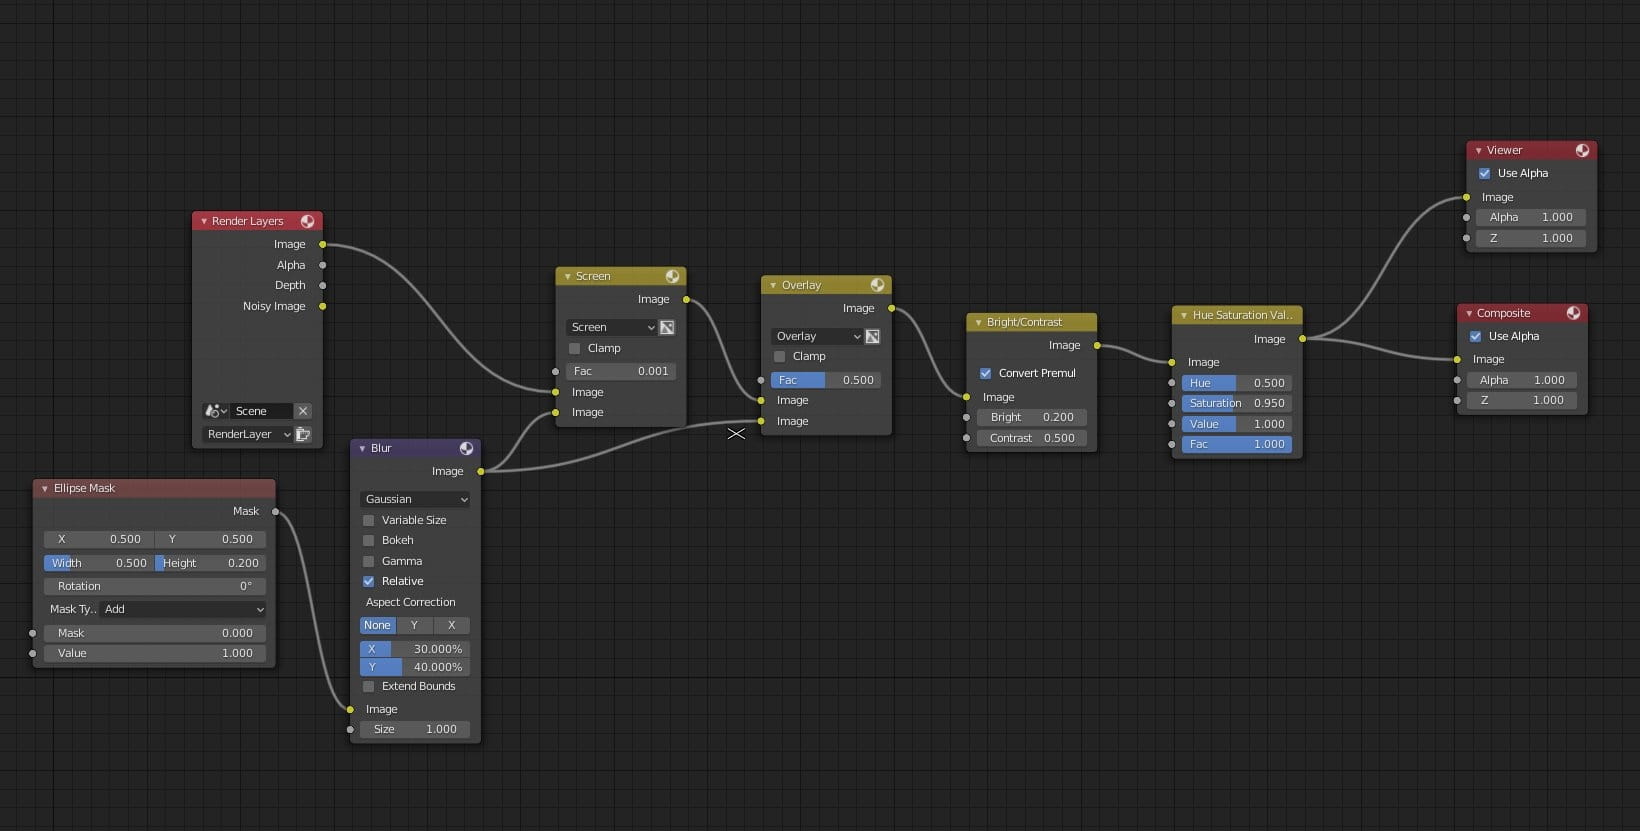
This is small post-production setup that we created in Blender. We used ellipse mask for vignette. we used brightness / contrast node and we turned down saturation just a little bit with Hue Saturation Value Node.
Thanks for reading! :)


LEAVE A COMMENT


|

|

|

|

|
 Customer zone
 Your orders
 Edit account
 Add project
 Liked projects
 View your artist profile
COMMENTS