Create Dirty Windows - material tutorial
New tutorial by RenderRam.


In accordance with the art. 13 section 1 and 2 of the European Parliament and Council Regulation 2016/679 of the 27th April, 2016 on the protection of natural persons, with regard to the processing of personal data and on the free movement of such data, and repealing Directive 95/46/EC (General Data Protection Regulation), hereafter RODO, I hereby inform that:
1. EVERMOTION S.C., 8 Przędzalniana Str., 15-688 Białystok, Poland is the Administrator of your Personal Data (APD)
2. Data Protection Inspector can be reached through e-mail: iod@evermotion.org
3. Your personal data are to be processed on the basis of art. 6 section 1 letter a, b and f of RODO in order to:
a) prepare, conclude and execute the agreement and for other purposes approved by you,
b) to execute the legitimate interest like marketing of products and the agreement, claim assertion or defence against claims resulting from the law regulations.
4. Entities entitled to the reception of your personal data may be the authorised public bodies; mail providers; providers of the services covered by the agreement; responsible for debt recovery, keeping the archives, document utilization, legal consulting, technical services, IT services and accountancy.
5. Your personal data shall not be transferred to the third country, nor to the international bodies.
6. Your personal data shall be processed within the period of the agreement and upon your additional consent until you withdraw it. APD shall keep the data for the period of any civil law claim execution connected with the agreement.
7. You have the right to demand an access to your personal data, to correct or to delete the data if there is no other basis for the processing or any other purpose of such processing or to limit the processing of the data, to transfer the data to another administrator and to raise objections to the further data processing if there is no legal basis for further processing and to withdraw any previous consent.
8. You provide the personal data voluntarily, however they are necessary to conclude the agreement. The refusal of providing such data may result in the refusal of the agreement conclusion.
9. You have the right to lodge a complaint to the Personal Data Protection Office when in your opinion the data processing violates the regulations of General Data Protection Regulation of the 27 April, 2016 (RODO).
10. Your data will be automatically processed, including the form of profiling.
11. You are obligated to forward above mentioned information to your representative, especially if you appointed this person in the agreement as the contact person or as the representative for the agreement execution.

Click on image to enlarge 
Click on image to enlarge 
Once walls were ready I started to cover them with planks. I made one, unwrapped it and used it everywhere changing its length if needed. Every time I added Array modifier with the same offset so that the spacing between every piece would be always the same.
Click on image to enlarge 
Described workflow pays off when it comes to texturing. Bare in mind that all the planks are already nicely unwrapped but they carry the same UV coordinates as they are all based on one object. Being aware of this upcoming small glitch I already knew how to handle it. I applied Array modifiers, joined planks together and entered UV/Image Editor when I used two of my favourite shortcuts (Ctrl+A - average islands scale, Ctrl+P - pack islands). This way I made sure that all the islands are in a right scale and placed tidy within Image bounds. Note that for packing I disabled Rotate option so that all the planks would keep their horizontal position.
Click on image to enlarge 
Electric discharge within one of the lamps was a tricky thing to do. Sure I knew that texturing and post production could be enough but I decided to model it anyway. I believe you should always try to take advantage of such situations and learn new techniques that you may use in your future projects. In this example I decided to create several loose subdivided edges that form a kind of hourglass shape together. After that I entered proportional editing and rotated a few vertices from the top view to give my model less regular structure.
Click on image to enlarge 
For my next step I needed weight group that would gather all the vertex except the ones at both ends of my model. I used it for three displace modifiers based on Cloud texture that resulted in randomizing their location even more. In order to keep everything inside the lamp and not to "shake" all the edges too much, I completed my stack with a Subdivision Surface modifer. When I was satisfied with the result I converted all the lines to curves using Alt+C shortcut. I thought it would be a good start to add them precise thickness and make them renderable.
Click on image to enlarge 
From my own observations and intuition I decided that all the curves will be thinner in the middle where there's no contact with any surface. In order to achieve such effect I added new BezierCurve object, formed it slighlty so that it would resemble the "U" shape and used it as a Taper Object for electricity beams.
Click on image to enlarge 
Another interesting case here was a sculpture in one of the showroom chambers. I don't think I'm a good sculptor therefore instead for a tablet I reached for a modifier stack once again. This time I operated on a simple Plane that I subdivided six times using Simple method. Basic idea behind my workflow is to displace the surface of my model on exact axis, subdivide it more and displace once again. Bevel modifier perserves the most important lines of my model that would normally be gone after using Decimate modifier that comes right after. Finally there's Subdivision Surface modifier with Catmull-Clark method that smoothes the final effect and get rids of all the artifacts.
Click on image to enlarge 
I always tend to make my models as detailed as possible with minimum effort. At some point you are experienced enough to use all kind of shortcuts that make your work efficient and relatively fast. Glass walls are a great example of how to use Mirror modifier and prepare only 25% of a model and copy the rest. Each wall is a hard copy of original mesh (Alt+D) that I slightly rised and rotated to make them all look natural and imperfect.
Click on image to enlarge 
Once my scene was ready I exported all the objects and camera as a .fbx file. This way all the information I needed, like camera position and angle, several UV coordinates, were kept and loaded to 3ds Max intact. As you see I decided to leave spots for lamps empty as I figured out it would be better to use production-ready models from our Evermotion archmodels collections.
Click on image to enlarge 
Try to follow one rule and one rule only - if there's an element of your scene that makes the scene then make it as good as possible. In this project I picked planks as the most important part of the whole showroom so that I put an extra effort to create a proper shader for them. As you can see I like to use Composite map and mix different textures using Color Correction now and then. I believe you can make decent set for reflection, diffuse and bump using the same images but glossiness requires additional maps.
Click on image to enlarge 
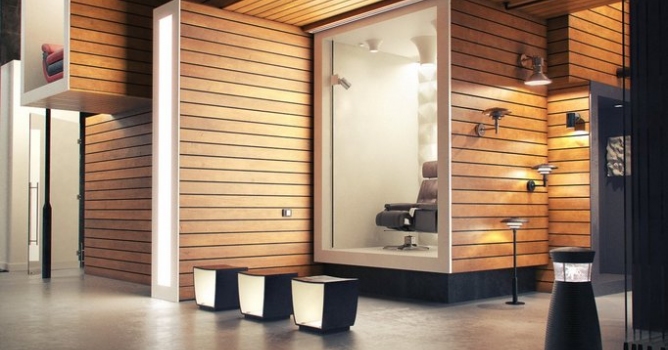
I went for HDR image for an environment map and added only a few extra Vray Lights that simulate light sources invisible for the viewer. All the rest simulates light that come from the lamps that are part of showroom exibition.
Click on image to enlarge 
Render settings are always self explanatory. For render elements I chose Illuminance, MaterialID, Reflection and Specular.
Click on image to enlarge 

Click on image to enlarge 
Click on image to enlarge


LEAVE A COMMENT


|

|

|

|

|


COMMENTS