Evermotion Pass 10% Off - Get Instant Access to Thousands of 3D Assets

Check Plans

Information Clause

In accordance with the art. 13 section 1 and 2 of the European Parliament and Council Regulation 2016/679 of the 27th April, 2016 on the protection of natural persons, with regard to the processing of personal data and on the free movement of such data, and repealing Directive 95/46/EC (General Data Protection Regulation), hereafter RODO, I hereby inform that:

1. EVERMOTION S.C., 8 Przędzalniana Str., 15-688 Białystok, Poland is the Administrator of your Personal Data (APD)

2. Data Protection Inspector can be reached through e-mail: iod@evermotion.org

3. Your personal data are to be processed on the basis of art. 6 section 1 letter a, b and f of RODO in order to:
a) prepare, conclude and execute the agreement and for other purposes approved by you,
b) to execute the legitimate interest like marketing of products and the agreement, claim assertion or defence against claims resulting from the law regulations.

4. Entities entitled to the reception of your personal data may be the authorised public bodies; mail providers; providers of the services covered by the agreement; responsible for debt recovery, keeping the archives, document utilization, legal consulting, technical services, IT services and accountancy.

5. Your personal data shall not be transferred to the third country, nor to the international bodies.

6. Your personal data shall be processed within the period of the agreement and upon your additional consent until you withdraw it. APD shall keep the data for the period of any civil law claim execution connected with the agreement.

7. You have the right to demand an access to your personal data, to correct or to delete the data if there is no other basis for the processing or any other purpose of such processing or to limit the processing of the data, to transfer the data to another administrator and to raise objections to the further data processing if there is no legal basis for further processing and to withdraw any previous consent.

8. You provide the personal data voluntarily, however they are necessary to conclude the agreement. The refusal of providing such data may result in the refusal of the agreement conclusion.

9. You have the right to lodge a complaint to the Personal Data Protection Office when in your opinion the data processing violates the regulations of General Data Protection Regulation of the 27 April, 2016 (RODO).

10. Your data will be automatically processed, including the form of profiling.
11. You are obligated to forward above mentioned information to your representative, especially if you appointed this person in the agreement as the contact person or as the representative for the agreement execution.

OK

Making of Moloh

Edi_W 2007-11-29 00:00 tutorial  > 3ds MAX  > misc

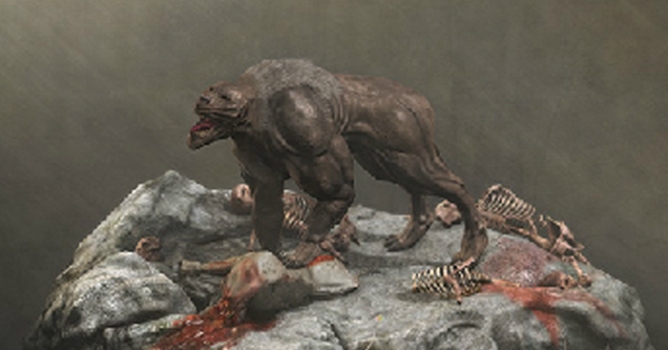
Hello and welcome to this making-of about my latest game art model created for the New Dawn game project. This making of contains also some models that I've done earlier and some that will be not used in the game.

Before I start few words about the project - New Dawn is a cRPG game which is set in the future. The world is recovering after a comet hit the Earth in 2029. As the plot is set a couple of hundred years after the disaster, the world has already had the chance to diversify significantly. In the game you can see elements from both post-apocalyptic and fantasy games. The world is full of strange characters and animals like the moloh for example.


CONCEPT ART
When working on game arts, especially for new dawn, every creature and character must have his purpose in the world and a simple description and concept art is being made. Like the one you see below. Even that's a very simple concept it gives me the major idea of the creature. I recommend that you always do or let somebody do, a concept art before you start the modeling process. Those drawings were made by Przemyslaw Geremek.


MODELING
When the concept is done we can start to model this "ugly" creature.
There are many ways to start your modeling process - one is start from ZBrush by creating highly detailed models and then work your way to low poly models by retopolise the mesh.
Other way, and that's the way I usually do it, is to prepare the low poly mesh first.
For me the hardest thing is to start - prefer the box modeling technique, just start from a simple box and by adding some edges try to create the basic shape of the creature - it's simple if you have the proper concept (from side and top for example).
When the mesh becomes more and more complex I often use soft selection and FDD modifier to change some proportion of the model. Most of the models are symmetrical so I also use symmetry modifier on it.
Putting the right material on model, while creating it, is also very helpful - I use simple gray material with faced option turned on and set the specular level higher.

Below you see all the models that I've made for the low poly scene.
Even that they are ready I often change some proportion while sculpting or even after texturing process, by using soft selection and FDD modifier.


UVW MAPPING
Next step is unwrapping.
Actually you can first sculpt models in Zbrush and then unwrapping them but I usually do it first.
In most of the models, even when using normal maps I do a symmetry mapping.
Some people says that using symmetry mapping with normal maps is bad but it's works fine for me. While mapping it's good to plan some things ahead, for example I usually make the head uv part bigger then the rest, even when creating creatures like this one.


HP SCULPTING
Now the best part - high poly sculpting in Zbrush.
That's the part I like the most, especially now when Zbrush 3 is available.
After Unwrapping in 3ds max I've exported the models to obj formats and then import them in ZBrush and start sculpting. Sometimes I use muscle pics as a references photos and some works from other cg artists as well, especially those done in zbrush.
You probably heard that million of times but I will say it one more time - be patient while sculpting your models, do not model details before the main shape of the muscles is not done. If you in a hurry your model will loose on quality.

Although the zbrush have the power to manage millions of polys I usually do not model lots of details like a skin facture, I just use bump maps that are created from my color map. In practice I connect the bump maps with baked normal maps.
You can read more about this technique in my normal maps tutorial on the Evermotion site.
(https://evermotion.org/index.php?unfold_exclusive=158&unfold=exclusive).

Below you can see some of the high poly models, I know that they are not as good as you can see at Zbrush forums but for the game art purpose it will do.


BAKING NORMAL MAPS
Baking normal maps inside Zbrush is very simple, some time ago I've made a normal map tutorial so I will not write a lot about it here. Just go to evermotion site and download the tutorial if you wish to know more about the baking process (https://evermotion.org/index.php?unfold_exclusive=158&unfold=exclusive) or just mail me at edi [at] evermotion.org if you have problem with download, and I will send the pdf or doc to you.
Like you see below I've used the ZMapper plug for Zbrush to bake the normal maps.


TEXTURING
Now the most time consuming part (for me) - texturing the beast.

The first thing that I do is the base color layer and usually I do it in ZBrush - and that's the only part of the texture that I do by hand. The rest is Photoshop compositing. I usually use lots of hi-res textures from www.cgtextures.com. This time I have used some rhino skin pics and some rocks textures. Even when using normal maps I do not want to have the color textures too flat so I use light map baked from high poly models on top of the color layers in PS. Usually I use this effect only a little bit but this time I wanted that the model looks good on render.


Some of the models, like the beast without head, I've modeled some time ago, so the texturing was already done, the only thing to do was to 'wound' it a little bit.


Making the fur
The technique is simple make a small plane with alpha and color then clone it and you have a fur.


NORMAL MAPS REFINE
To achieve more detailed normal maps I've combine the baked normal map from ZBrsush with normal map generated from color map by using nvidia normal map filter.


FAST RIGGING
I just needed a fast way to pose the beast, without some complicated bones structure, so I've just detached some body parts, moved their pivot points and done some simple skinning using the detached body parts as bones.


SCENE SETUP
The scene was rendered in scaneline without gi but with DOF camera effect and volumetric lights.
First the beast shader tests - color + normal + specular map.


Next some test lights with all shaders applied on the models.
All the shaders are simple standard materials with color, specular and normal maps.
Although the materials are simple and it's a scanline render it took some time to render the turn around of the entire scene - volumetric lights and DOF camera effect has extended the render time.


PS COMPOSITING
After the render was done I've decided to do some 'layers experiments' with it. In practice I just overlay some dirt or fabric or even rock textures on the main render. I do not want to achieve any particular effects, just tried out different combinations.

Link to thread on forum
New Dawn Game - Official Website


THE END
So that's it, I hope you're not bored to death and find it a little bit usefull…and if some of you want to share with us your making of or a tutorial just contact me at edi [at] evermotion.org and we will put it on evermotion website.


Author: Edi_W
Tags: tutorial
You may also like...
How to use pelt mapping

How to use pelt mapping

In this tutorial we will try to map a tree (main branches) using useful feature called pelt mapping.
×

LEAVE A COMMENT

You need to be logged in to leave a comment. Don't have account? Register now.